by Rustic Escentuals
This tutorial is a fun way to learn to experiment how to make soap with containers you already have on hand. Many a Pringles container has fallen to my mad soap making skills! This tutorial will be focused on what you can use for soap molds with what you have laying around the house.
This tutorial is an intermediate tutorial. If you’re just starting out into soap making check out the tutorial section to learn more about working with Melt and Pour Soap.
Supplies and equipment needed:
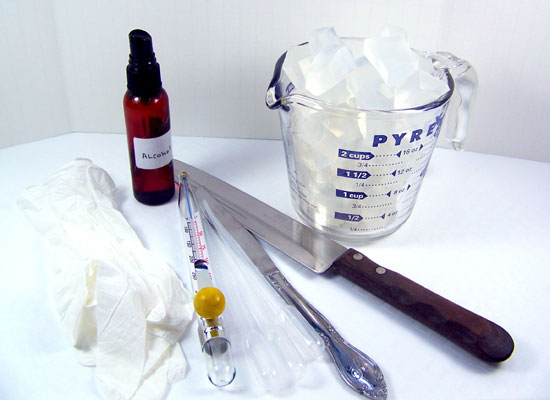
Microwave safe glass containers
Sharp knife to cut soap into cubes
Spray bottle with rubbing alcohol
Butter knives
Rubber gloves
Empty Pringles Can, Water Bottle, Pop bottle, and Yogurt container (you can use what you have on hand)
Disposable pipettes
Thermometer to monitor soap temperature
Ultra Clear Melt & Pour soap base
Gel Soap colorants of your choice
Fragrance Oils of your choice (bath/body safe)
Straight soap cutter (shown in directions)
Soap miter box (shown in directions)
Scissors or box cutter (shown in directions)
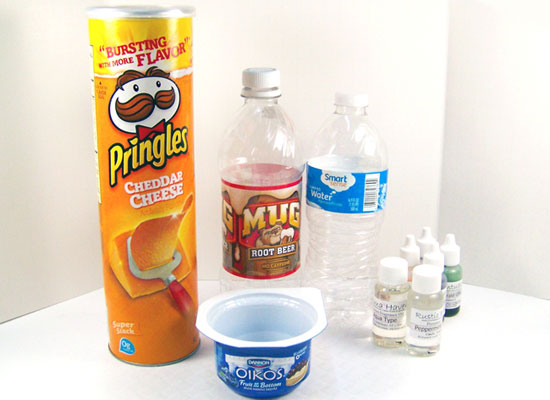
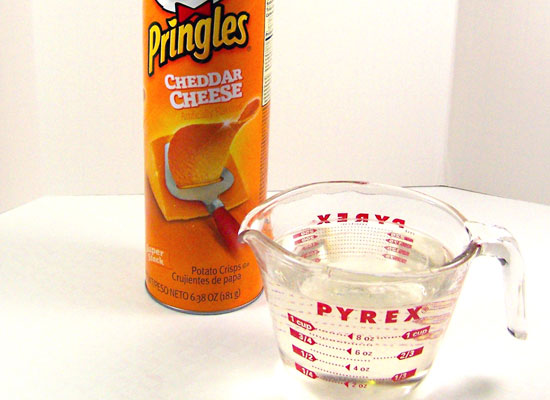
To start, I went on a scavenger hunt throughout my house and came up with an empty water bottle, a cup of yogurt, a small bottle of root beer, and a can of Pringles. The Pringles container would make a great loaf mold – just had to eat up some of those chips…
Tip: Don’t use any type of metal containers. Stick with plastic or cardboard/coated cardboard.
Step 1: Wash all your containers well and let dry completely. Take special care with the Pringles can since it’s made out of cardboard. After they all dry, I spritz them with alcohol and allow to air dry for an additional 10 minutes or so.
Step 2: Cut up Ultra clear Melt & Pour base into small cubes. You can use any soap base that you want here, try mixing it up!
TIP: To figure out how much each of your repurposed molds hold, you can fill them up with water then pour the water into a measuring cup. This will tell you approximately how much soap you’ll need. Make sure your molds are completely dry before using. To save you a step, do this while cleaning the containers.
Step 3: I will be using the Pringles can first. Take 16 ounces of cubed soap base and place in a microwave safe glass container. Melt in the microwave in 30-second bursts until melted. Be careful that you don’t boil the soap, boiling will result in a poor quality rubbery soap.
Step 4: Add about 6 drops of a gel soap colorant of your choice. I chose Sunflower Yellow.
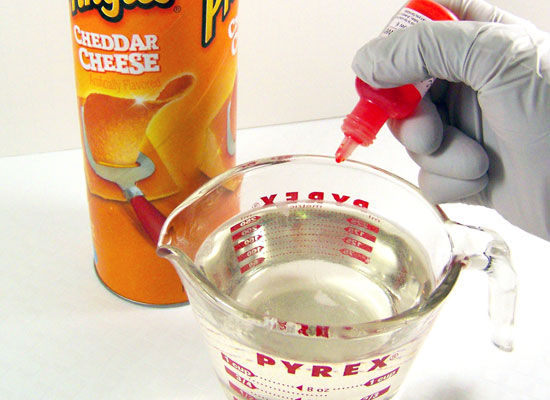
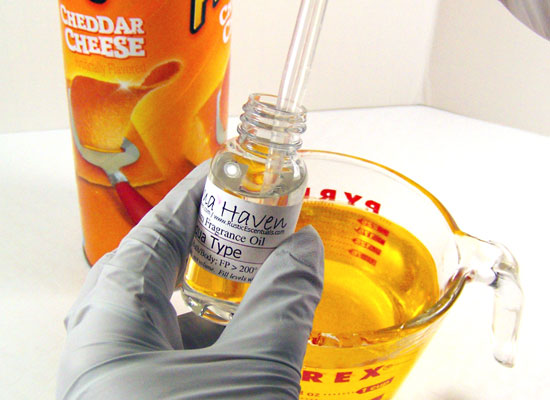
Step 5: Add a fragrance oil of choice using a disposable pipette. I chose Aqua type and added 8 ml’s to the soap base. Stir slowly.
Step 6: Use a thermometer to monitor the soap base temperature – it should be about 130° to avoid warping the molds. If soap is too hot, keep stirring slowly until soap reaches 130°.
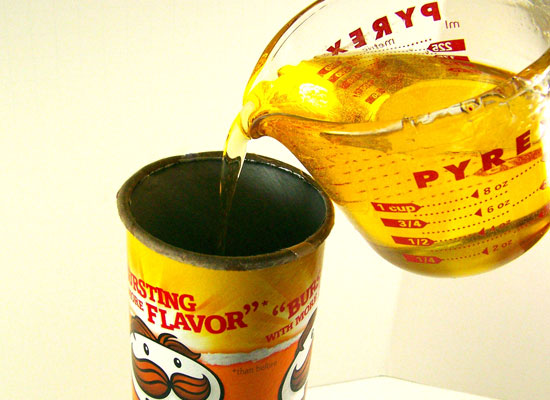
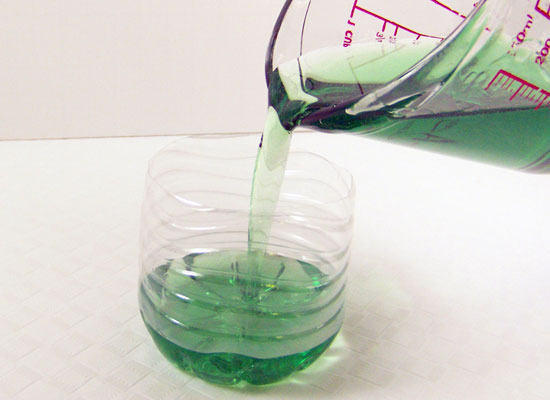
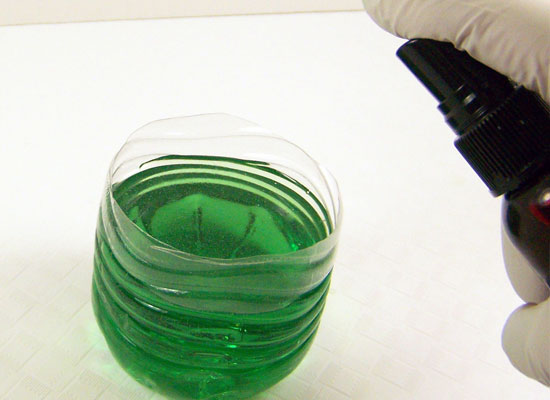
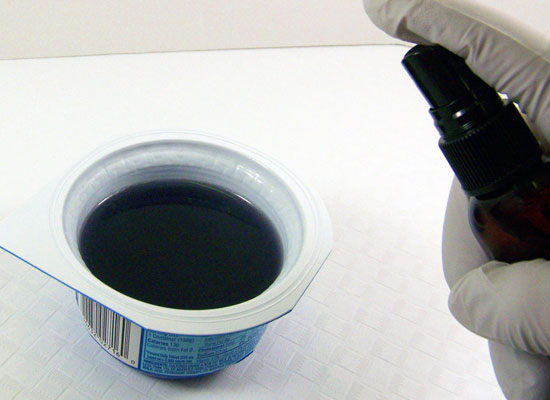
Step 7: Pour the soap base slowly into the Pringles can, spritz the top with alcohol, and set aside. Pouring slowly will help to avoid excess bubbles and spritzing with alcohol will get rid of any remaining bubbles that linger.
Step 8: Because this is a lot of soap, to get best results, allow the soap to set overnight.
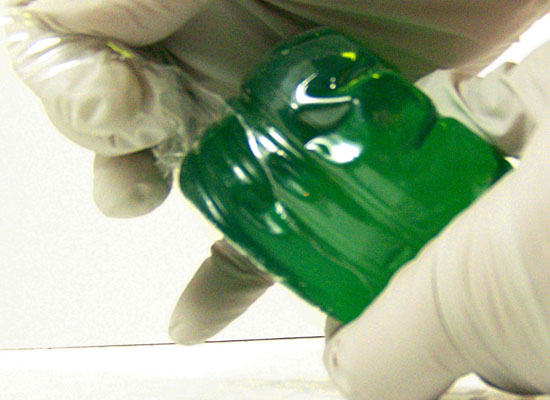
Step 9: When completely set, remove the soap from the container by slowly tearing away the sides of the container.
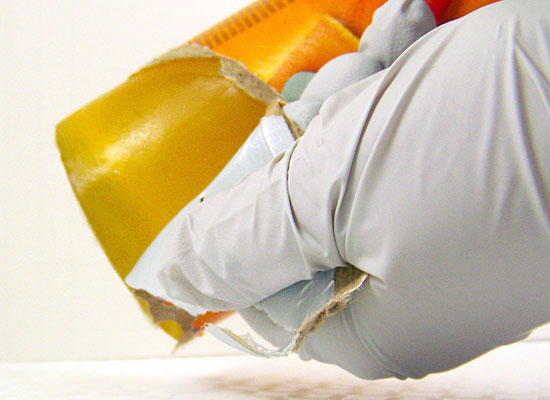
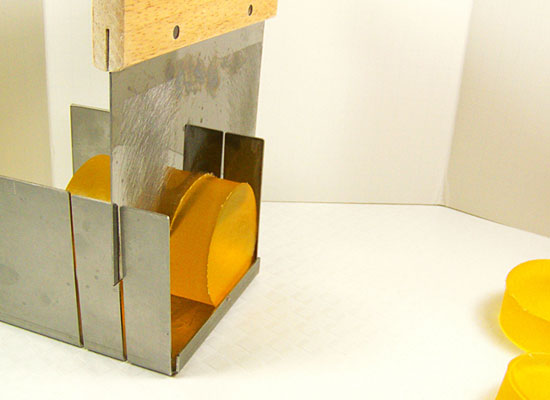
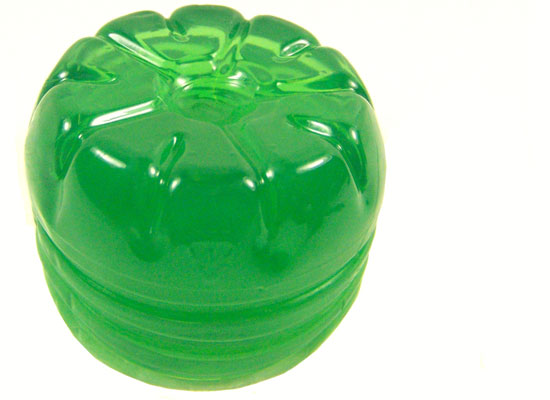
Step 10: You will have a one pound round loaf of soap. You can cut the loaf using a straight soap cutter with or without a soap miter box.
Now, following Steps 2 – 7, do the same for any other containers that you were able to scrounge up. Remember to adjust the amount of soap, color and fragrance oil to the specific containers you are using. The amount of time it takes for the soap to set will also vary.
Water Bottle
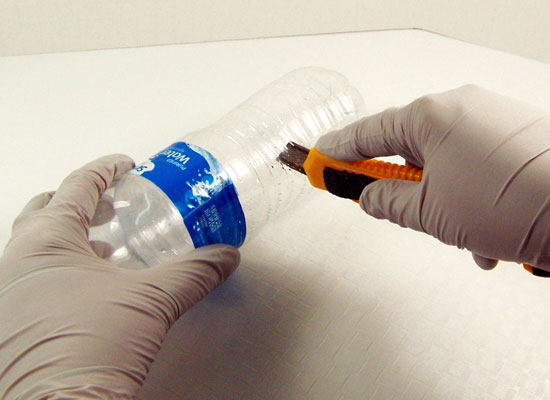
Step 11: Using a clean water bottle, cut the bottle down to size using a box cutter or scissors. Pour your prepared soap base, spritz with alcohol and let set completely before unmolding. Because the water bottle container is a thin plastic, it’s best to cut the plastic with scissors and slowly tear the plastic from the soap.
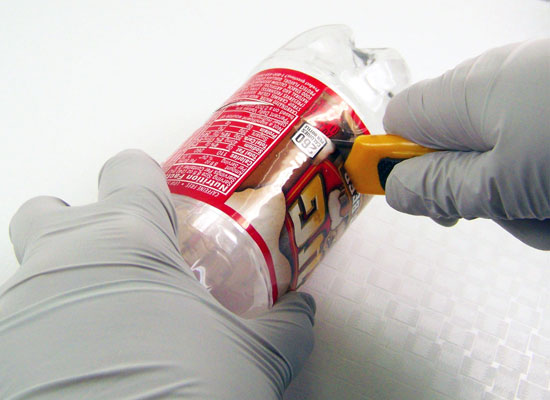
Soda Pop Bottle
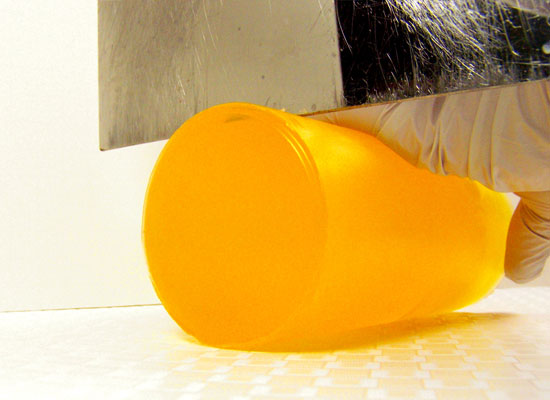
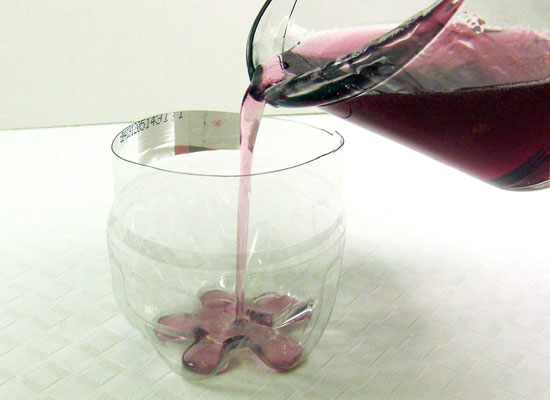
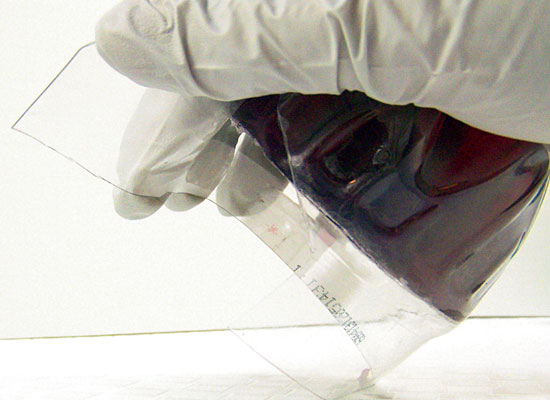
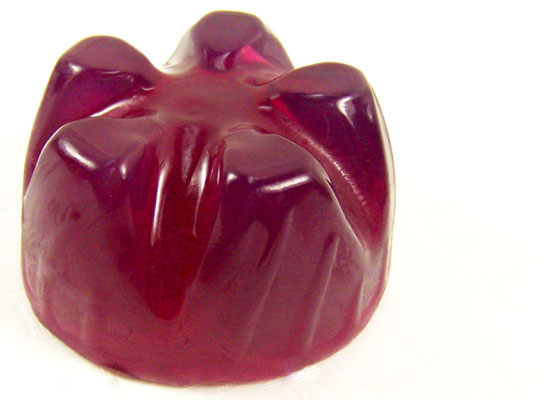
Step 12: Using a clean soda pop bottle, cut the bottle down to size using a box cutter or scissors. Pour your prepared soap, spritz with alcohol and let set completely before unmolding. The plastic of the soda pop bottle is a little thicker, but it’s still best to cut the plastic with scissors and slowly tear the plastic from the soap.
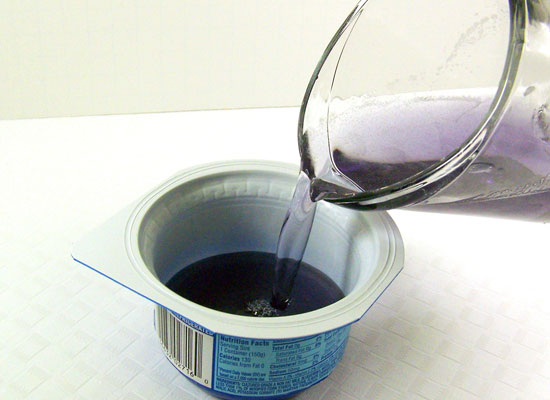
Yogurt Container
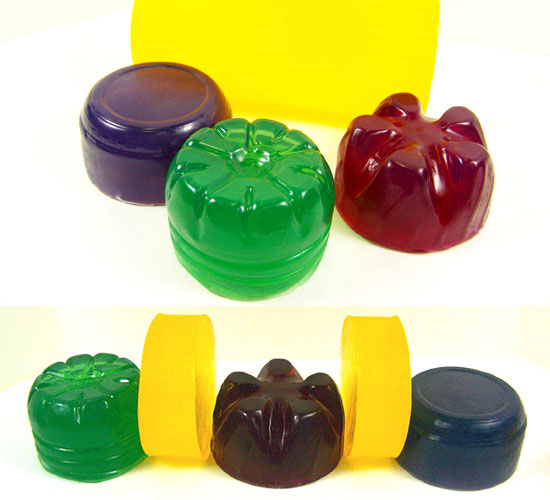
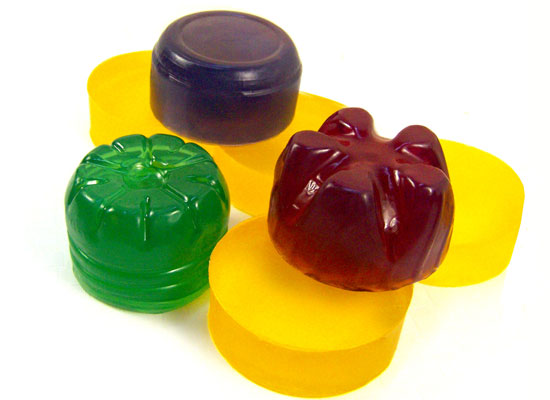
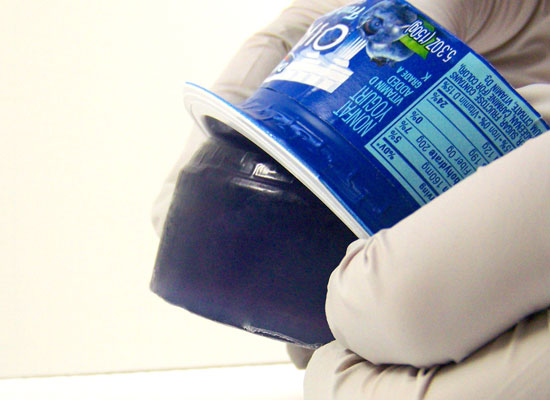
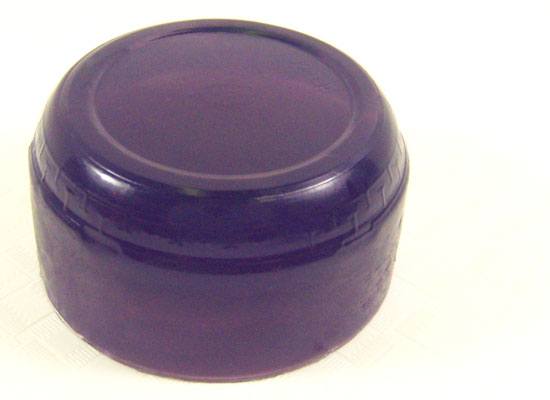
Step 13: Using a clean yogurt container, pour your prepared soap base, spritz with alcohol and let set completely before unmolding. This type of container doesn’t need to be cut. It’s made of a thick enough plastic that when you want to unmold the soap, you can just press onto the back of the container to pop out the soap.
That’s it! You can use a variety of different type of containers to get different looks and styles. There are many other containers you can re-purpose into soap molds besides the ones I’ve shown here.
Try small milk containers, ready made jello or pudding containers, Rubbermaid food storage containers…the list is endless.