• Skip to main content
  • Skip to primary sidebar
Recipes & Tutorials Crafting Library
  • Soap »
    • CPHP Soaps
    • Cold Process Soaps
    • Hot Process Soaps
    • Liquid Soap
    • Melt and Pour Soaps
    • Special Soaps
  • Bath & Body »
    • Bath & Body
    • Lip Balm
  • Candles & Scent »
    • Container Candles
    • Pillar Candles
    • Wax Tarts
    • Votive Candles
    • Special Candle Projects
    • Fire Starters
    • Air Fresheners
    • Fragrance OIls
    • Scent Blends
  • Seasonal & Holiday »
    • Spring
    • Summer
    • Fall
    • Winter
    • Valentine’s Day
    • Easter
    • Mother’s Day
    • Father’s Day
    • Independence Day
    • Halloween
    • Thanksgiving
    • Christmas
  • Misc. »
    • Misc Craft Projects
    • Business Side of Crafting
  • All Tutorials
  • Contact
You are here: Home / Lip Balm / Custom Flavored Natural Wax Jelly

Custom Flavored Natural Wax Jelly

December 5, 2011 By

DIY Crafting Tutorials - spread the love!

by Vickey Robinson

Natural Wax Jelly is a fantastic alternative to Vaseline because it’s free of petrolatum and completely all-natural. We like to use it plain, but also custom flavor it for both adults and kids in the family.

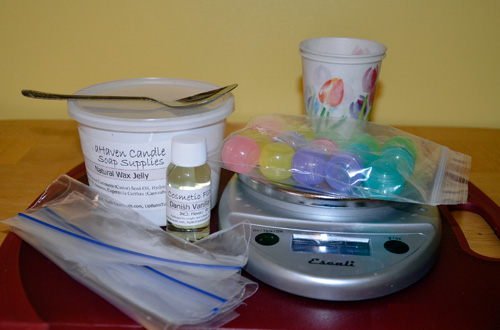
Step 1: Gather items needed:

Natural Wax Jelly
Lip Balm Flavor Oil
Sweetener (if desired)
Zip seal sandwich bags
Digital scales
Dixie cups
Spoon

custom flavored wax jelly: gather items needed

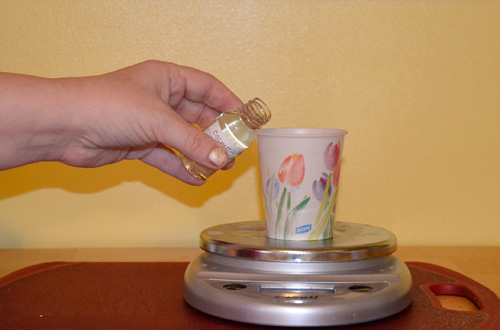
Step 2: Weigh lip balm flavoring oil and sweetener into a Dixie cup. Set aside.

custom flavored wax jelly: weigh flavor oil into cup

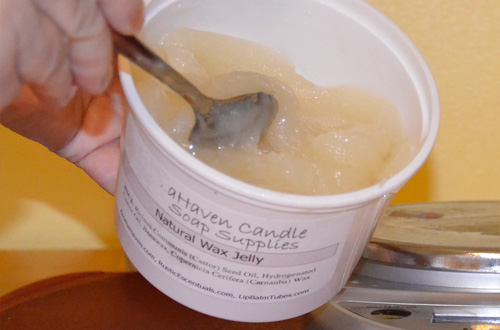
Step 3: Stir the Natural Wax Jelly well.

custom flavored wax jelly: stir wax jelly

Step 4: Line a 5 oz. Dixie cup with the zip seal sandwich bag.

custom flavored wax jelly: line cup with baggie

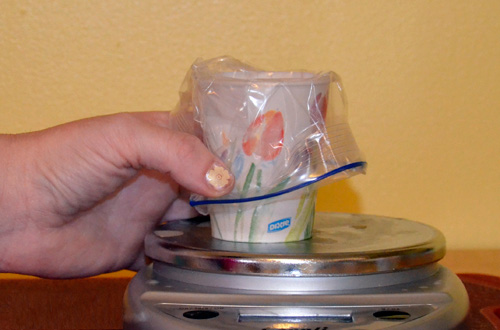
Step 5: Measure base into lined cup.

custom flavored wax jelly: measure base into cup

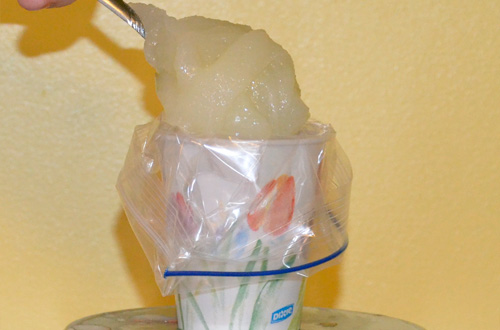
Step 6: Add lip balm flavoring oil and Sweetener.

custom flavored wax jelly: add flavoring & sweetener

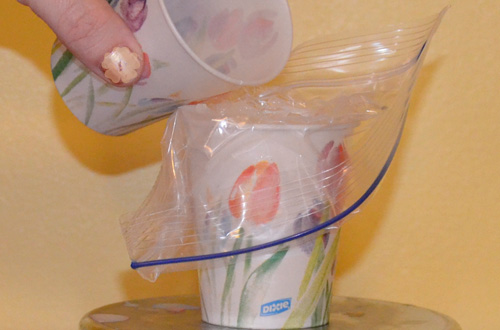
Step 7: Remove bag and knead/squish together to incorporate & mix everything completely.

custom flavored wax jelly: knead to mix

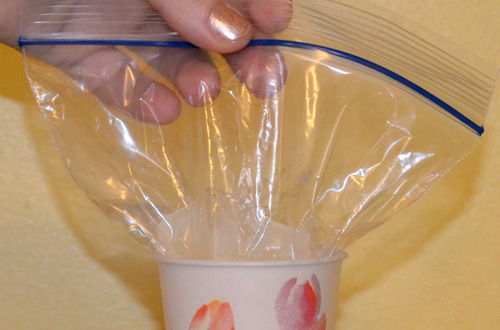
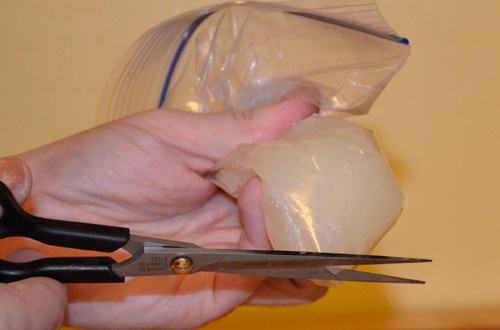
Step 8: Snip corner of bag.

custom flavored wax jelly: snip bag

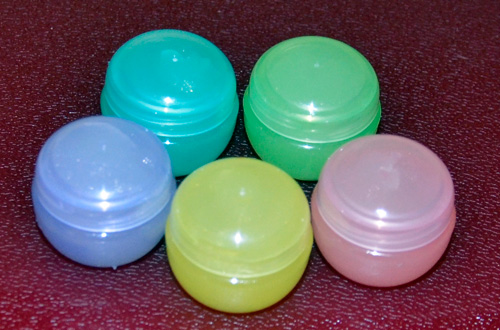
Step 9: Pipe into small pots, jars or other cosmetic container.

custom flavored wax jelly: pipe into pots

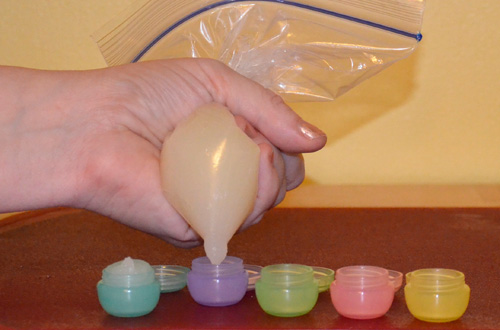
Step 10: Cap and you’re finished!

custom flavored wax jelly: cap and finish!


Print Friendly, PDF & Email

DIY Crafting Tutorials - spread the love!

Filed Under: Lip Balm, View All Tutorials Tagged With: how to make lip balm, how to make lip gloss

Previous Post: « How to Make Gemstone Soap Rocks
Next Post: Gemstone Soap Tutorial »

Primary Sidebar

Search the Library

Random Tutorials

Crayon Soap Tutorial

How to Make Lip Balm

Blue Shred Soap tutorial

Mini Leaf & Pumpkin Mold Tutorial, part 2

Soap for Father’s Day – Green Irish Tweed

Decorative Dipped Pine Cone Potpourri

Peppermint Candy Soap Loaf

Floating Holiday Dots Soaps

Home | View All Tutorials | Contact Us
copyright 2011-2022. Rustic Escentuals
All rights reserved.