by Rustic Escentuals
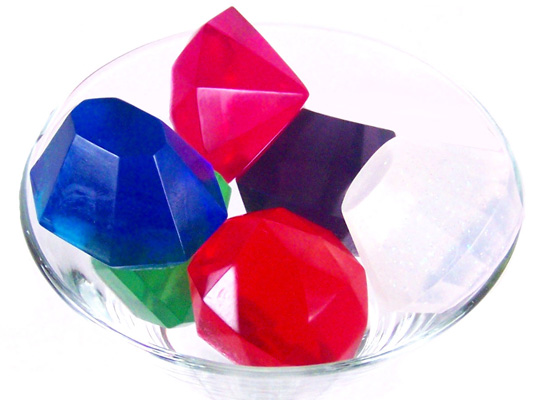
Diamonds, rubies, sapphires, garnets…oh my! Gems are not only for the fingers ladies!!!! This is a fun soap tutorial in which you get to try out different colors and soap scents for an entire set. It’s a great way to test out your new body safe scents and have fun with a unique soap mold!
Skills: Matching soap scent selections to colors
diamonds, rubies, sapphires, garnets.. oh my!
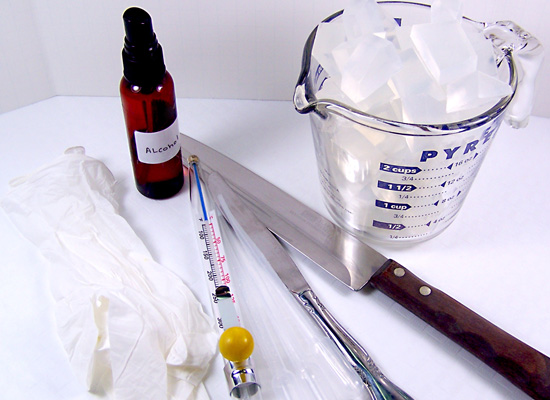
Supplies and equipment needed:
Microwave
Microwave safe glass containers
Sharp knife to cut soap into cubes
Spray bottle with rubbing alcohol
Butter knives for stirring soap
Rubber gloves
Disposable pipettes
Cool Jewels Silicone mold (6 cavities, 4.5 ounces total. Each cavity is between .7 – .9 oz ea)
Ultra Clear Melt & Pour soap base
Body safe soap scents
Gel Soap Colors in Emerald Green, True Red, Purple, Sapphire Blue, and Magenta
Shimmer Dust Glitter: Diamond Dust
.15cc Scoop (one)
gather basic supplies, tools, mold, etc
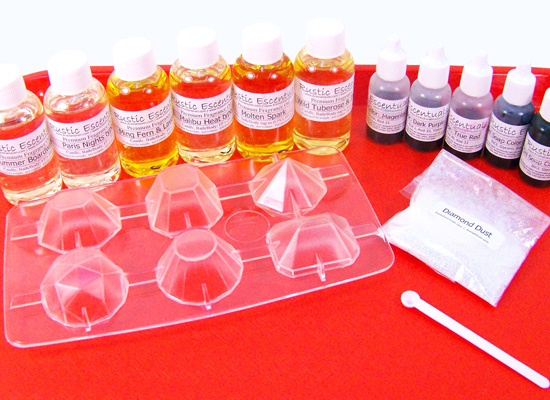
choose your gel soap colorants and fragrance oils
IDEAS: Here are some great color and scent combinations:
Ruby: True Red soap colorant and Molten Spark FO
Emerald: Emerald Green soap colorant and Summer Boardwalk FO
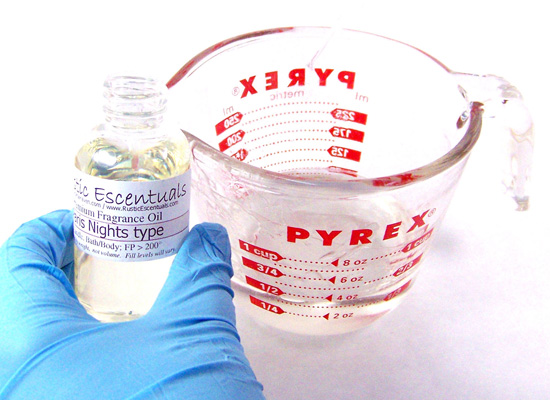
Diamond: No soap colorant, Diamond Dust Glitter, and Paris Nights Type FO
Garnet: Magenta soap colorant and Malibu Heat Type FO
Amethyst: Dark Purple soap colorant and Ming Fern and Lavender FO
Sapphire: Sapphire Blue soap colorant and Wild Tuberous and Jasmine FO
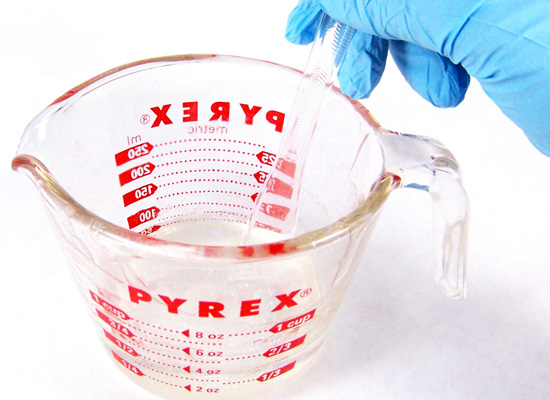
Step 1: Cut up approximately 5 ounces of Ultra Clear Melt & Pour soap base into small cubes using a sharp knife. You can either melt approximately .10 oz ounces for each color used or melt entire 5 ounces and pour the amount you need into a separate container. I prefer the first method as it prevents you from having to heat up the soap multiple times.
Step 2: Because I am melting .10 ounces at a time, using a microwave safe container, melt soap base in a microwave using a 10 – second burst, and then if needed, another 5 seconds until melted. Do not burn or boil, this will result in a poor quality rubbery soap. If there are any small chunks of soap left, stir slowly; the heat of the soap will melt these small chunks. TIP: I am melting a little extra to take into account that some of the soap will stick to the container.
Step 3: Choose a soap color and scent combination
Step 4: For this step we will be making the “Amethyst”. Add one drop of Dark Purple soap colorant and stir.
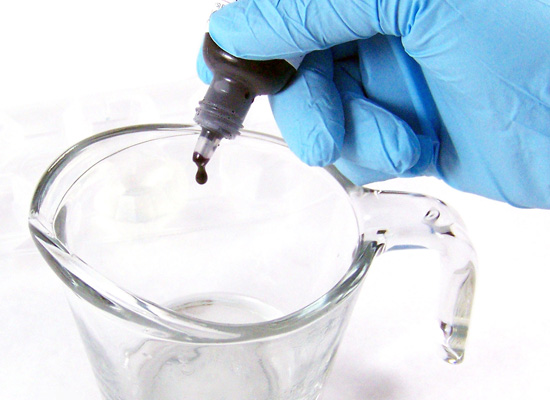
add one drop of soap colorant and stir
Step 5: Using a disposable pipette, add .5 ml of Ming Fern and Lavender Fragrance Oil and stir in slowly.
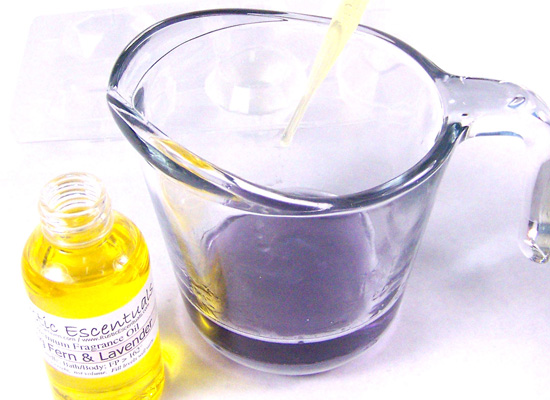
add .5ml of desired fragrance oil and stir in slowly
Step 6: Because this is a small amount of soap, it will cool faster than you are normally used to. I find that a thermometer is not needed.
Step 7: Choose a gem cavity and pour slowly to the top. Finish off with a spritz of alcohol to remove any bubbles.
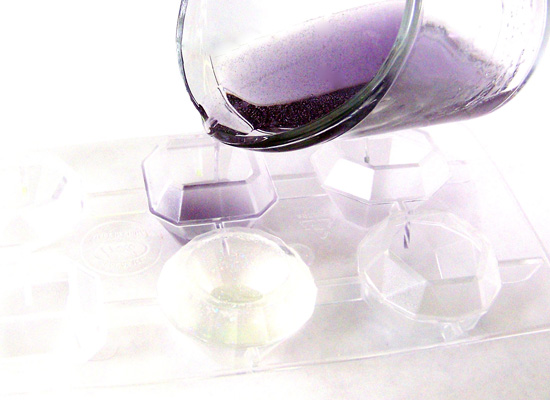
slowly pour prepared soap to the top of the gem cavity
Step 8: It’s that easy! We are now going to create another “Gem”. Melt another .10 ounces for approximately 10 seconds until melted.
Step 9: No need for a soap colorant because this is going to be the “Diamond” Gem.
Step 10: Using a disposable pipette, add .5 ml of Paris Nights Type Fragrance Oil and stir in slowly.
add fragrance oil and stir slowly to combine
Step 11: Using a 0.15cc scoop, mix in 1 scoop of Shimmer Dust Glitter in Diamond Dust and stir slowly until mixed well. Tip: Always stir slowly when adding the Shimmer Dust or any type of additions to your soap base to avoid creating excess bubbles.
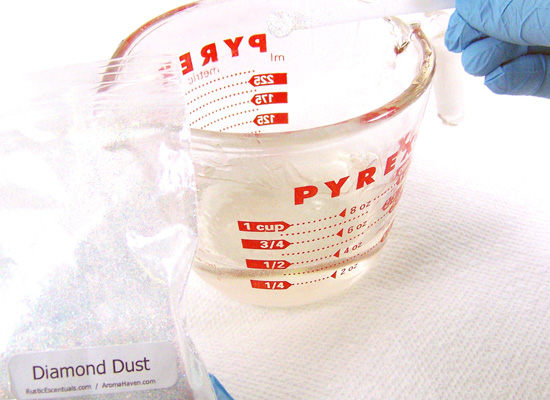
mix in 1 scoop of Diamond Dust Glitter
stir slowly until mixed well
Step 12: Choose a gem cavity and pour slowly to the top.
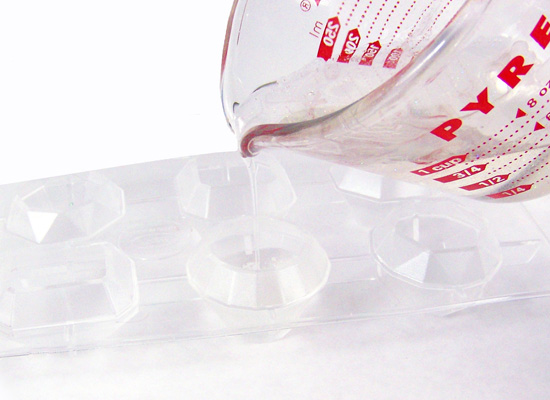
pour your “diamond” soap to the top of the gem cavity
Step 13: Finish off with a spritz of alcohol to remove any bubbles.
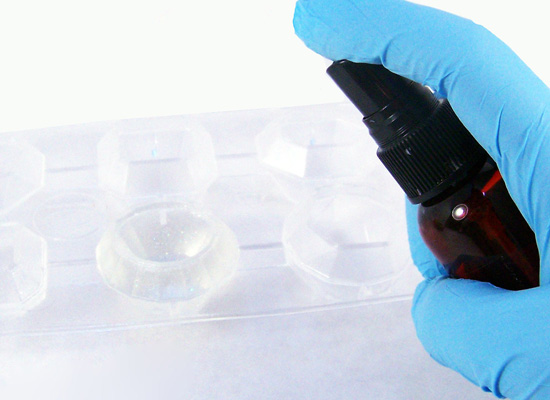
spritz with rubbing alcohol to remove any bubbles
Step 14: Now repeat steps 2 through 7 (with or without glitter) to complete your set of “Gems”.
wait for soap to completely harden
Step 15: Wait 45 – 60 minutes for the soap to completely harden.
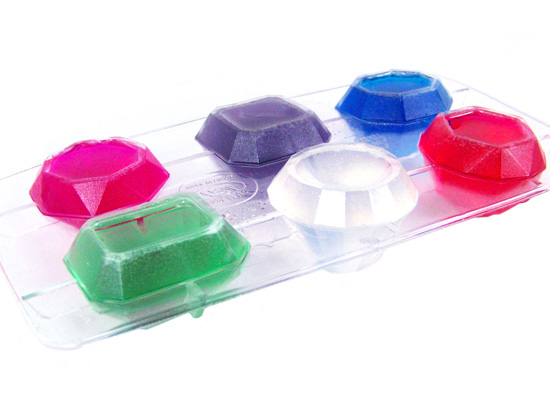
Step 16: Turn the silicone soap mold over carefully and slowly press on the bottom of the cavity to release each soap. You may have to pull the edges of the mold away from the soap slightly to add an air pocket. Admire your hard work!
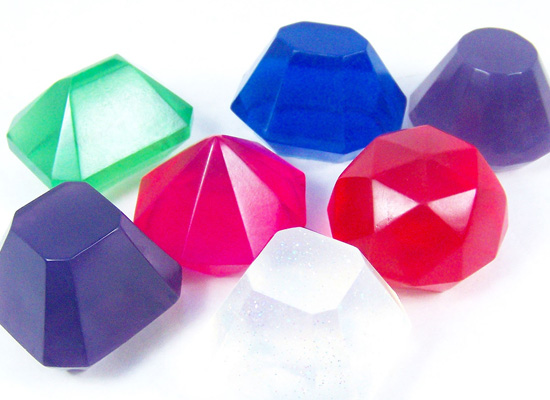
ooooh! lovely gem soaps!