by Rustic Escentuals
In this tutorial you will be using cookie cutters and a small circle embed mold to help create designs as embeds/inserts. Preparation is key for this tutorial, as you’ll need to create the embeds and have them ready to go for making this soap. Let’s get started!
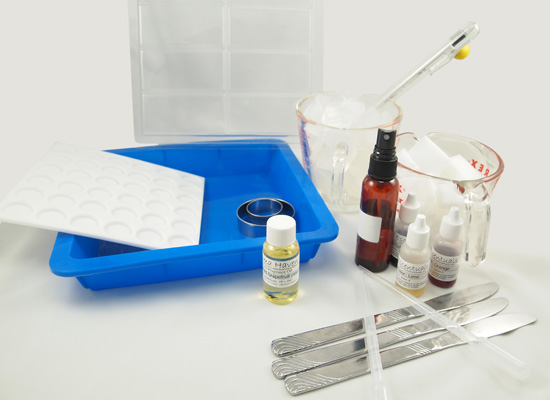
Supplies and equipment needed
• Microwave safe glass containers (3-4 if you have them)
• Sharp knife to cut soap into cubes and the final soap into bars
• Spray bottle with rubbing alcohol
• Butter knives
• Rubber gloves
• 2 Cookie Cutters – one 2 1/4″ circle and one 1 1/2″ circle
• 1″ Circle Embed mold
• Disposable pipette
• Thermometer to monitor soap temperature
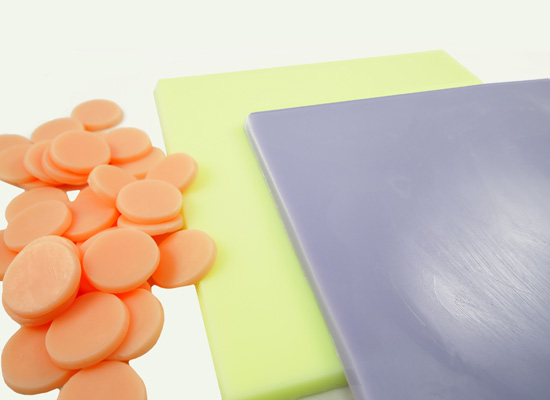
• 24 oz Ultra Clear Melt & Pour soap base
• 25 oz White Melt and Pour soap base
• Gel Soap colorants in Lime, Orange, Purple
• Ruby Red Grapefruit fragrance Oil
• Large Rectangle Tray Soap Mold
• Silicone baking pan
Making Inserts
I used cookie cutters and a 1″ Circle Embed mold for this soap project – but you can use almost anything. Prepare these in advance.
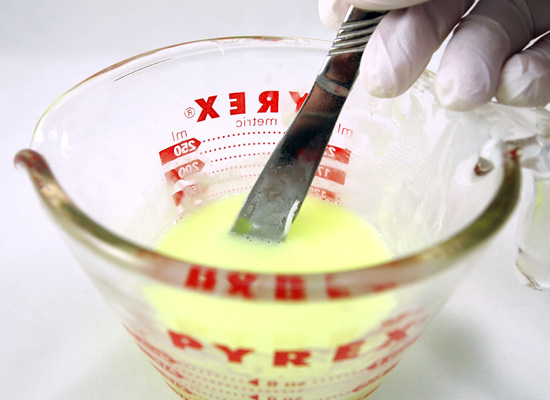
Step 1: Take 7 ounces of cubed white melt and pour soap base and place in a microwave safe glass container. Melt in the microwave in 30-second bursts until melted. Be careful that you don’t boil the soap, boiling will result in a poor quality rubbery soap.
Step 2: Mix in 3 drops of Gel Soap Colorant in Lime – no scent is necessary at this stage. Stir slowly until mixed well.
Tip: Always stir slowly when adding colorants, fragrances or any type of additions to your soap base to avoid creating any more bubbles than you have to.
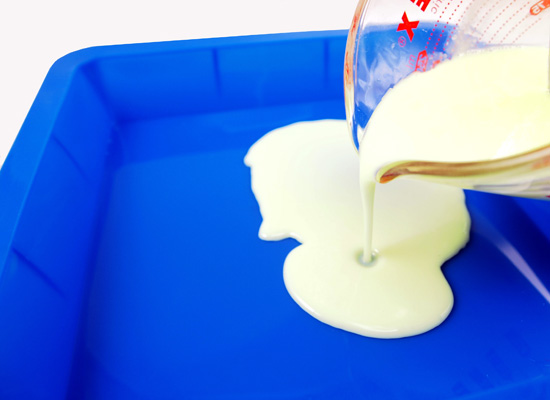
Step 3: Pour the Lime colored soap base into a silicone-baking pan. This will be approximately a 3/8″ layer. You can pick up these silicone pans almost anywhere. The temperature of the soap base can be around 135 – 140 degrees. Silicone molds can withstand warmer temperatures and are great because the soap comes out easily. If you don’t have a silicone-baking pan handy, you can use one of your soap molds or any flexible container.
Step 4: Spray soap with Alcohol to remove any bubbles that may have form whiled pouring.
Step 5: Wait for soap base to set approximately 10 minutes. Begin checking the soap at 10 minutes and then go from there. If it’s not firmed up yet, wait a couple more minutes. When the soap is firm, slowly release the soap from your mold and place on a flat surface. Start at one end and pull up slowly.
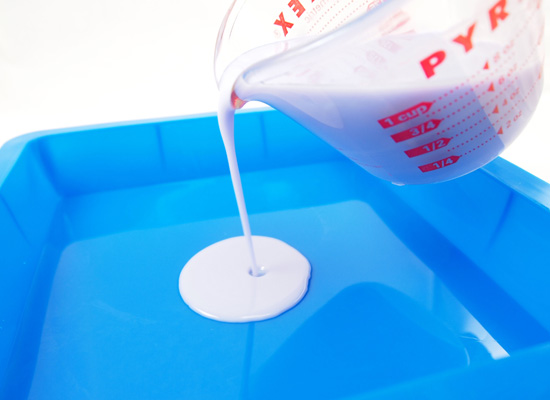
Step 6: Prepare your Purple color using Steps 1 to 5.
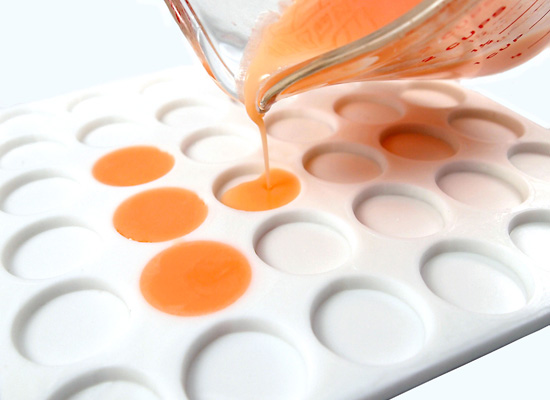
Step 7: I also wanted a 1″ circle and found that this embed mold was perfect. Following Steps 1 and 2, I melted 4 oz of white soap base and colored it using the Orange Gel Soap colorant. Keep temperature of soap around 135 degrees, pouring warmer will allow the soap to flow into the circles better. I waited about 15 minutes for this soap to set. Once set, pop them out and they’ll be ready to use. If you are having difficulty removing from the mold, place in a freezer for about 5 minutes, remove and wait another couple of minutes.
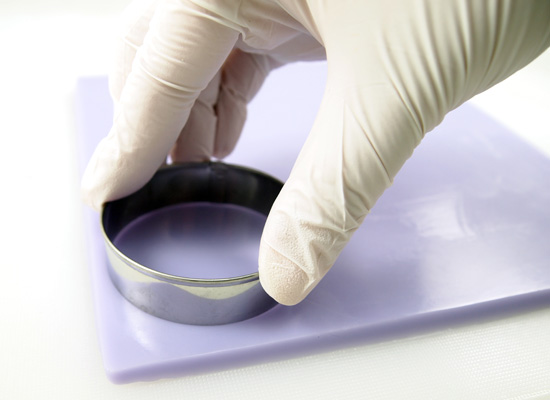
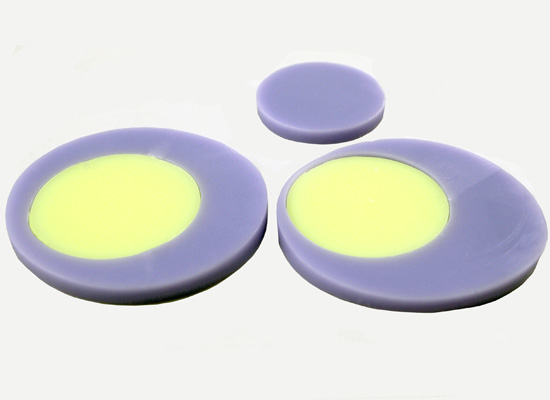
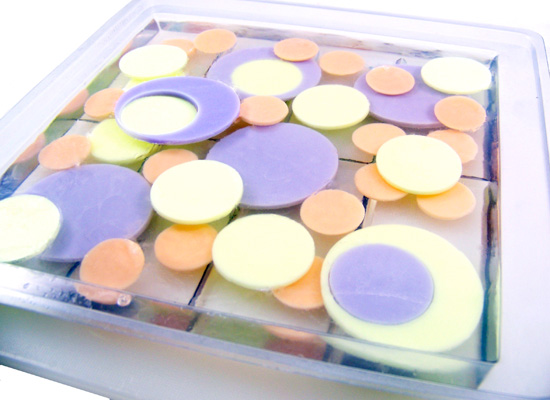
Step 8: Once your silicone pan soaps are ready and on a flat surface it’s time to have some fun with the cookie cutters for some soapy fun. In this session, I used the 2 1/4″ circle cookie cutter on the purple soap and the 1 1/2″ circle cookie cutter on the yellow soap. Cut out as many as you want.
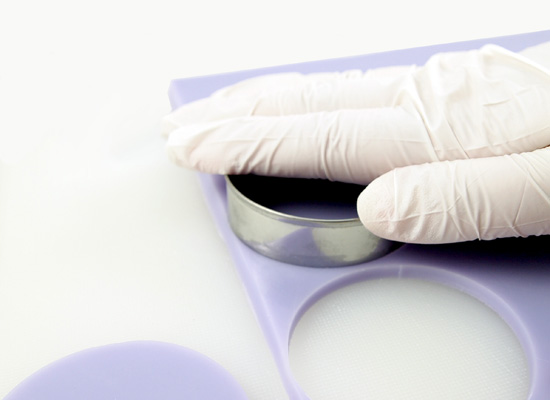
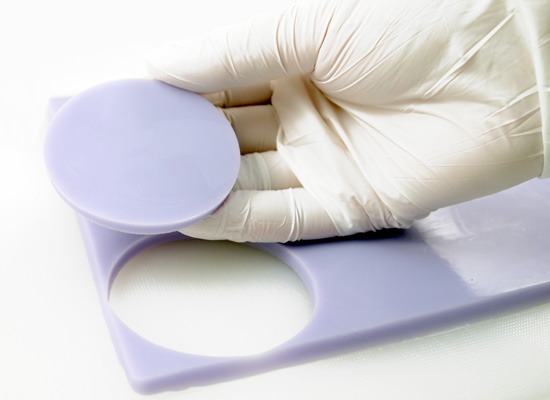
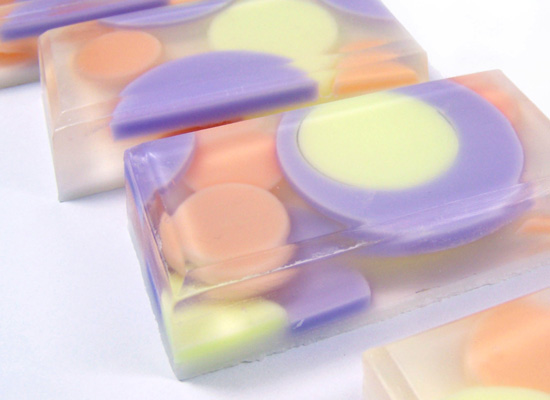
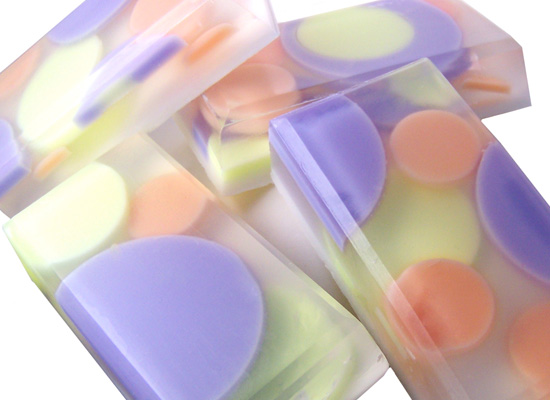
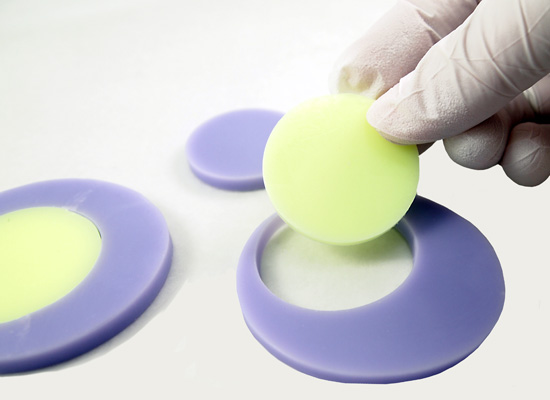
Step 9: To change it up a bit, I made some “retro” circles for some fun. Using the 2 1/4″ cookie cutter, cut out a purple circle, then using the 1 1/2″ cookie cutter, cut out a circle off-center from within that larger circle. I then did the same with the yellow soap. I then placed the smaller yellow circle back into the larger purple circle. If this sounds confusing, the pictures below should clear it up.

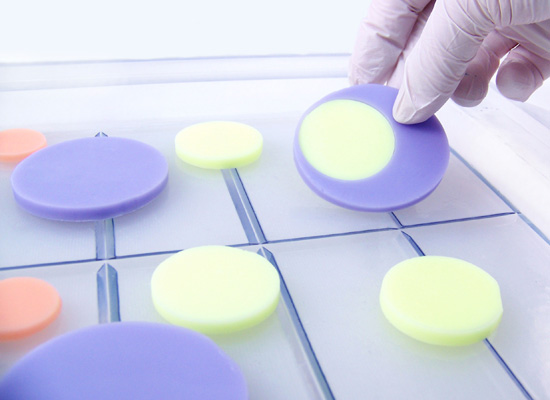
Step 10: Arrange your cut-outs on your work space so that you know ahead of time how you will be arranging your embeds. This will save you a lot of time!

Making Your Soap
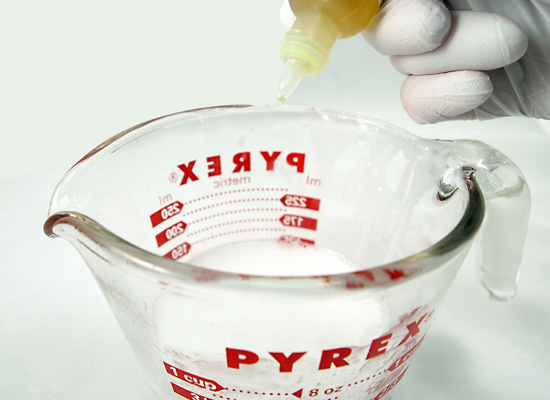
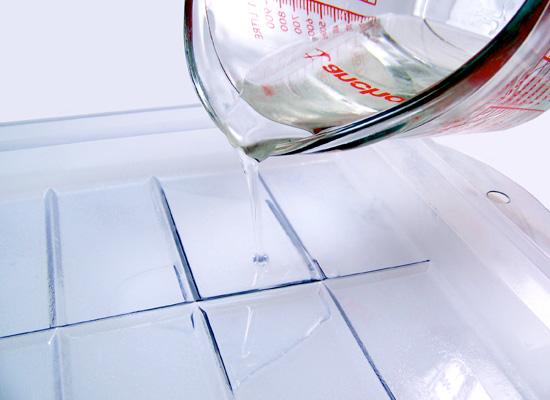
Step 11: Melt 24 oz of clear melt and pour soap base using step 1 above. No colorant is used. Using a disposable pipette, add 7 ml of your Ruby Red Grapefruit Fragrance Oil to the soap and stir slowly. Make sure the temperature is around 130 degrees and pour a very thin layer of clear in your Large Rectangle Tray Soap Mold, just enough to cover the bottom of the mold completely. Spritz with alcohol to remove any bubbles, you want this to be as bubble free as possible. You will not be pouring all of your clear at this time. Let soap sit for 8-10 minutes to form a hardened layer. Press gently with your finger to test. If your finger is able to form a dent, wait another minute or two. You want the layer to be able to support your soapy embeds
Step 12: Once your first layer is set, reheat your clear soap base. Use a thermometer to monitor the soap temperature, it should be about 130° or cooler to avoid warping your mold or melting your embeds. If soap is too hot, keep stirring slowly until soap reaches 130°.
Step 13: Spritz the hardened soap that is already in the mold to help the embeds and the next layer adhere. Now you have to work quickly here. Pour a small amount – approximately 2 – 3 oz of melted soap into the mold. Spritz your cut-outs with alcohol and then place your cut-outs into the mold. Once your embeds are placed in the mold, spritz with alcohol and then pour some clear soap over the embeds and let set. Remember that you need to place the side of the embed that you want showing facing downward. The bottom of the soap mold is the top of your soap (Ask me how I know this!).
Step 14: Add 1 -2 more layers following Steps 12 and 13 to get a multi – dimensional look to the design. Stop at 1/4″ from the top.You’ll work faster if you’ve planned where your embeds will be going ahead of time. Let soap set until for about 10 minutes.
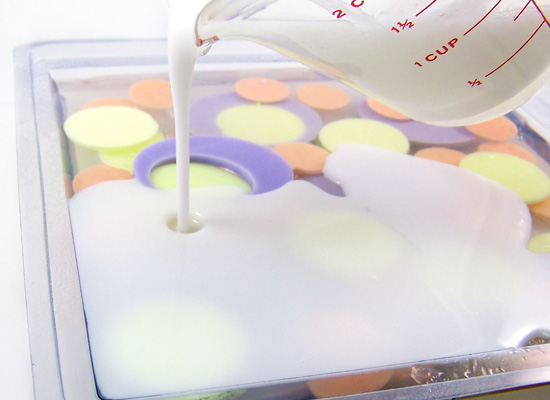
Step 15: Take the rest of your cubed white melt & pour soap base (about 6 ounces) and place in a microwave safe glass container. Melt in the microwave in 30 second bursts until melted. Be careful that you don’t boil the soap, boiling will result in a poor quality rubbery soap. Add about 1.5 ml of Fragrance Oil and stir slowly. Monitor temperature of soap until it reaches 130 degrees.
Step 16: Spritz the soap in your mold with alcohol, especially at the edges of the mold and slowly pour your white soap to the top of the mold. Spritz with alcohol to remove any bubbles. The white soap will make your embeds show up better.
Step 17: Let completely harden over night if possible. This is a large amount of soap and you want to make sure it’s completely hardened before removing from pan.
Step 18: Turn mold over and slowly press on the corners of the mold to release the soap.
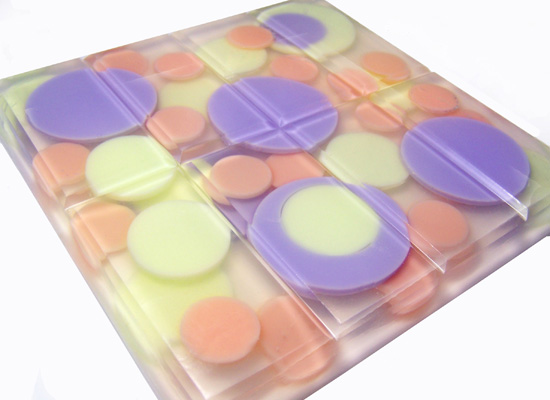
Step 19: Cut soap into bars and enjoy all your hard work! This project will give you 8 bars of soap at 4 ounces each.