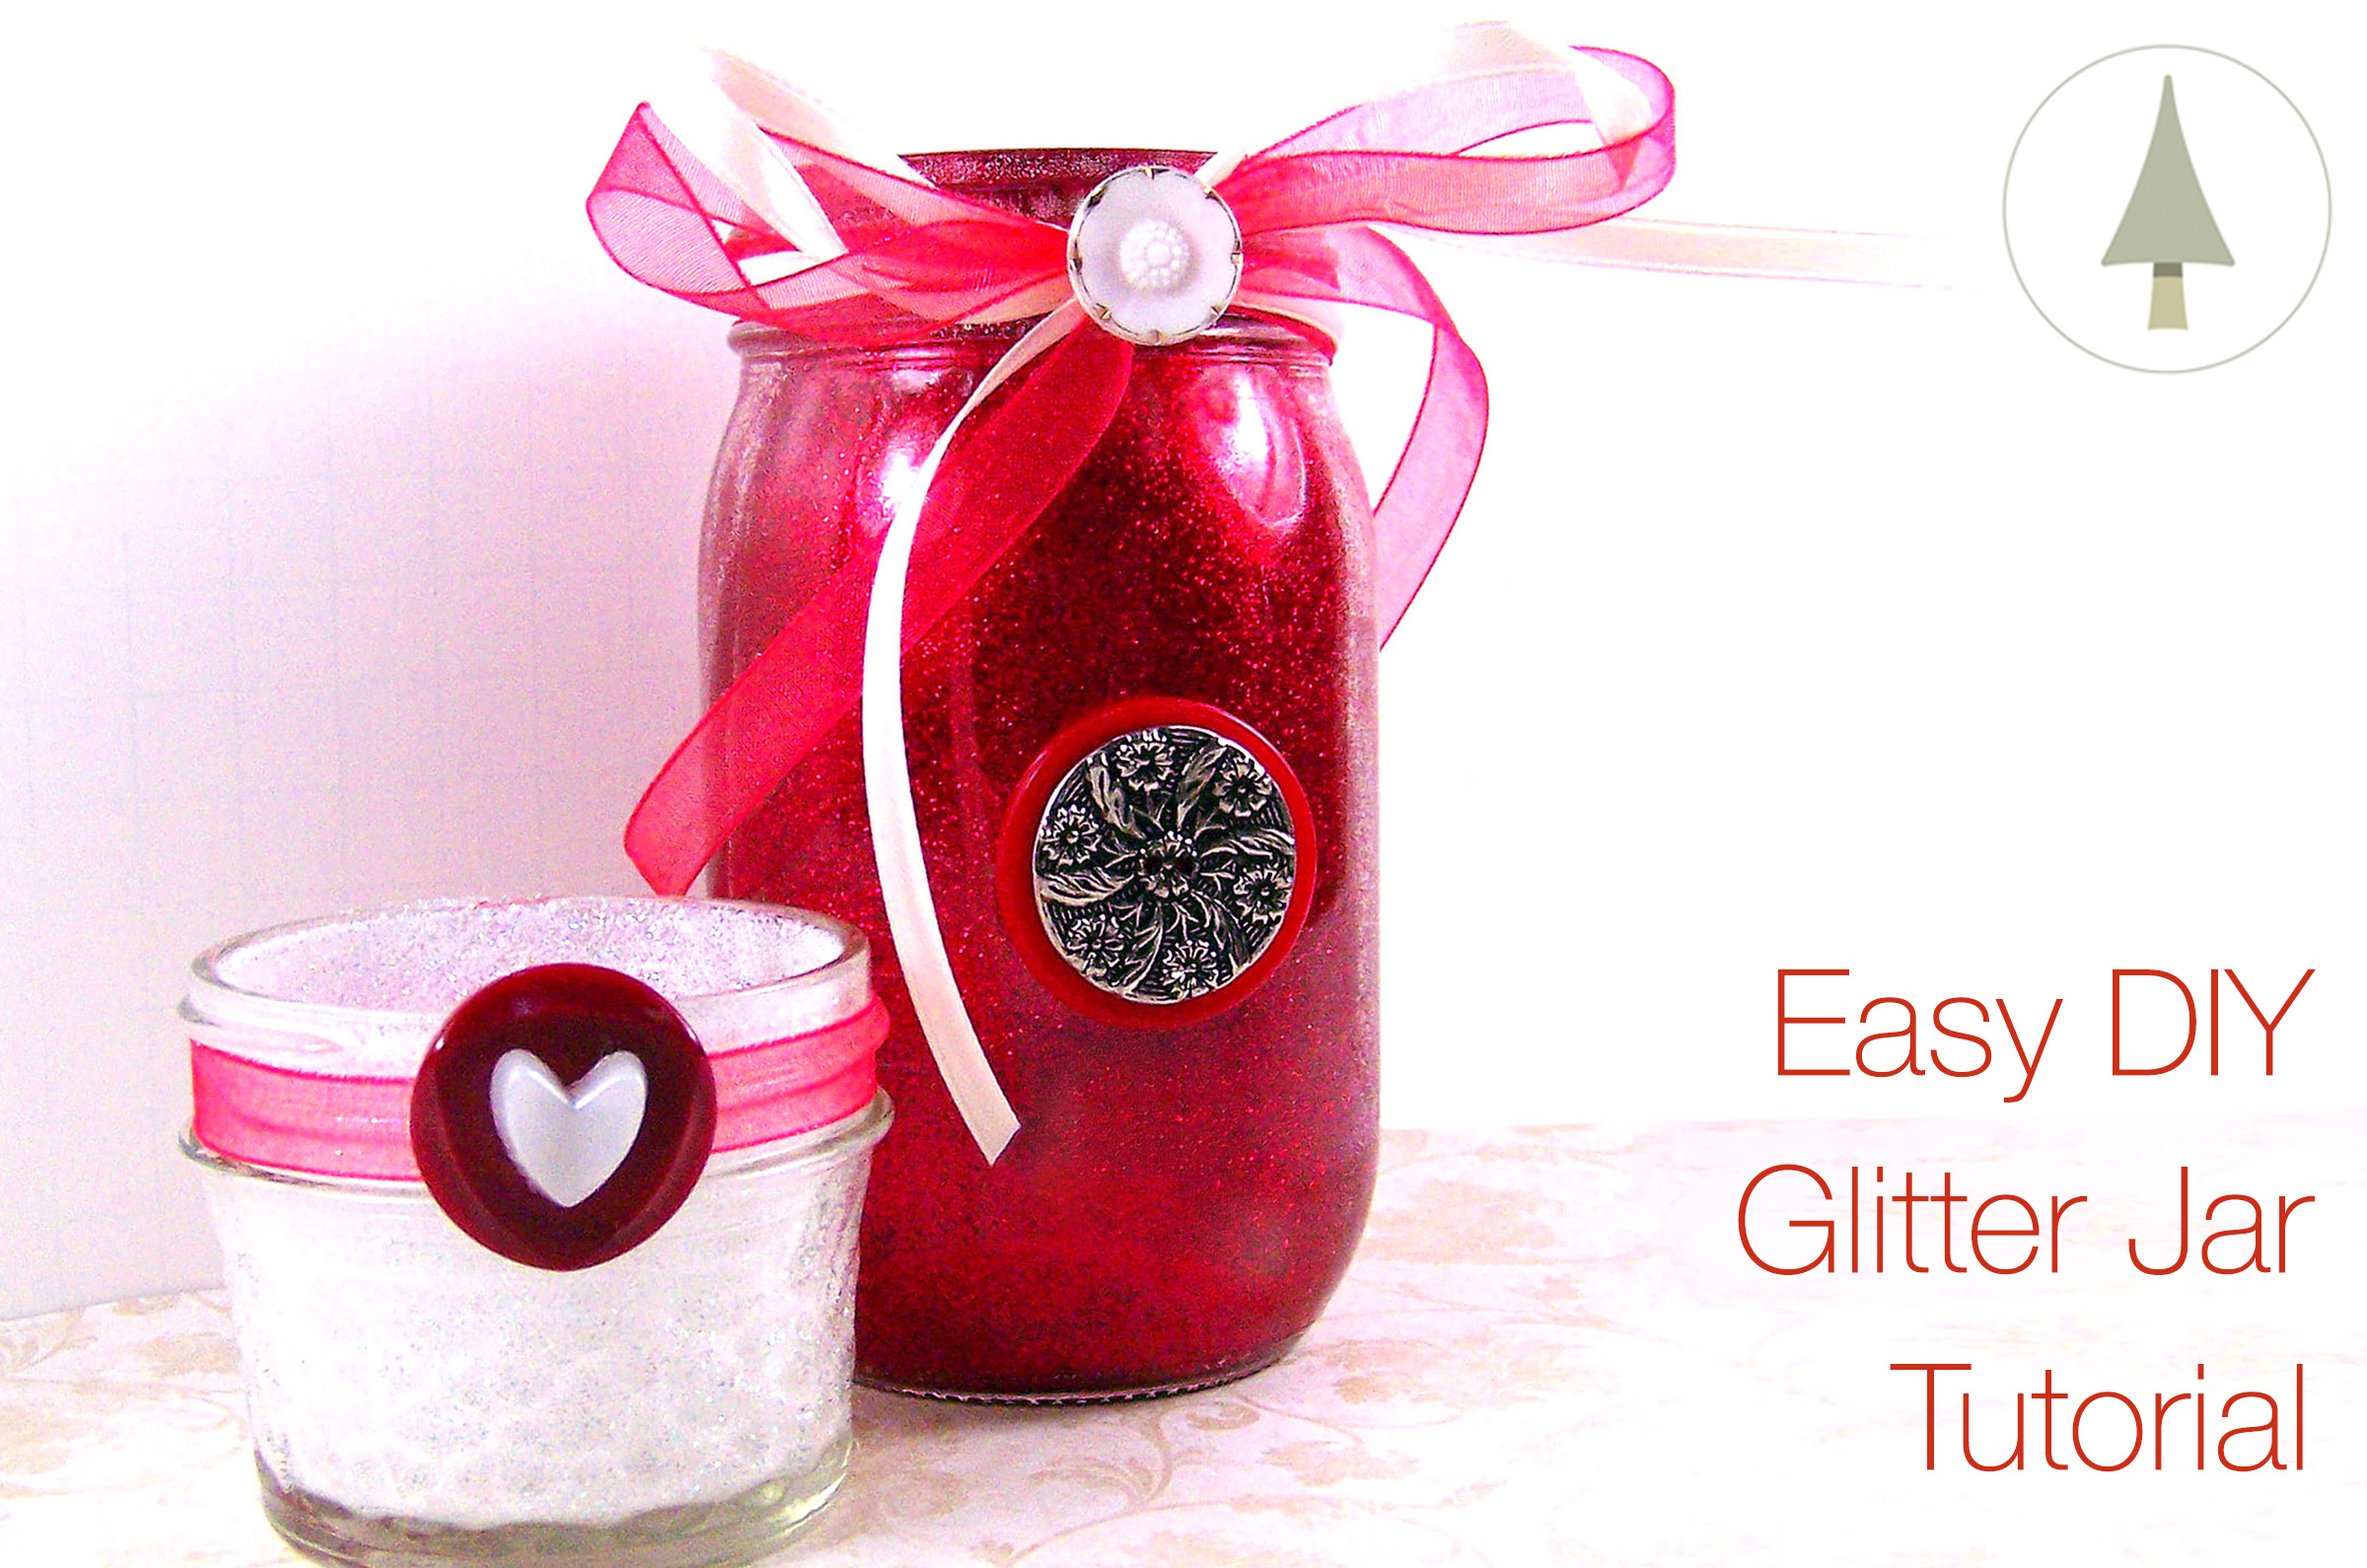
Here is a tutorial for a fun project that has been going around with one of our most wonderful and sparkly products….GLITTER! Make some of these for your sweetheart this Valentine’s Day. They can be used from vases to pencil holders to craft storage.
Supplies and Equipment Needed
Rubber gloves (helps to keep glitter off of your hands)
Quick Shine Floor Finish for Hardwood, Tile, Vinyl or Stone
Ribbons
Vintage Buttons
Paper Towels
Glue Gun
Candle Jars
Lids for Candle Jars
Shimmer Dust Glitter in Bright Red 006
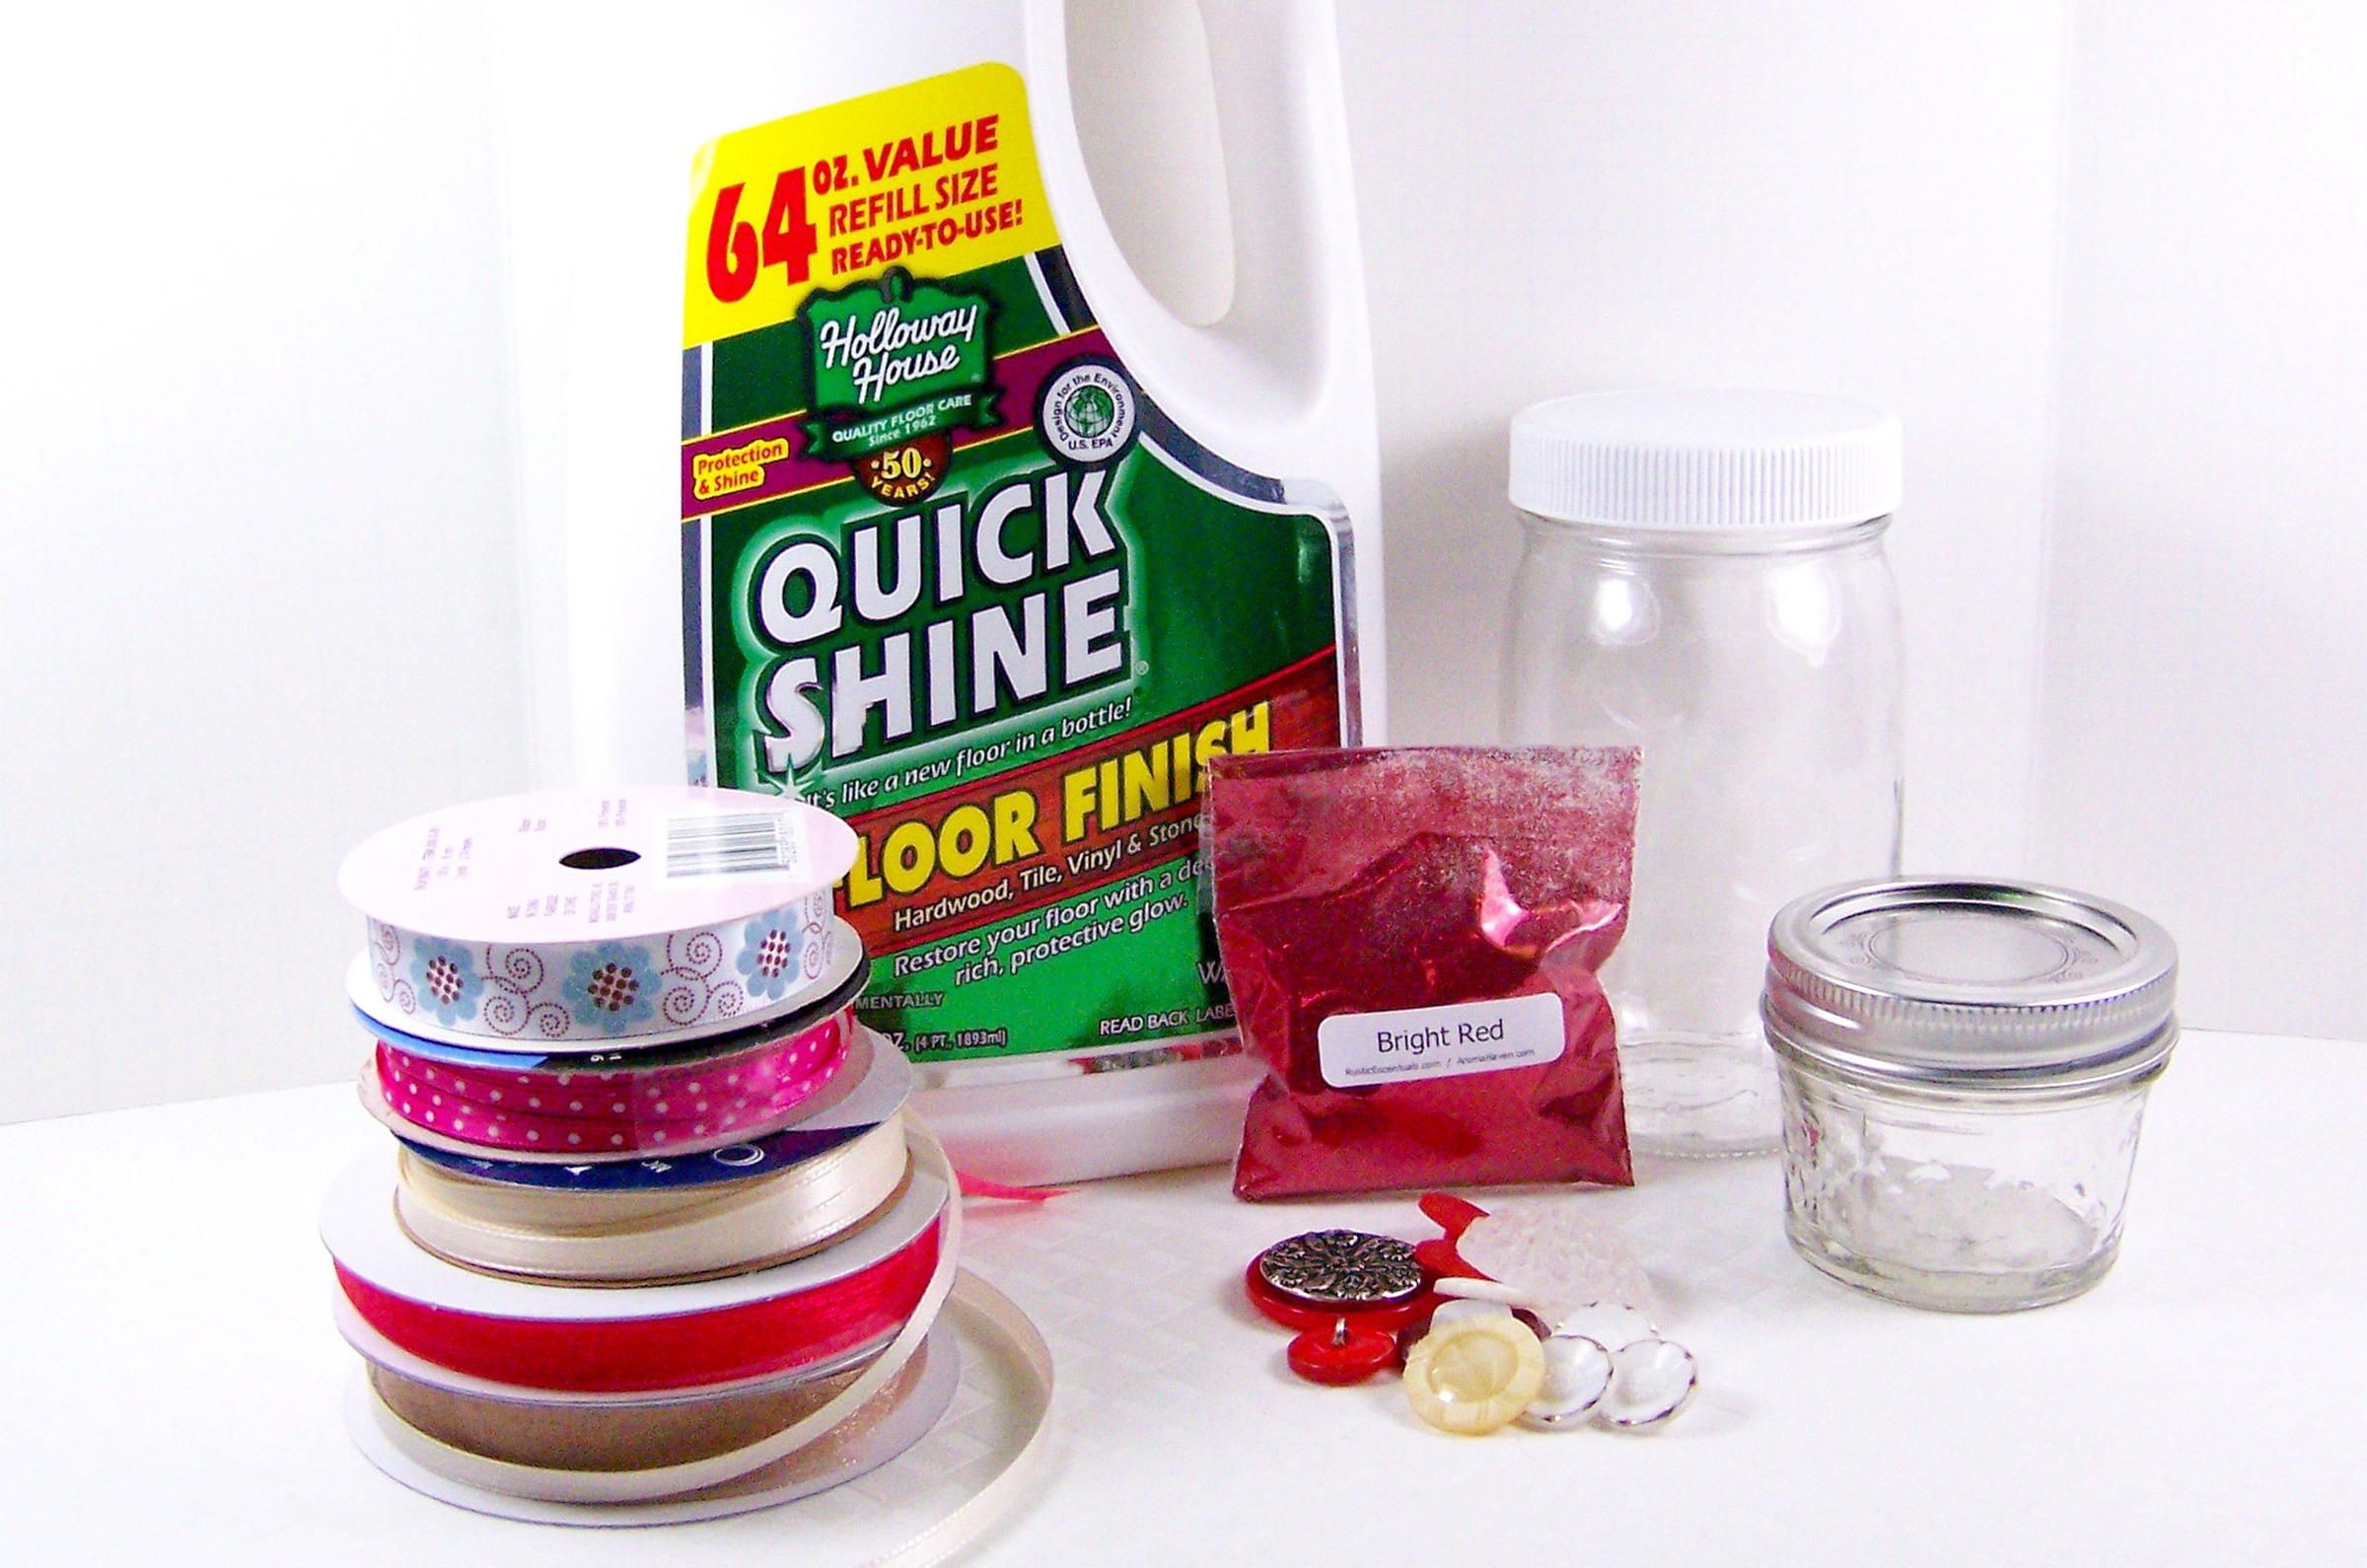
Note: Any brand floor finish will do for this project; just make sure it is a Quick Shine Floor Finish that is acrylic based. You really don’t need 64 ounces for this project, it’s what I had on hand, and you’ll only need a small amount. You can find this at any hardware store.
Step 1: Gather the jars together and cover your work surface with paper towels or newspaper. Pour approximately 1/2 inch of Floor Finish into the bottom of the jar. Don’t over think or measure, just pour.
Step 2: Twist the jar lid on tight and slowly swirl the Floor Finish all around the inside of the jar until it is fully coated. Do this slowly because the Floor Finish tends to bubble. Do not shake as I did on my first attempt – I was too impatient!

Step 3: Uncap the jar and pour the Floor Finish into a cup or your next jar. If you’re finished with the project, you can pour it back into the Floor Finish container – no waste here!
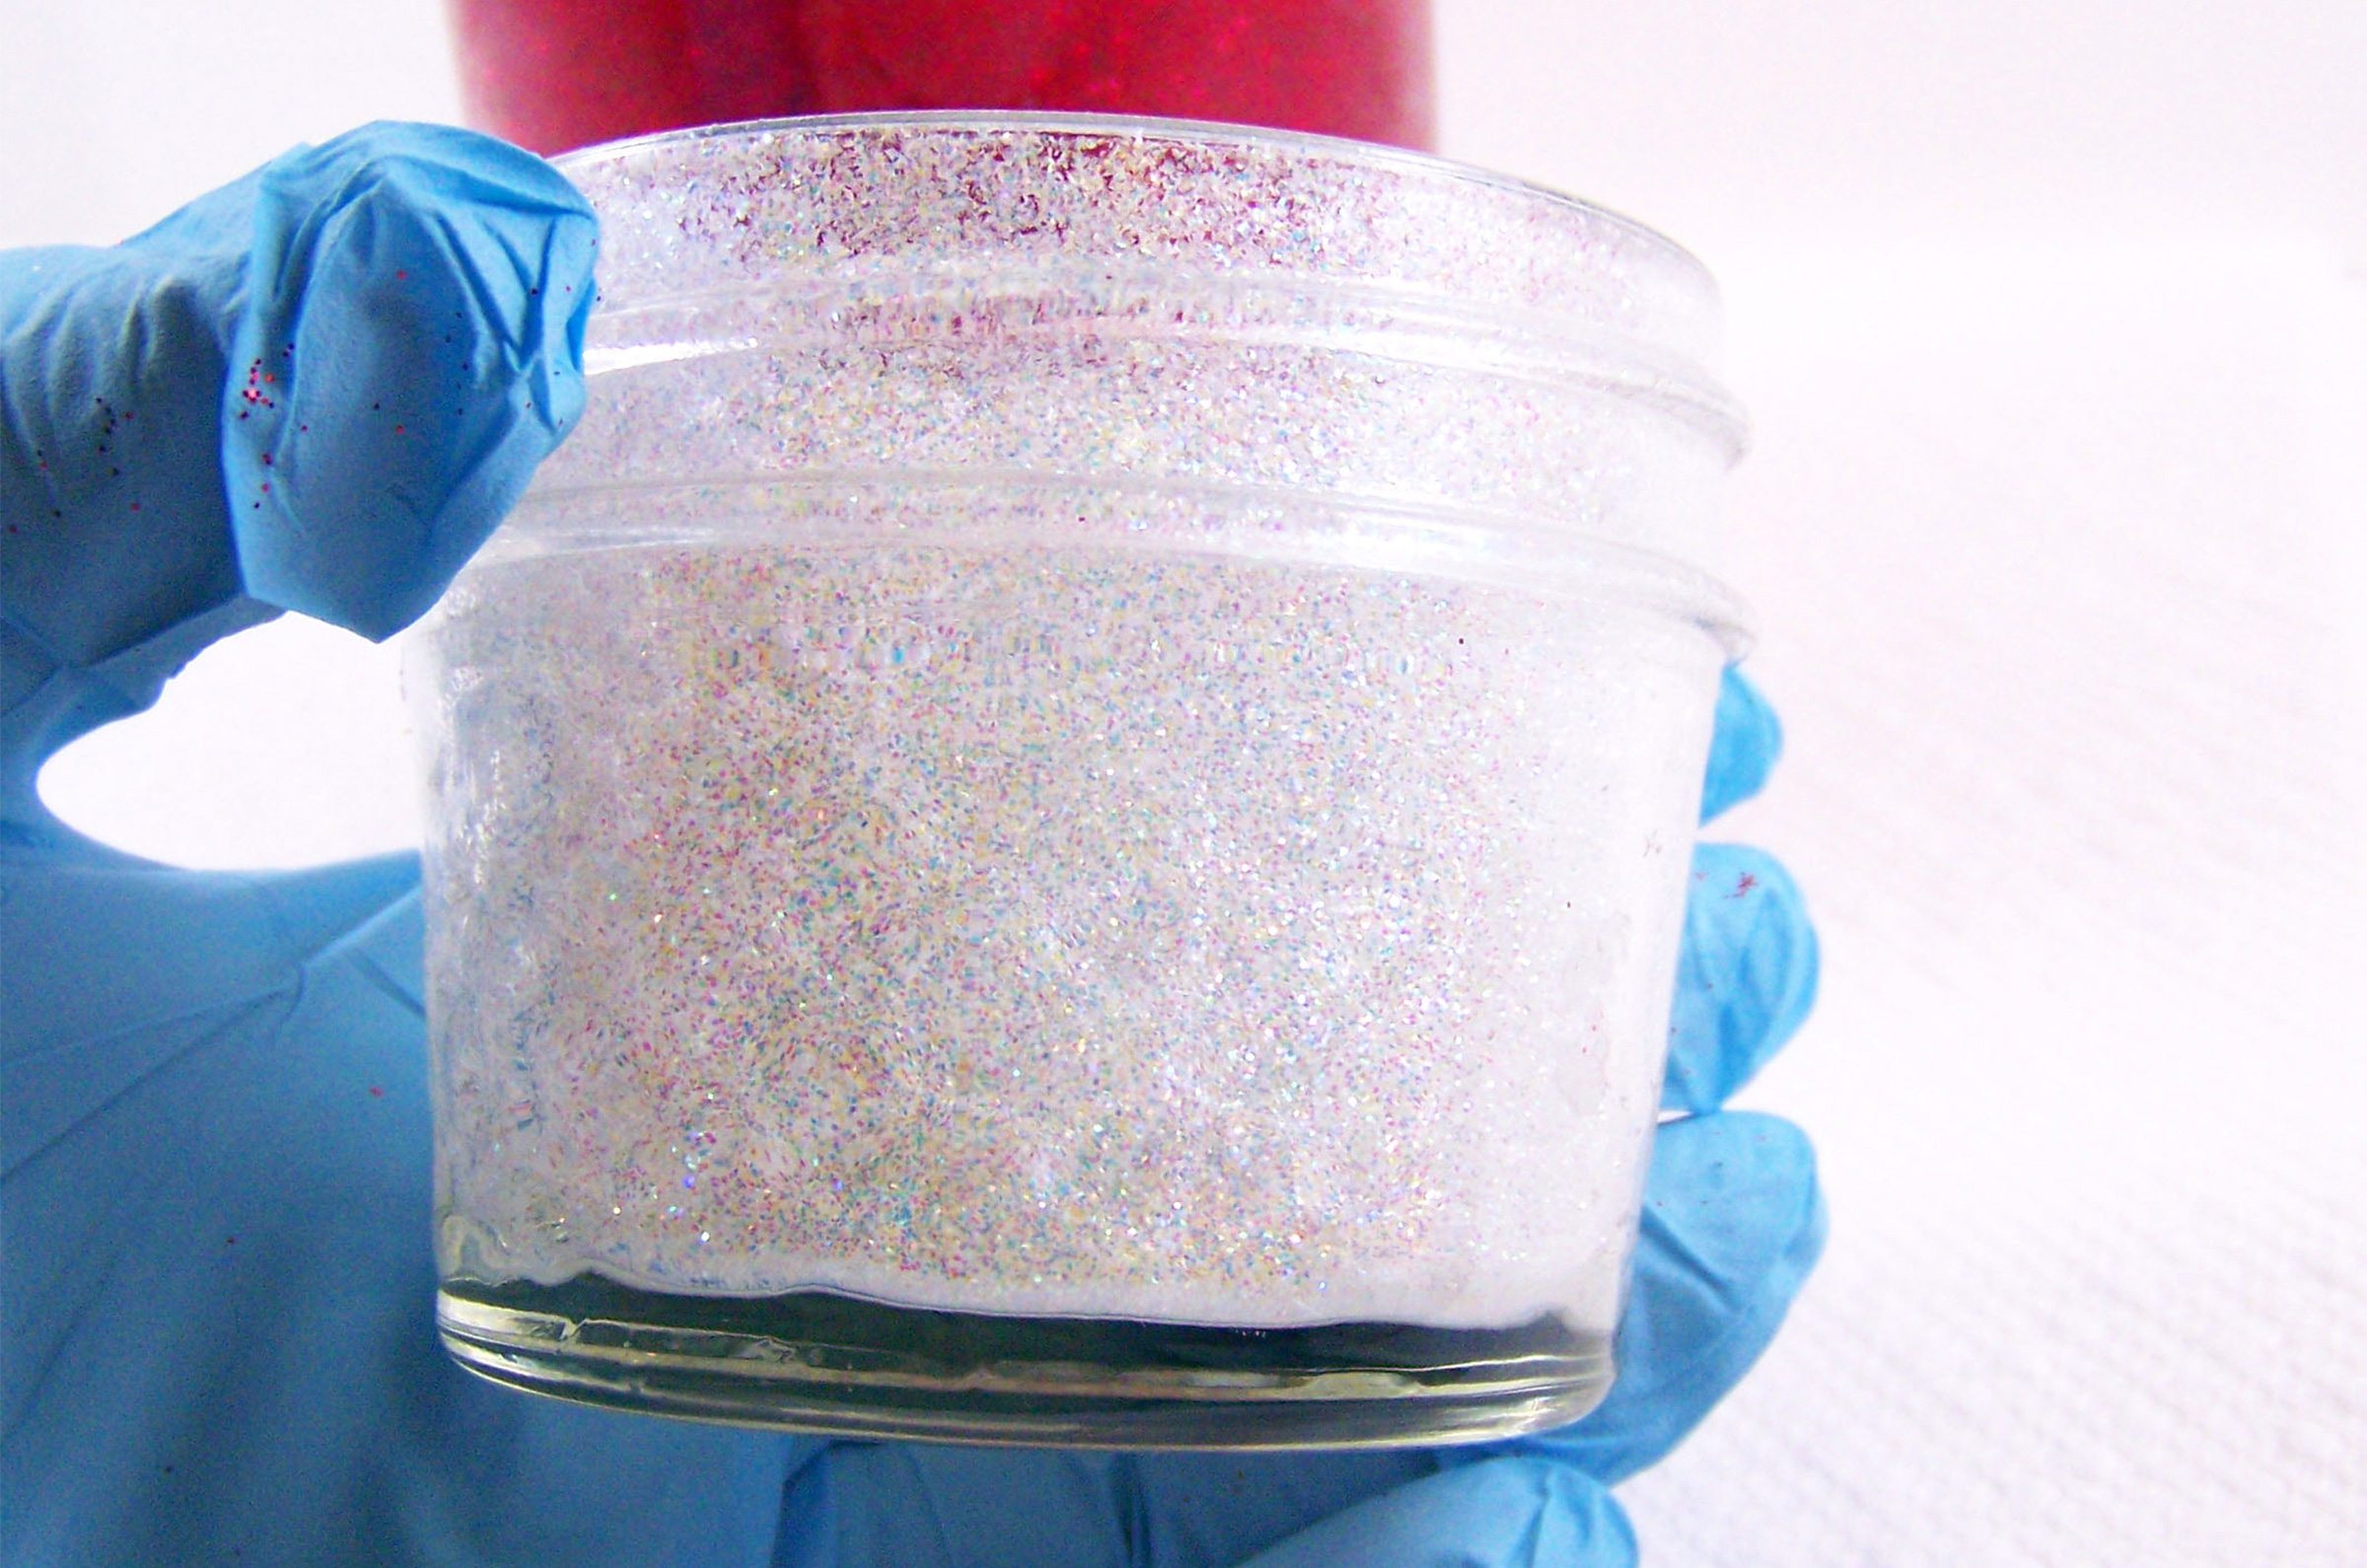
Step 4: Add approximately 2 to 3 tablespoons of Shimmer Dust Glitter in Bright Red into the jar. Note: I used 3 tablespoons but now think I could have used 2. Depending on the size of your jar, reduce or increase the amount you will need.
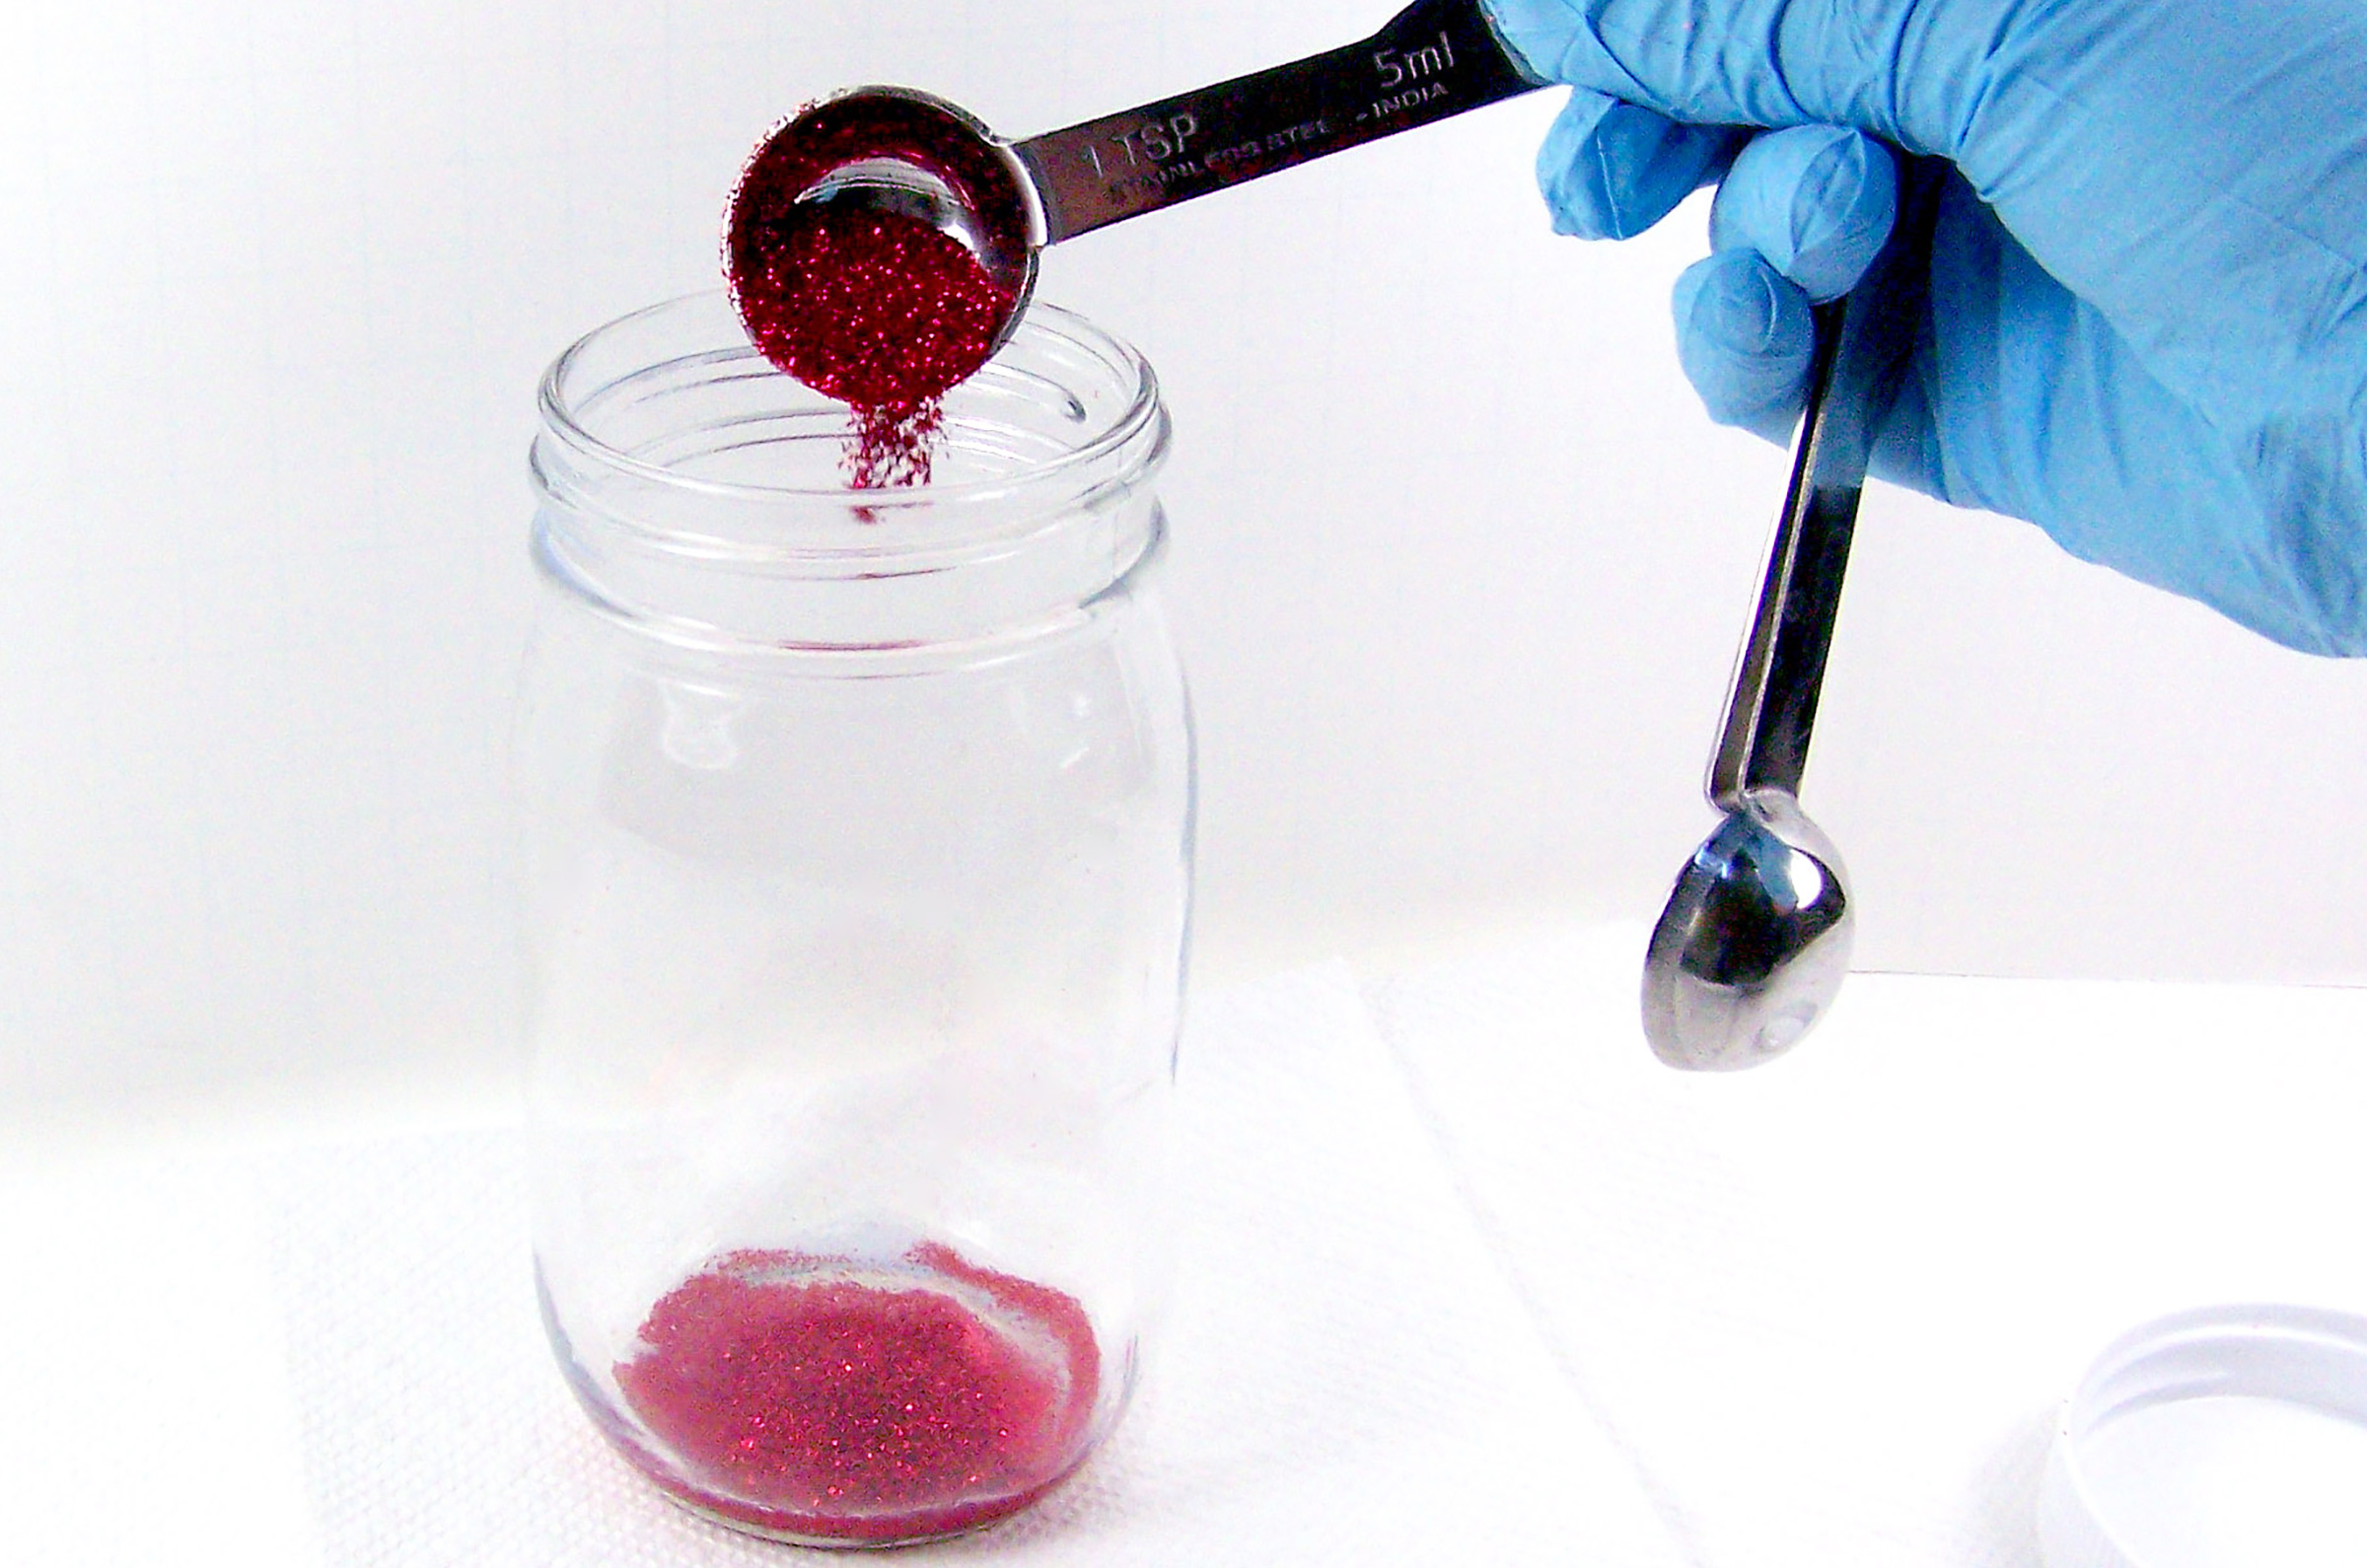
Step 5: Super important (unless you want to make it rain glitter): don’t forget to cap the jar.
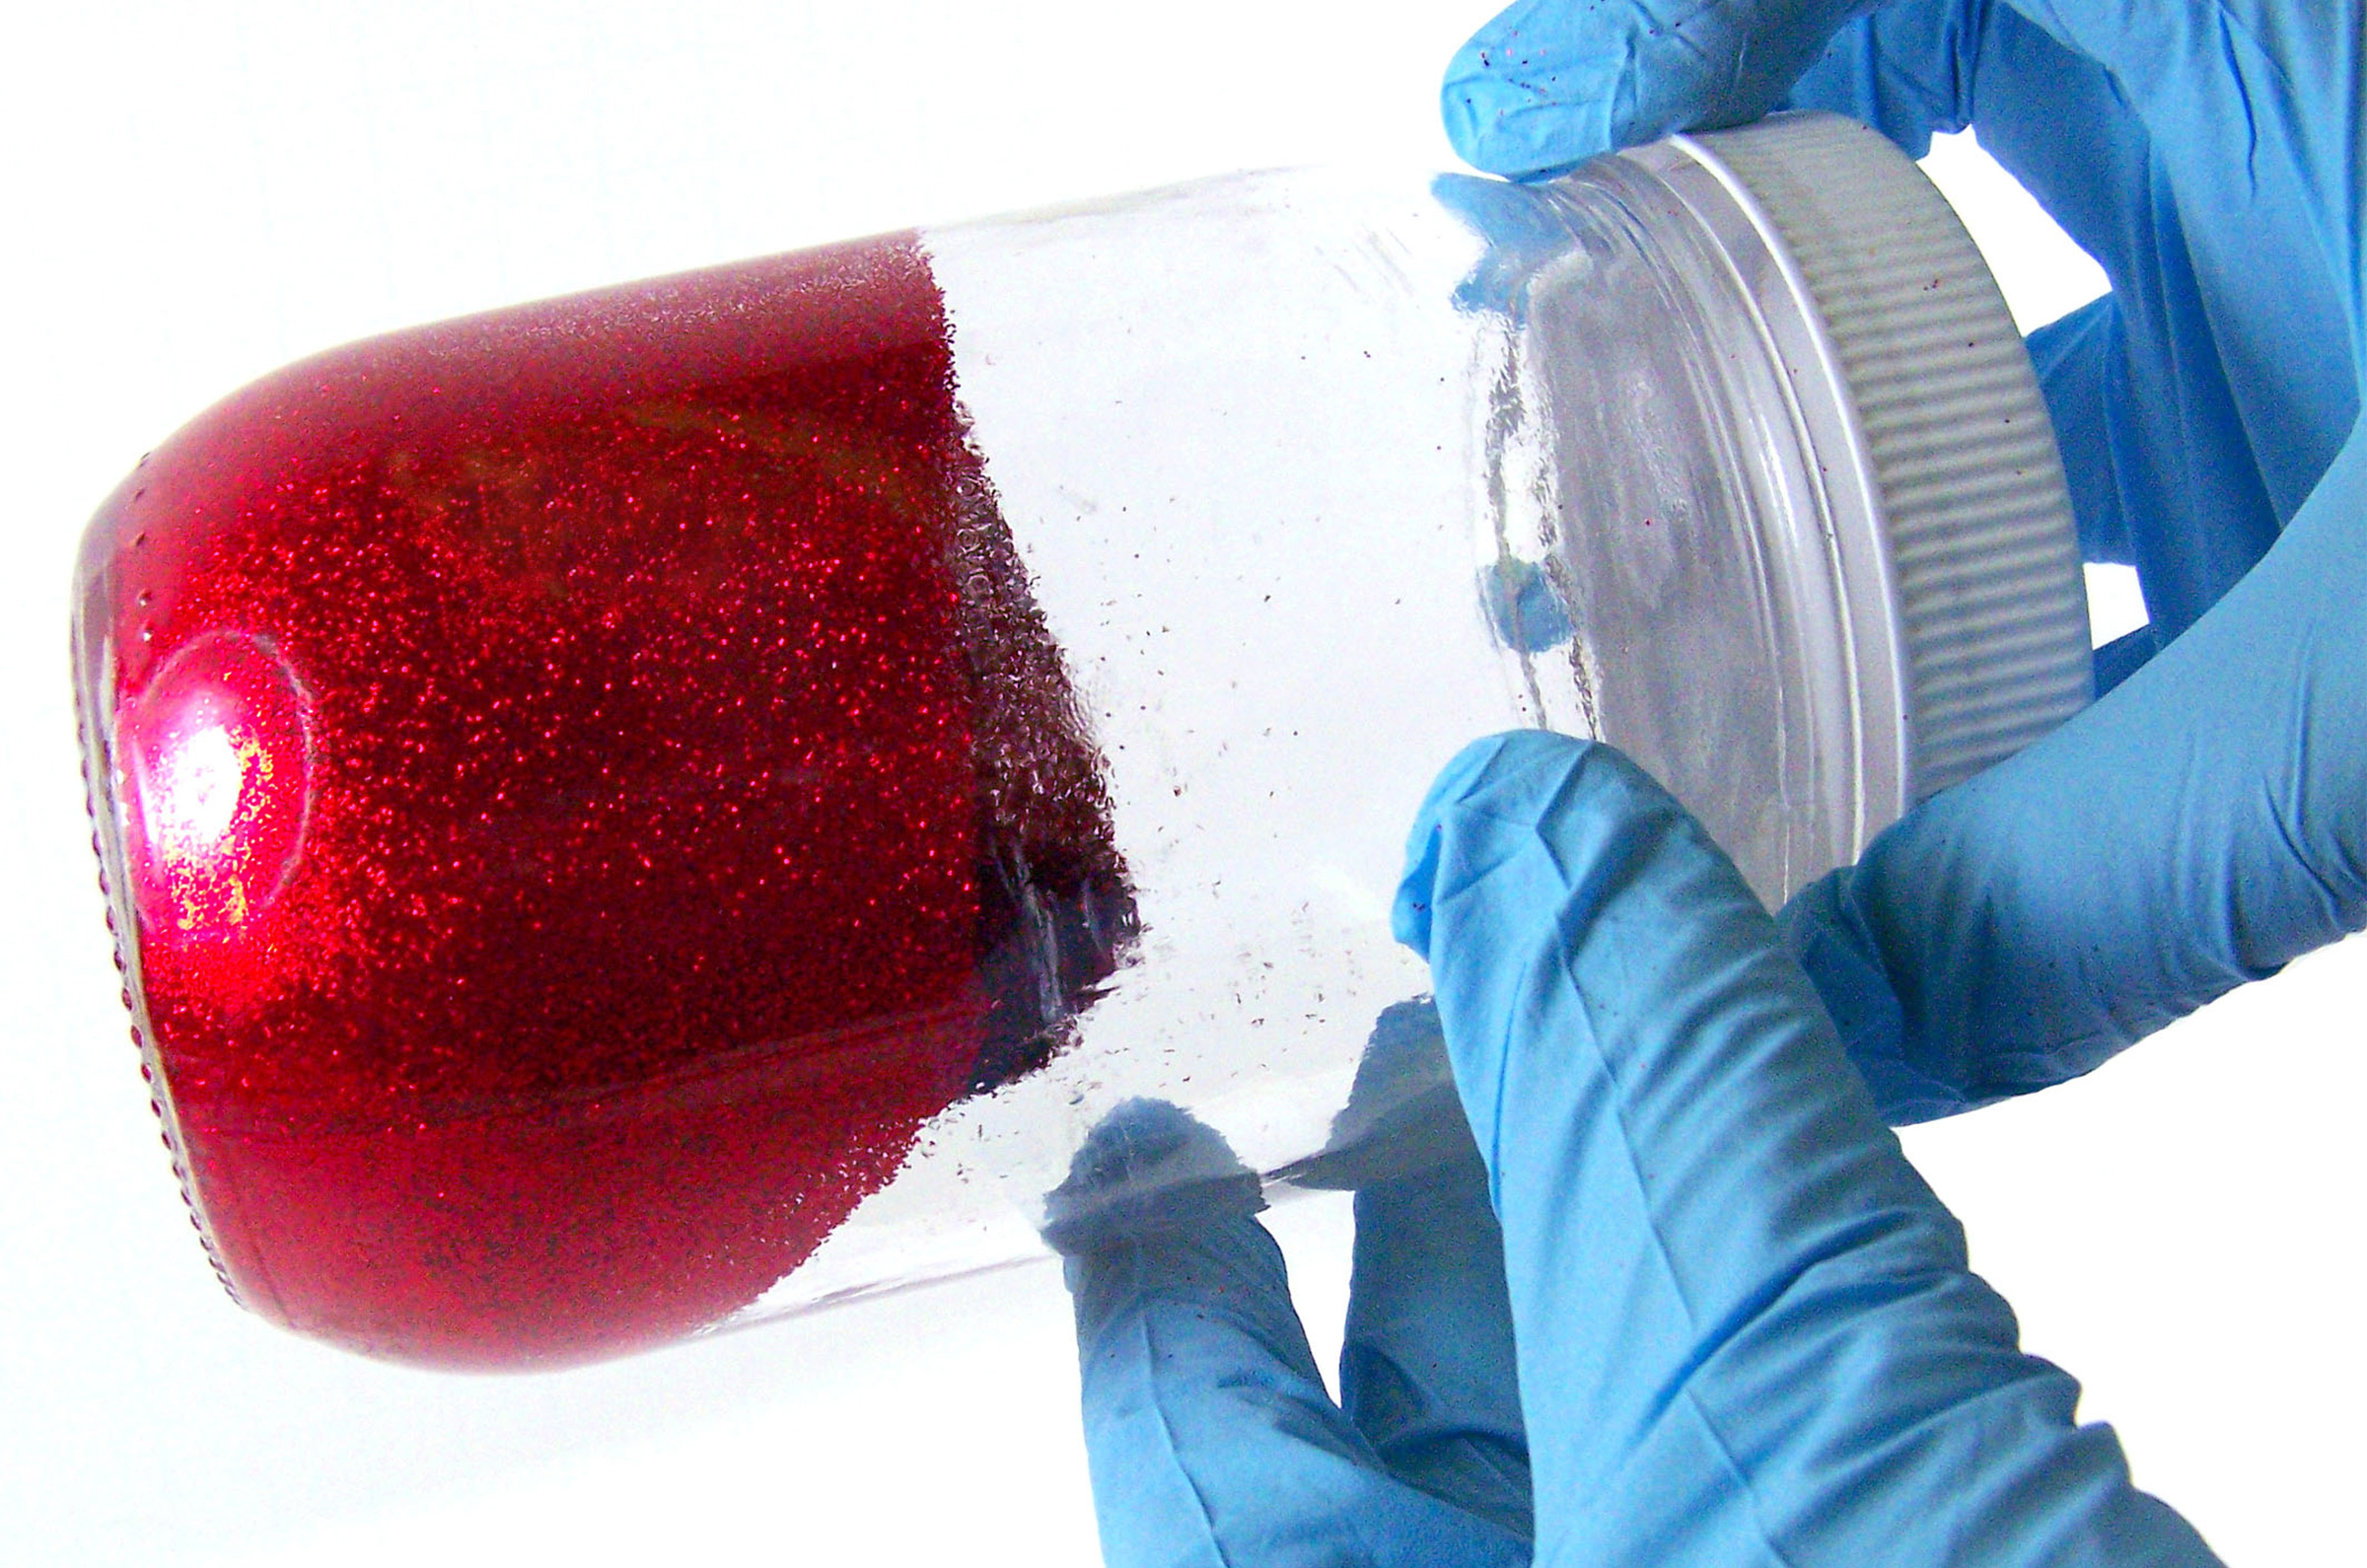
Step 6: This is the fun part, it’s like magic! Slowly turn the jar on its side and turn slowly around, covering the inside with glitter. It completely coats the inside of the jar beautifully! Turn the jar several times until you are happy with the result. Add more glitter if you need to.
Step 7: Uncap and gently shake out the loose glitter. You can use this for the next jar. Do not use this leftover glitter for any candle or bath/body projects! Place the jar to the side and let completely dry. I left mine overnight but it only takes about an hour to completely dry.
Step 8: If you are planning on making more, just repeat Steps 1 through 7 with different colored glitter and/or size jars. Check out the awesome glitter color assortment that Rustic Escentuals carries here.
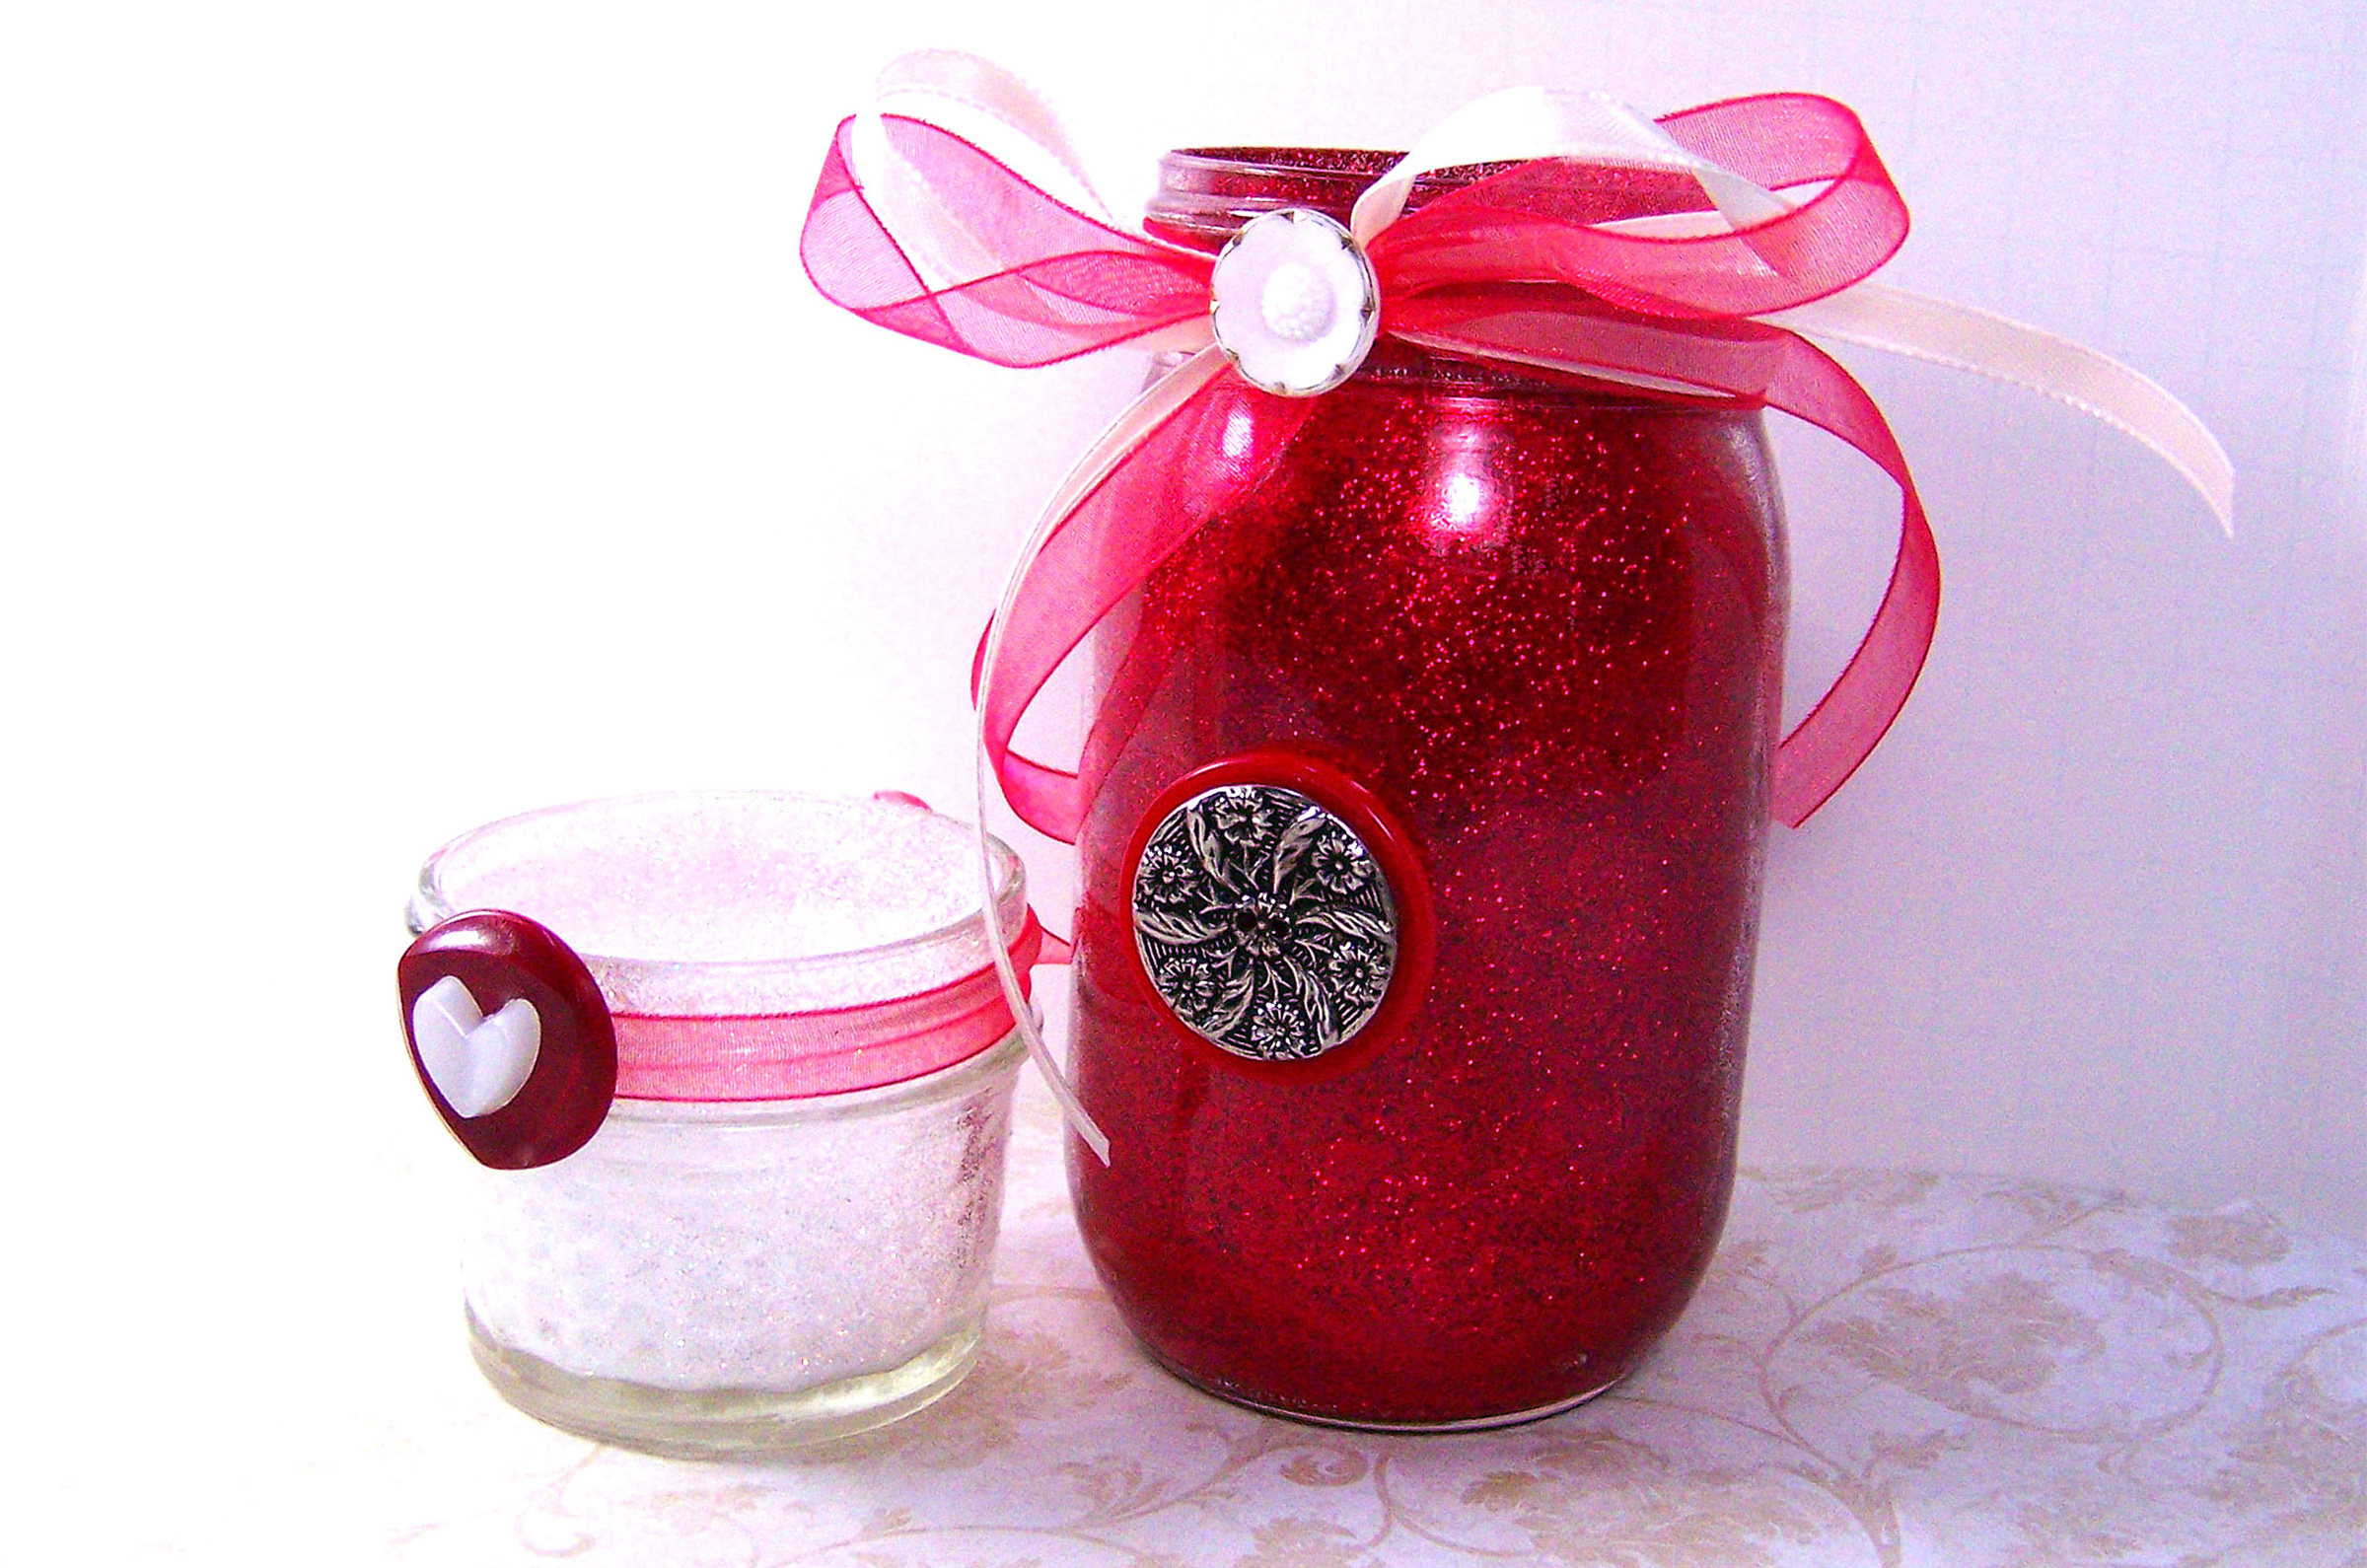
Step 9: Now it’s time to decorate the jars! I used vintage buttons and ribbon – use your imagination. A little hot glue and you can add buttons to the jars and ribbons for a cute Valentine’s project.
Optional: You can spray a bit of sealant into the jar after it has completely dried. I find that it’s not really necessary, but for those who want a bit of an extra sealant, it won’t hurt the finish.
All done! Aren’t these super cute! These have not been tested for safety as candle holders, so skip the candles and use these for vases, makeup brush containers, pencil/paint brush holders and craft storage…use your imagination!