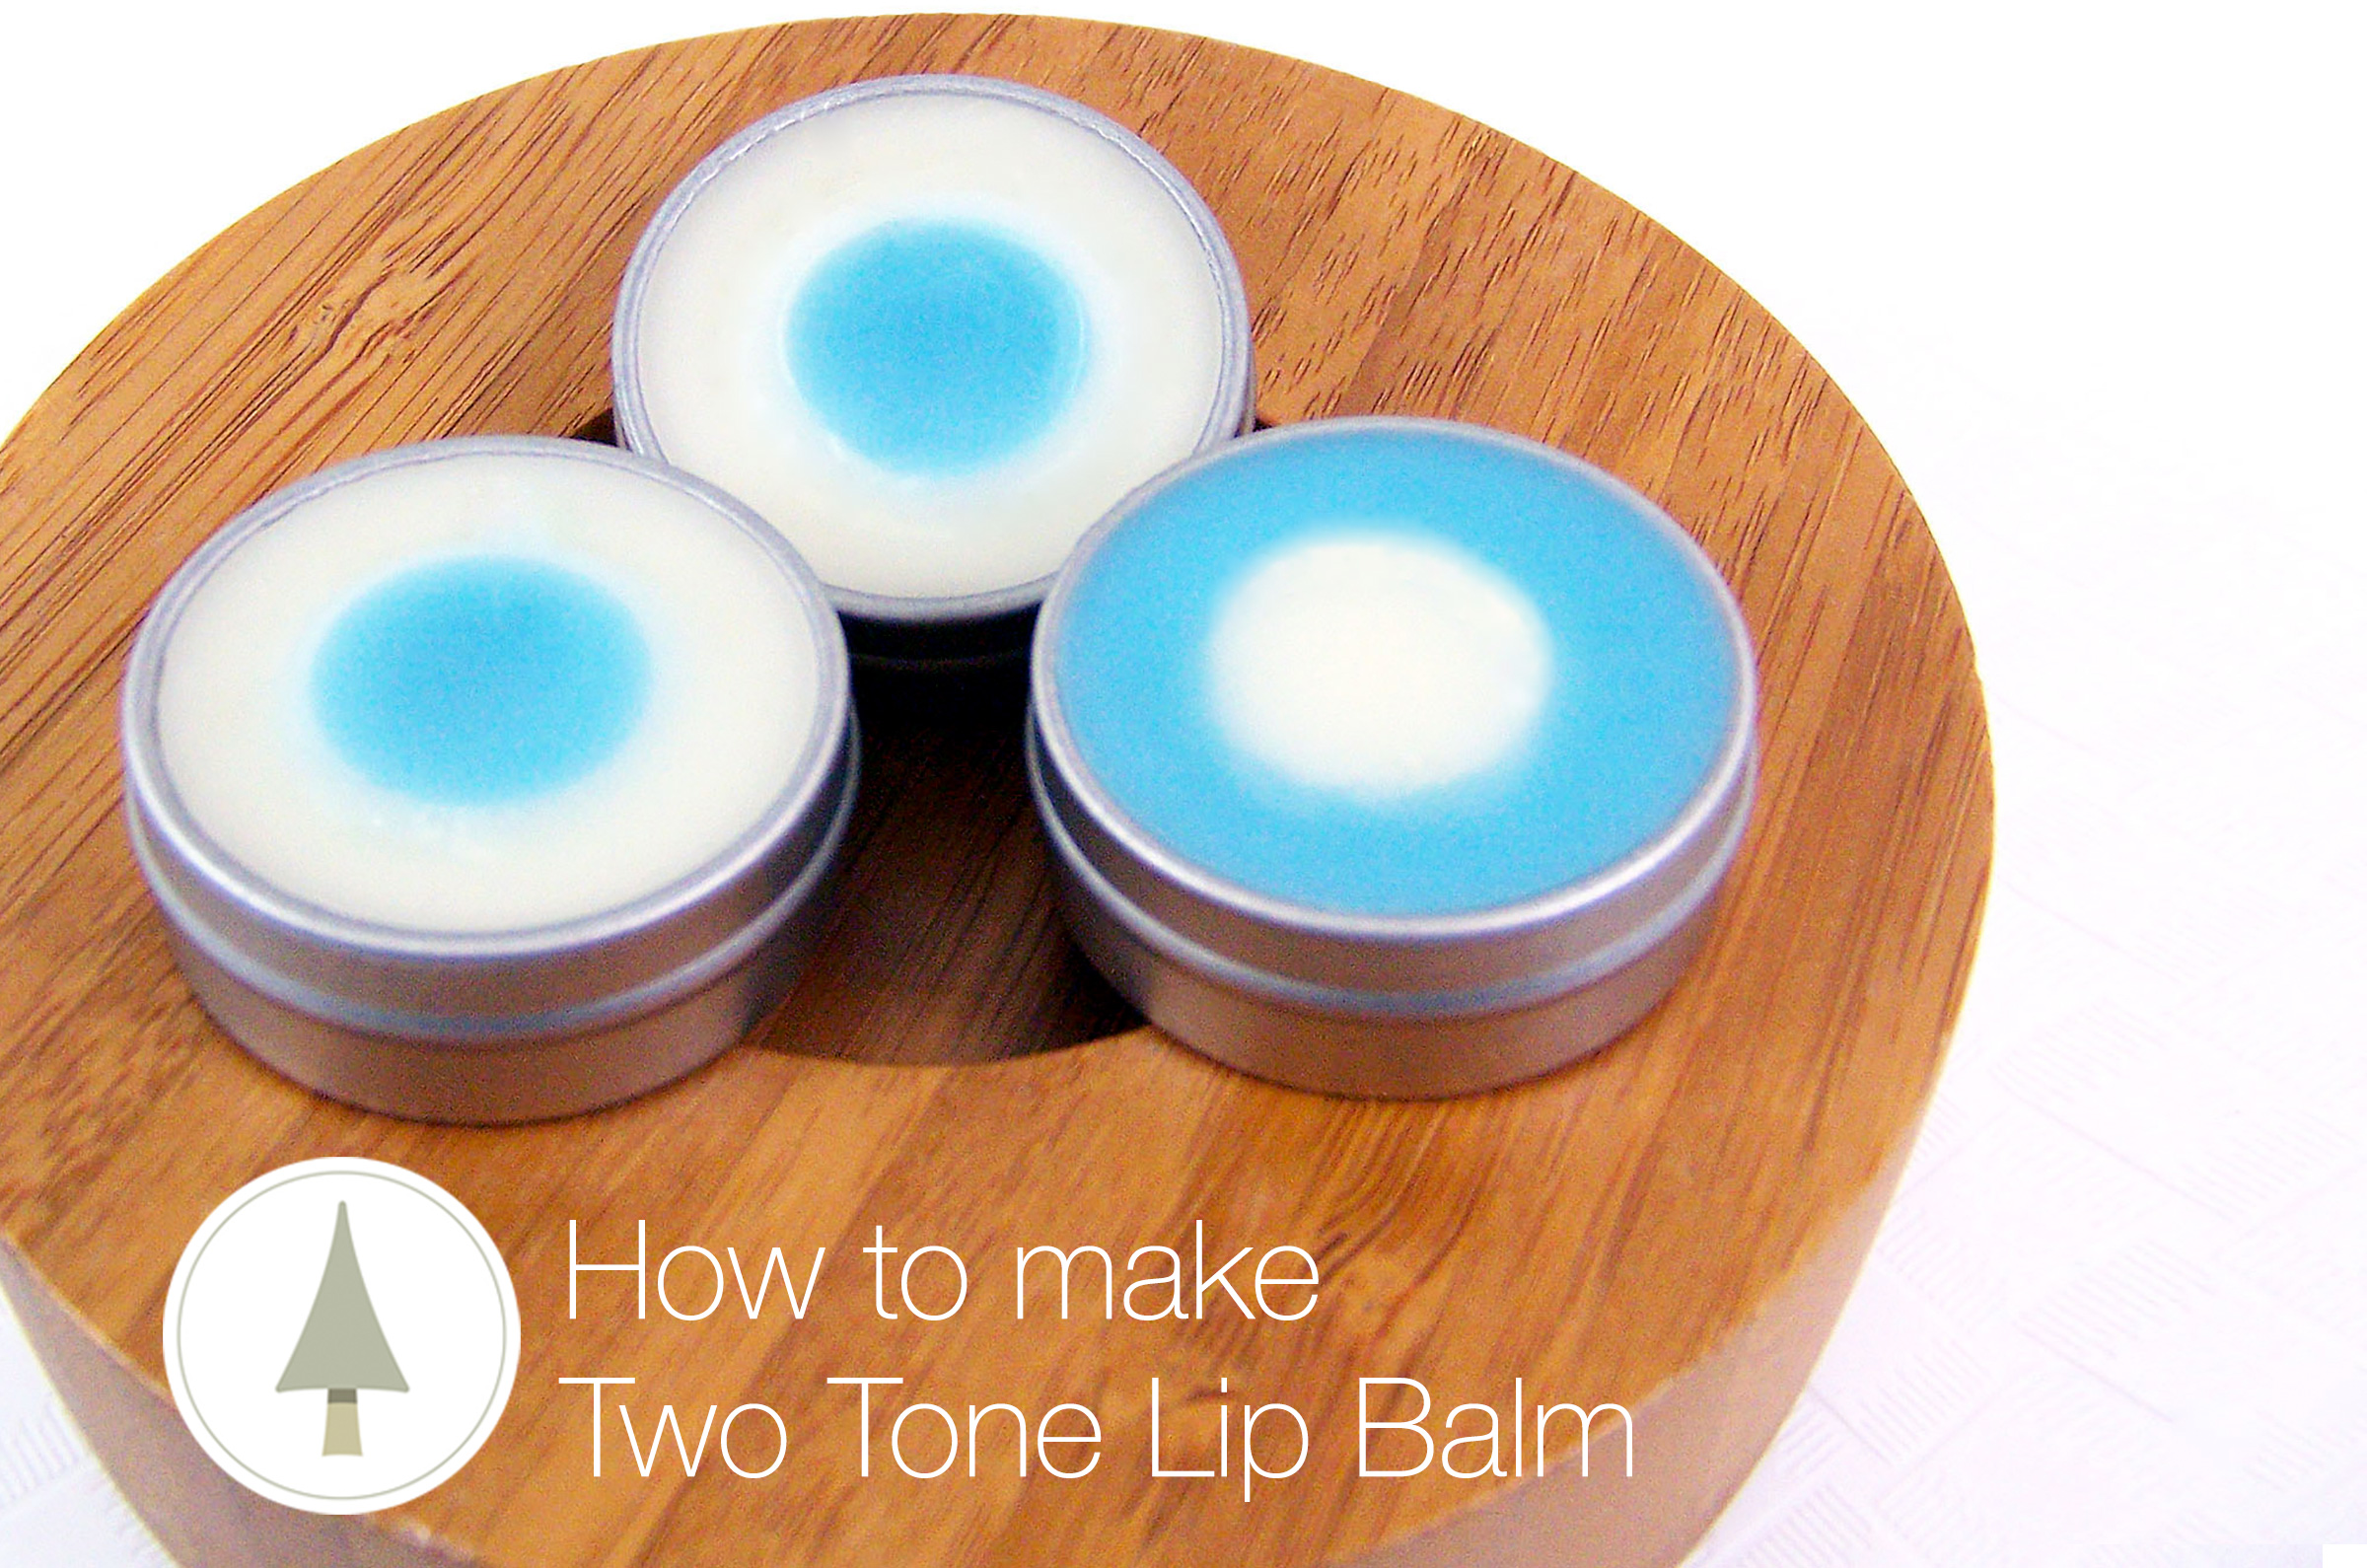
Here is a fun twist on lip balms using the Natural Lip Balm Base and Lip Balm Tints. This is an easy way to wow all those around you with your lip making skills! Plus, during the dry season, the more lip balms the merrier! Following the amounts used in this tutorial, you will be able to make 3 lip balm tins.
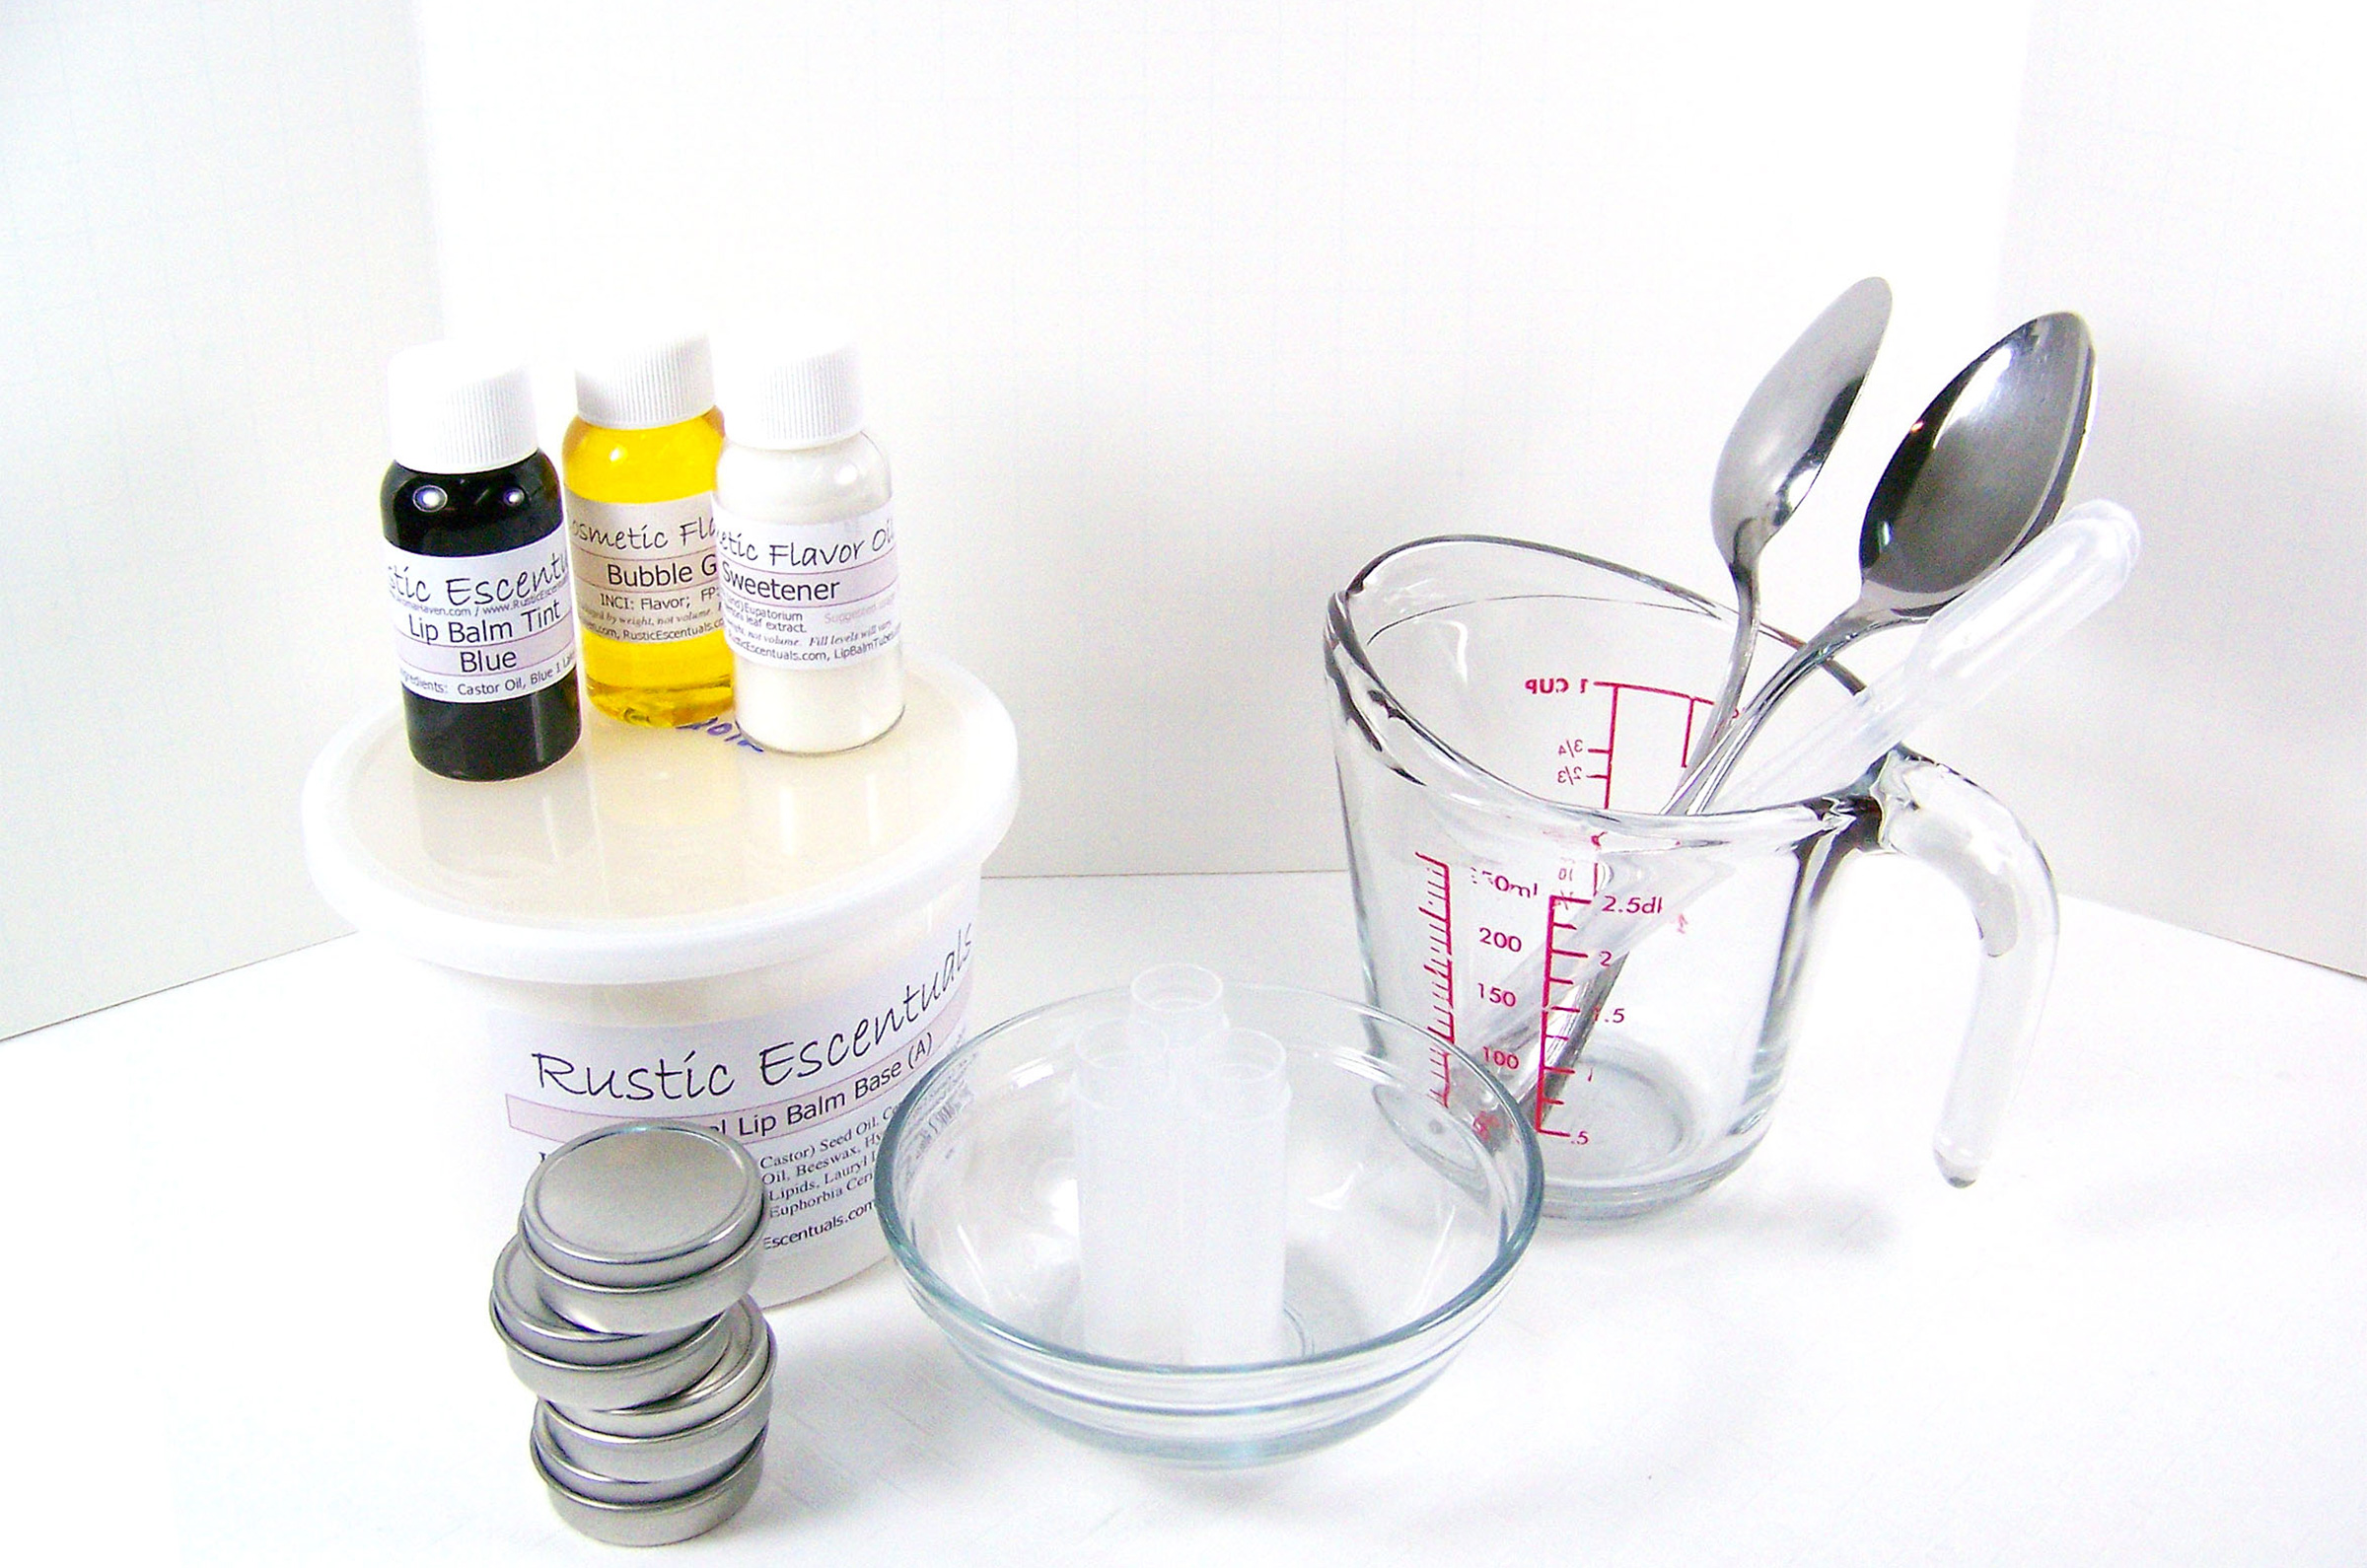
Supplies and Equipment Needed
Spoons
Rubber gloves
Glass measuring cup
Digital Scale
Disposable pipettes
Mini melting pot or microwave
.25 oz Round Lip Balm Tins
Lip Balm Tubes
Natural Lip Balm Base (A)
Bubble Gum Lip Balm Flavor Oil
Lip Balm Tints
Lip Balm Sweetener
General flavor oil percentages for lip balms are up to 3% (Multiply your product weight by .03 and the resulting number is the weight of the flavor oil you should add.) I prefer to start with 1% and adjust up, as it is easier to add more than to reduce it. When using a pipette to dispense flavor oils, for this recipe using 1 ounce of lip balm base you want to use approximately 6 drops of lip balm flavor oil.
Why am I using lip balm tubes?
The lip balm tube was the exact size I wanted for the center of this lip balm. I liked the idea that it was long enough to easily grab and easily obtainable for those wanting to do this tutorial. Please use clean, unused lip balm tubes.
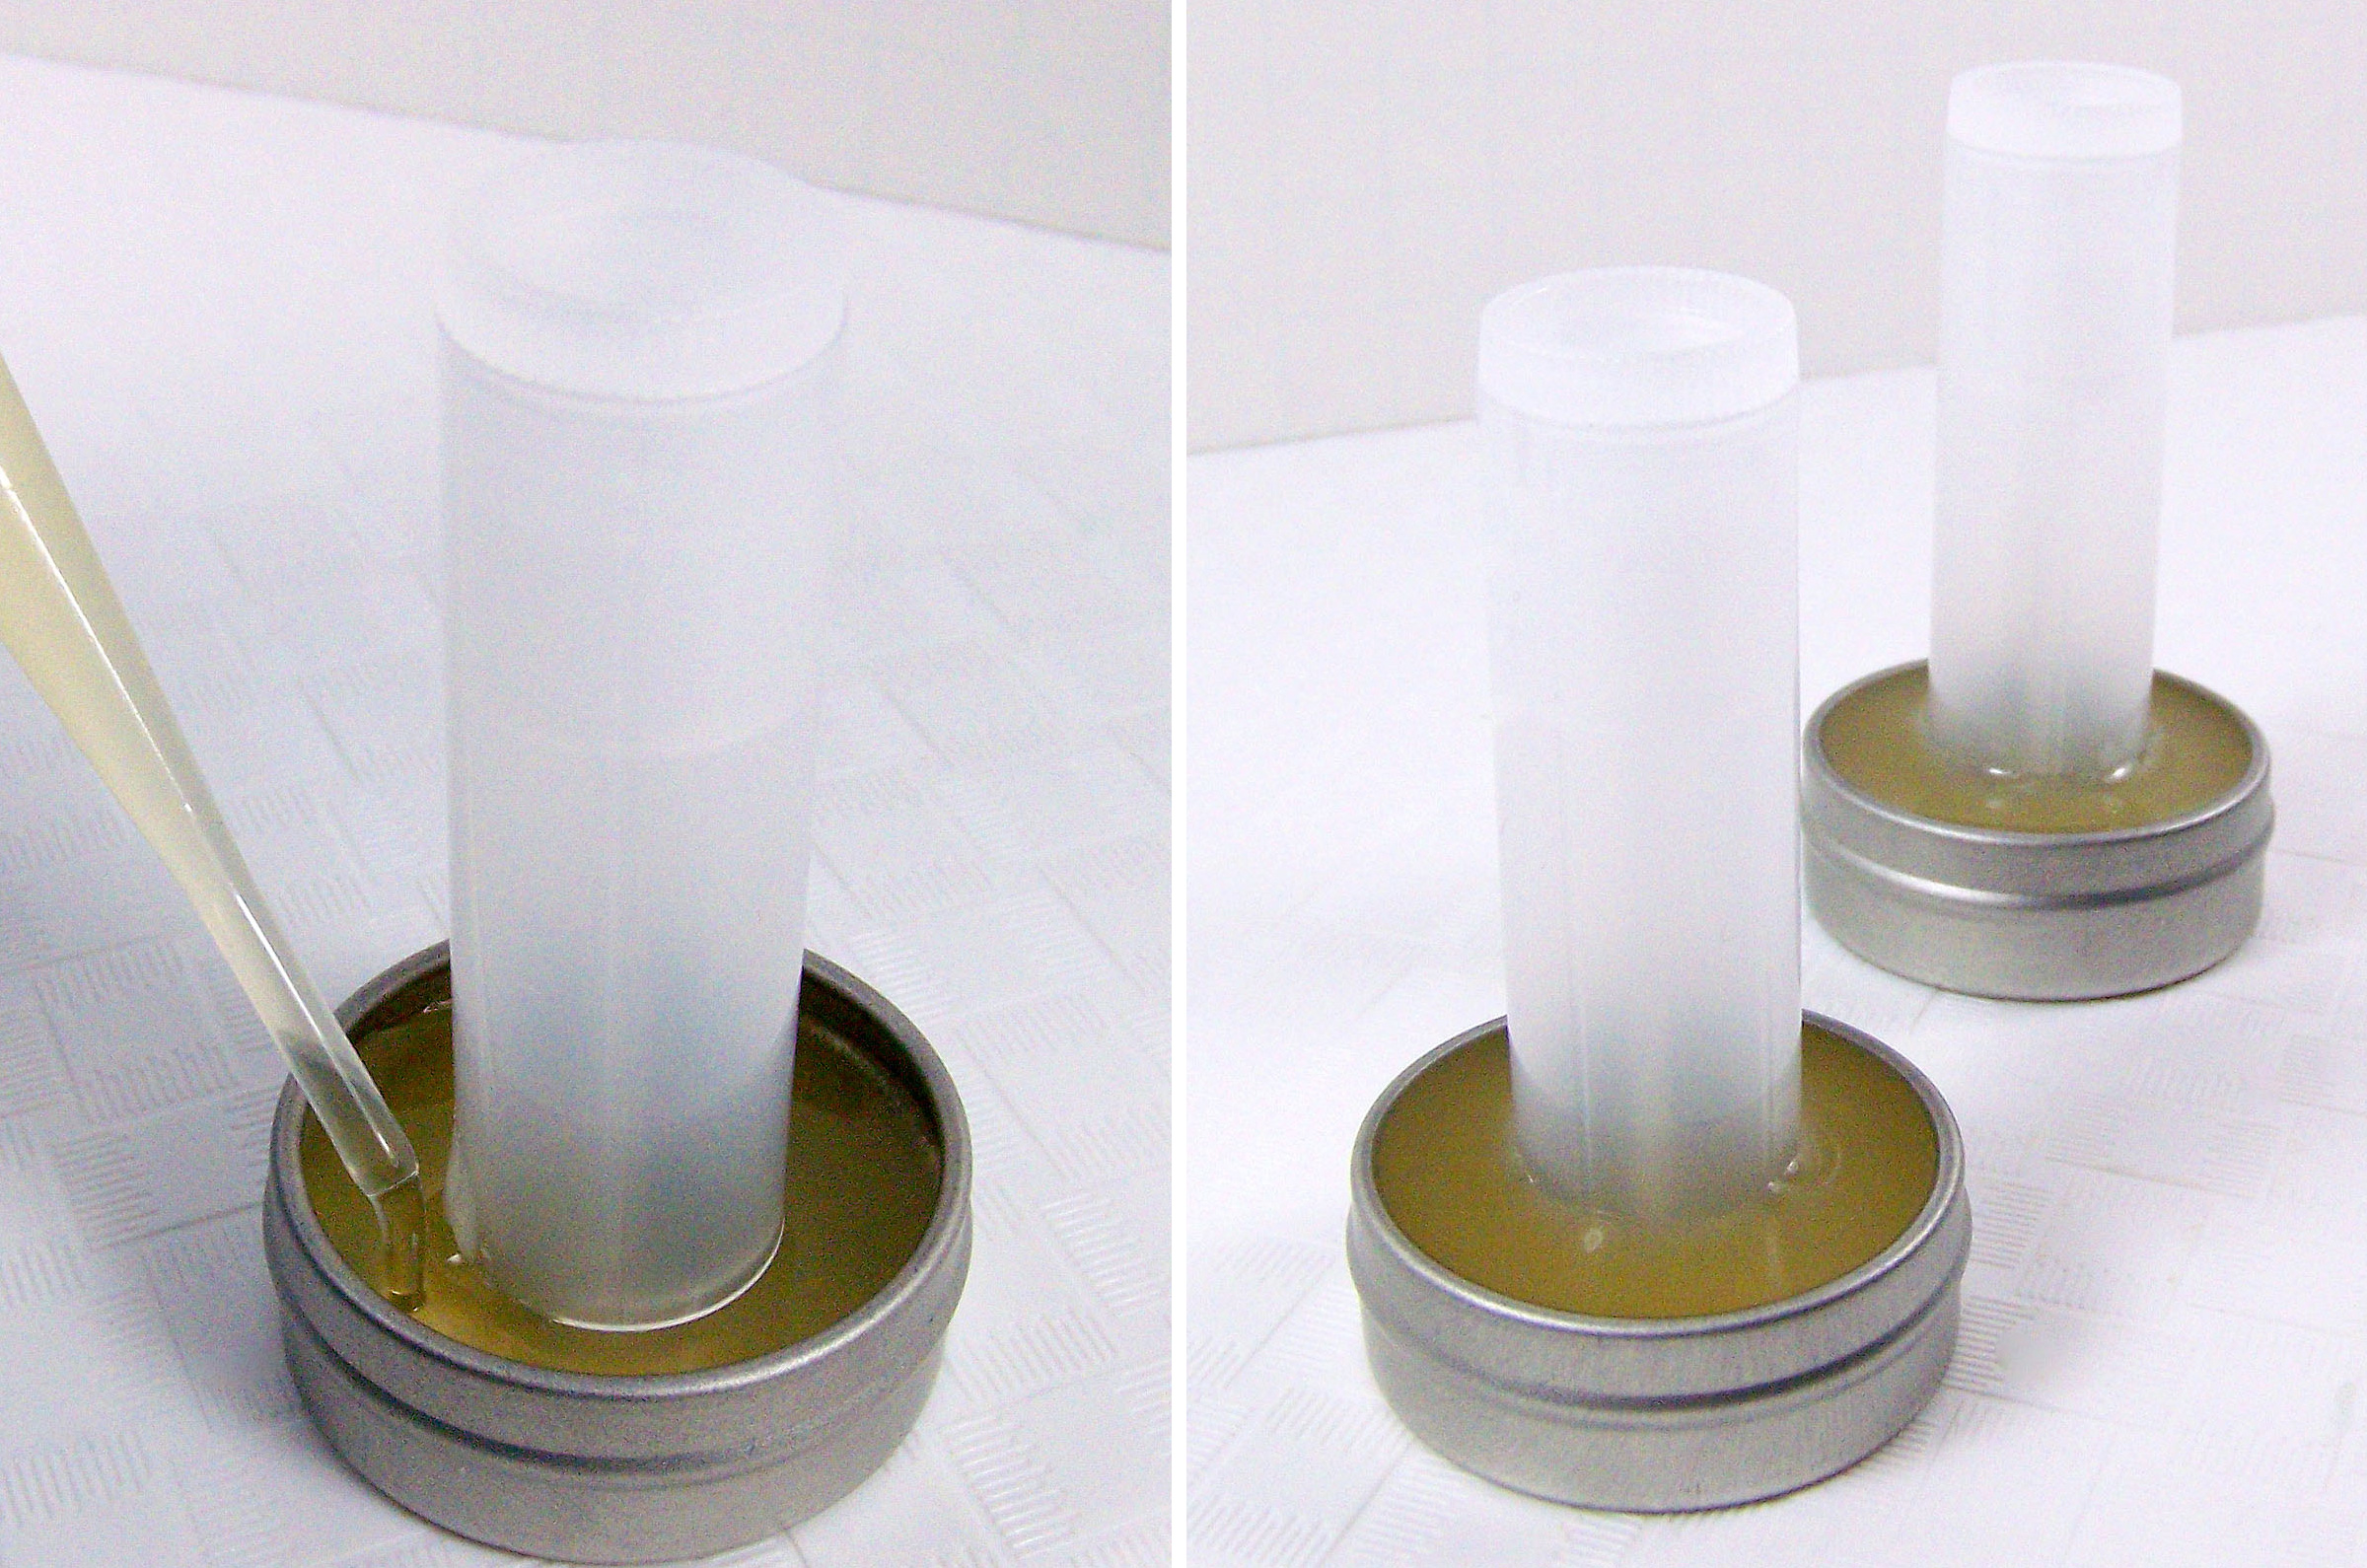
Prepare your lip balm tins
Using 3 tins and 3 tubes, take the caps off of the lip balm tubes and lids off the tins. Place a lip balm tube upside down into the center of each tin and set aside.

Prepare the lip balms
Step 1: Place your glass container on the digital scale and tare out the container (zero out the scale). Measure out 1 ounce of the Natural Lip Balm Base.
Step 2: Slowly melt the lip balm base in a microwave for 30 seconds at a time until fully melted. Do not overheat! Slowly stir between each 30 seconds. It took me 2 turns at the microwave to fully melt this amount of balm. Optional: if you have Mini Melting Pot, add the measured lip balm base to this pot instead of the microwave.
Step 3: Add the Cotton Candy Flavor oil to the melted balm using a disposable pipette. Start with 1% and if necessary, work your way up to 3%. I chose to use 3% in this tutorial.
For 1 oz of balm:
6 drops = 1%
12 drops = 2%
18 drops = 3%
Step 4: Using the same process as in Step 3, add the sweetener. I chose to add 2%, however, you can add up to 3% in your lip balm. Stir slowly until fully incorporated. Note: The sweetener may be in a solid state in your bottle – simply warm by placing the uncapped bottle in a microwave for about 20 seconds or placing the bottle in a hot water bath.
TIP: How to test if your lip balm is flavored or sweet enough: take a clean pipette and drop one or two drops onto your palm and let it set (within seconds). You can then test this small amount on your lips to see if you need to add more flavor oil or sweetener. Do not exceed recommended dosage.
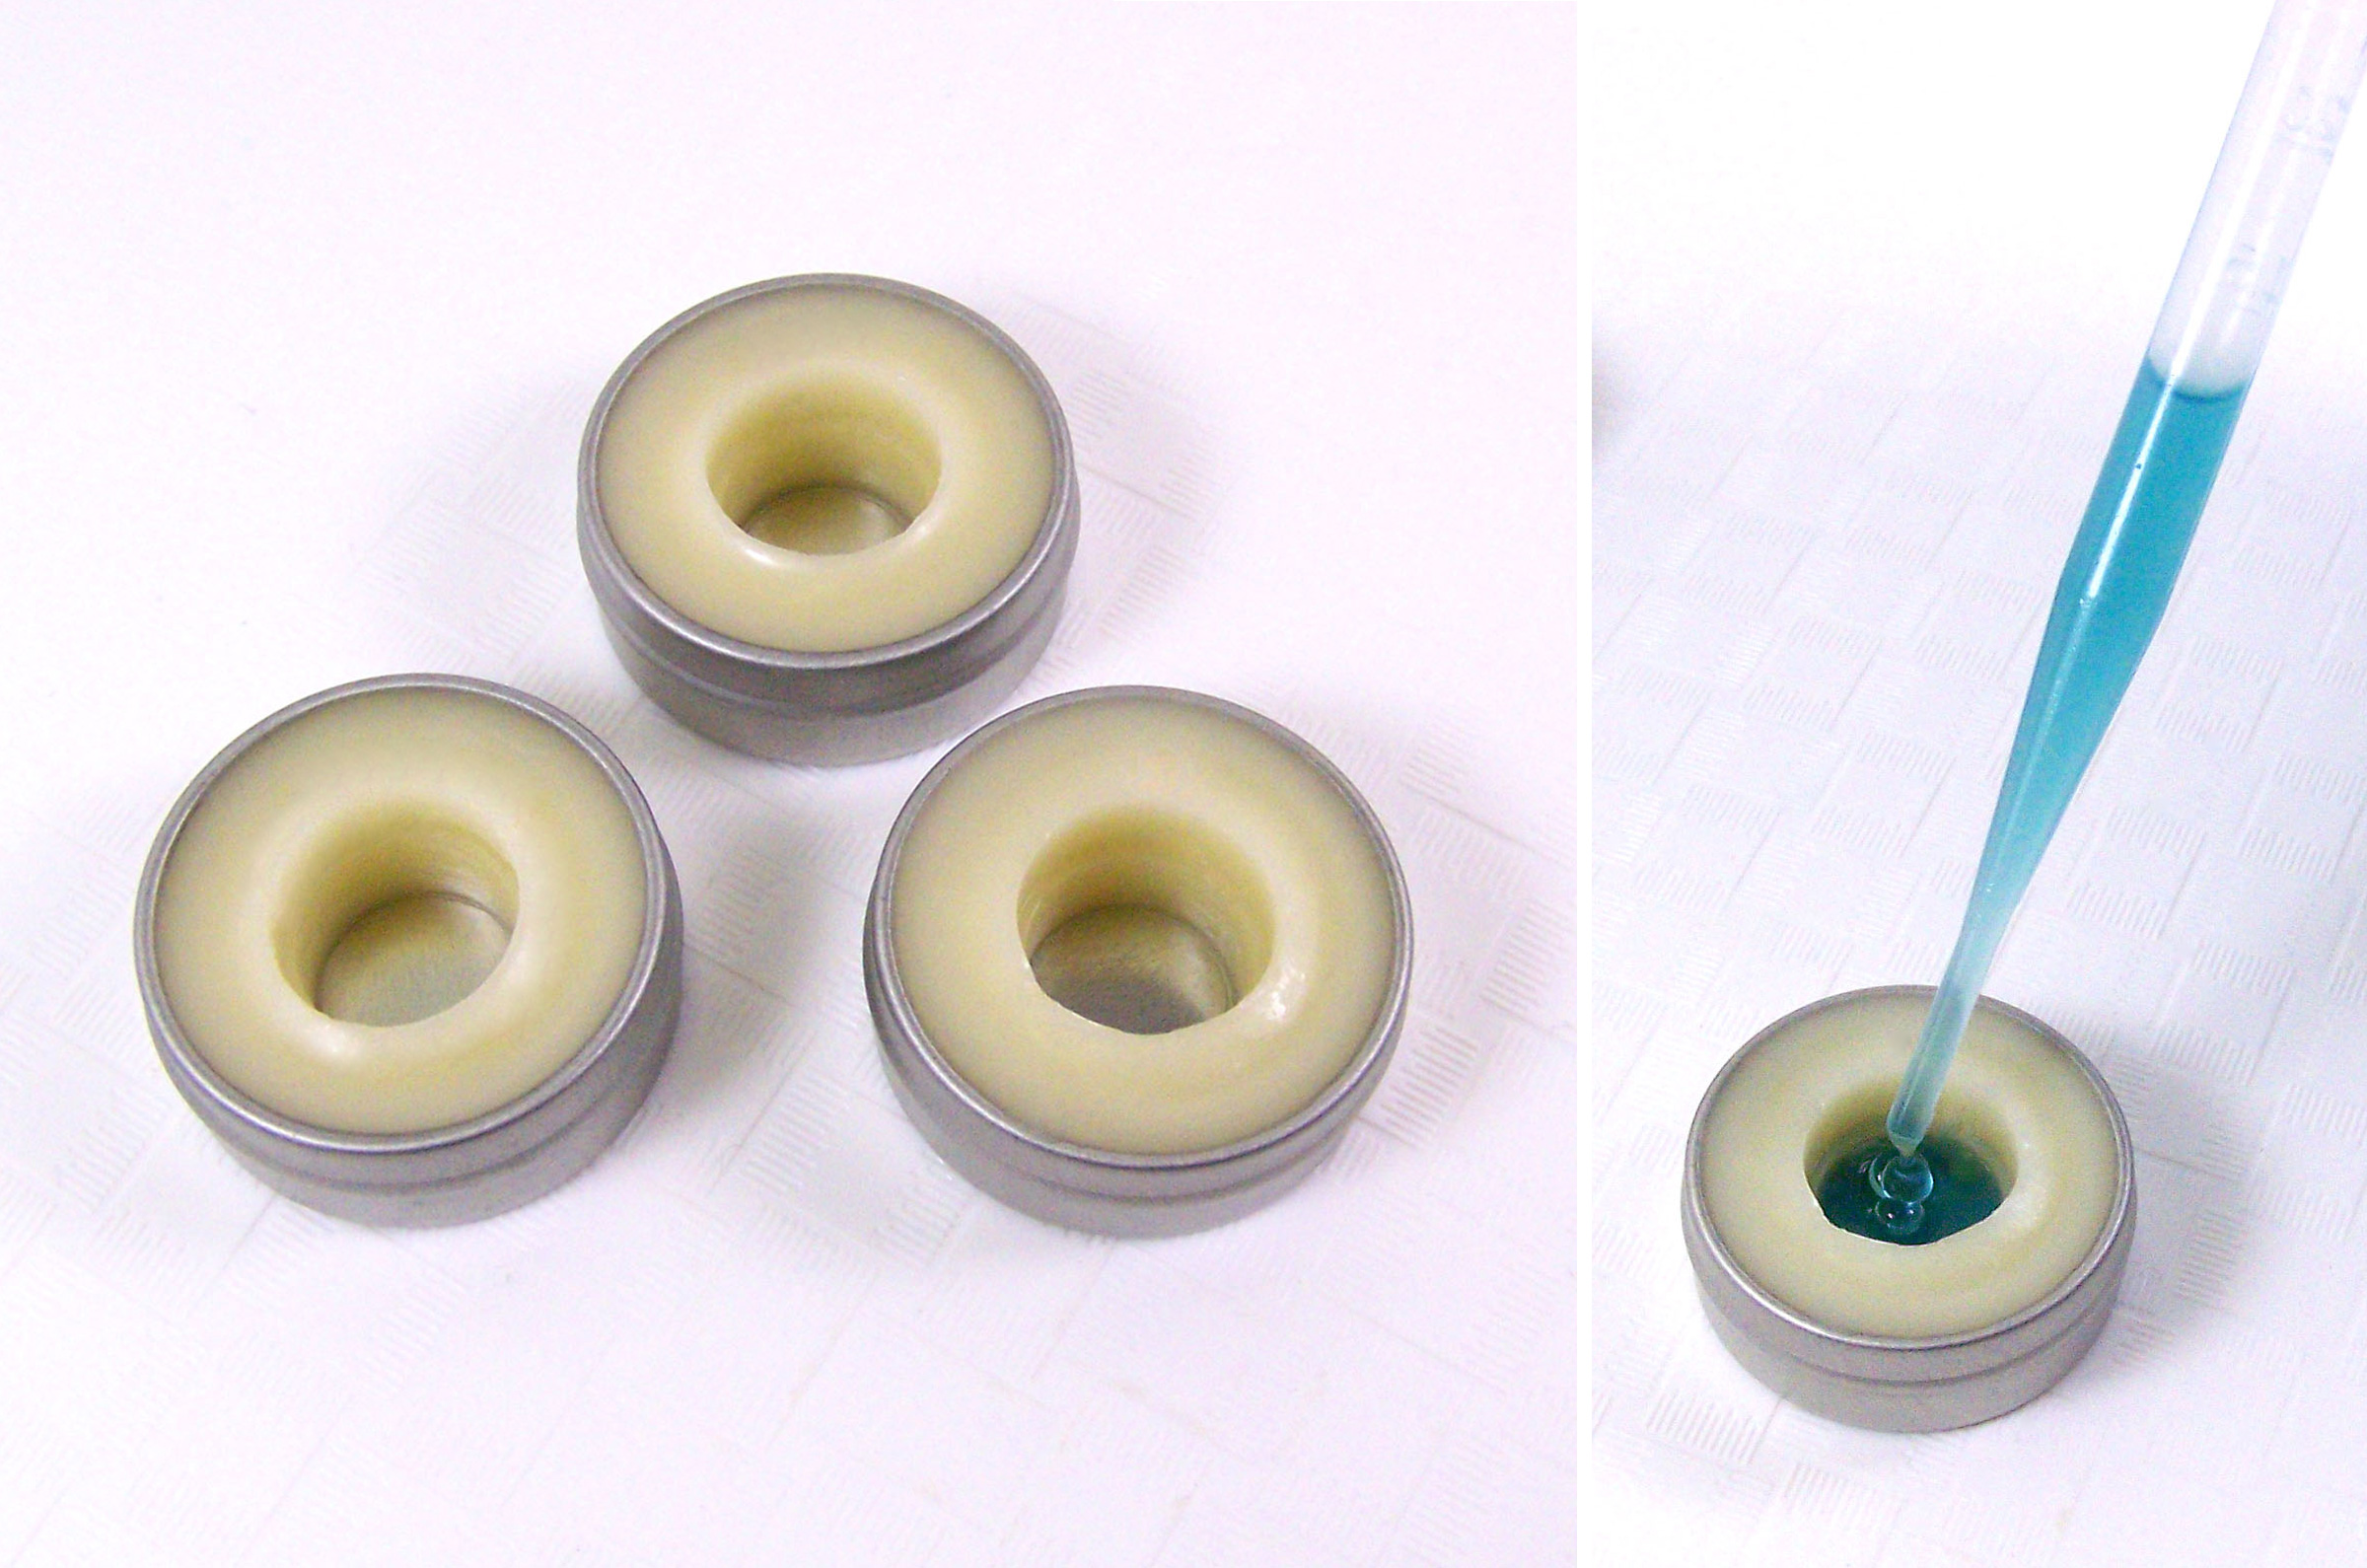
Step 5: Taking a clean pipette, draw up the base and slowly start filling the lip balm tin being careful not to touch the tube. Let the lip balm completely cool and harden.
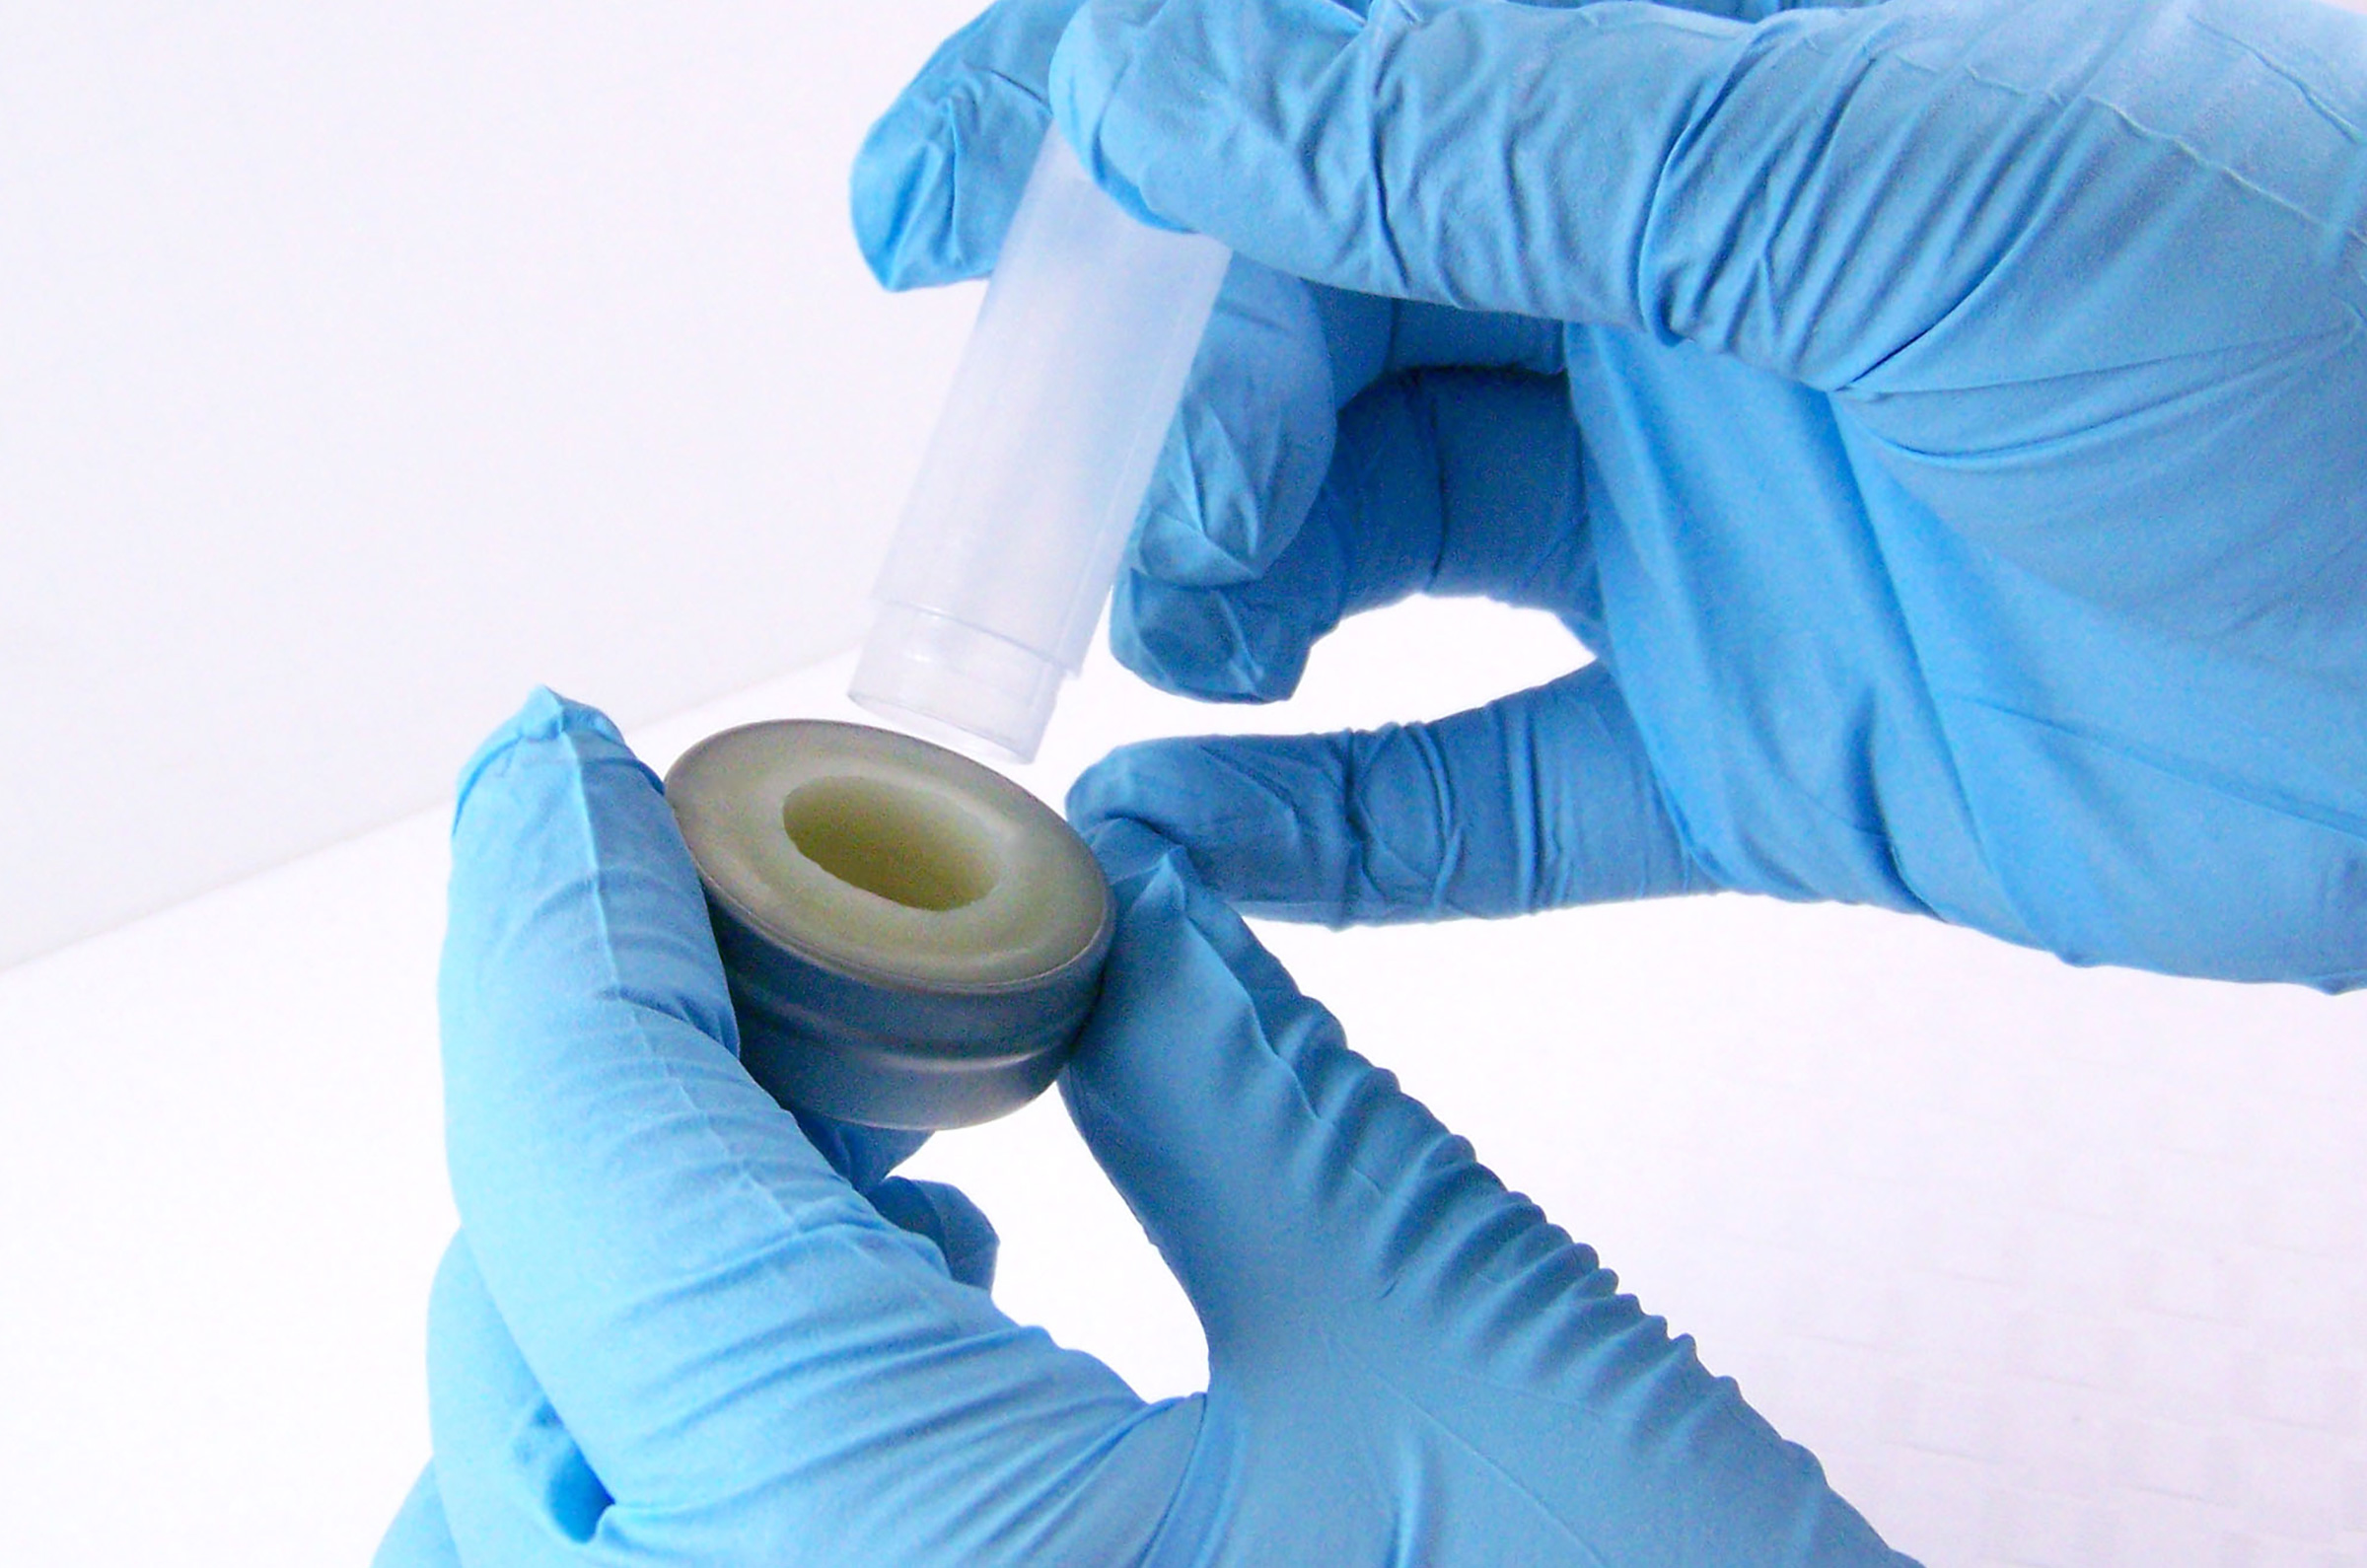
Step 6: It’s very important that the balm has completely cooled and hardened before you attempt to remove the tubes or you risk having the balm crack and form uneven edges when you remove the tube. Twist the tube slightly and pull up. If the lip balm is completely set it comes up easily, if not – you may need to fix up the edges. I let mine set approximately 2 hours.
Step 7: When you are ready to fill the center of the lip balms, repeat Step 1 – 4 using .5 oz of Lip Balm Base. Melting, flavoring and sweetening should be adjusted according to the amount of base you are working with.
Step 8: Add one or two drops of the Blue Lip Balm Tint and stir completely to incorporate.
Step 9: Using a clean pipette, slowly add the blue tinted lip balm to the center hole. At first it may appear as if you have added enough but if you look at eye level you’ll notice you can add some more drops to the center to make it even with your uncolored balm.
Step 10: Allow to set completely before capping. Now you have awesome looking lip balms that are a step above!
TIP: Once set, if you see any gaps between the two colors, you can use a heat gun to quickly swipe it over the lip balm to smooth out the problem. Not too many swipes as you may risk melting the colors together.

Get creative using ideas from this tutorial to combine different flavor oils with different colors for unique lip balms!