by Rustic Escentuals
We love the look of this soap and the scent is awesome! This soap tutorial uses a moisturizing Shea Butter soap base with clear confetti type shreds. You’ll end up with 9 slices of soap – plenty to last a long time. Enjoy and share with your friends and family!
Skills: embedding, soap loaf
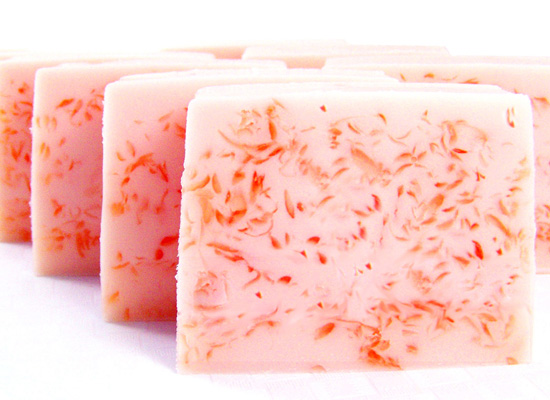
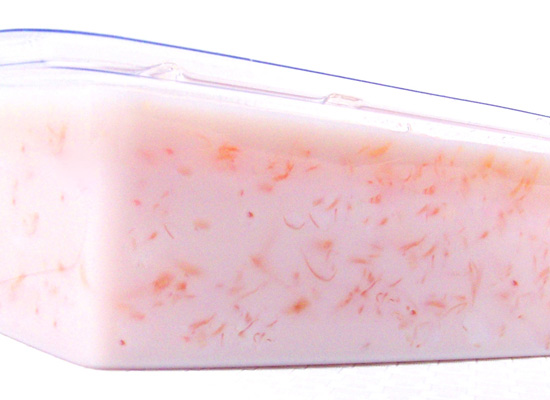
a lovely soap with clear confetti soap shreds!
Supplies and Equipment Needed
Large Microwave safe glass container – enough to hold 40 ounces of soap
Sharp knife to cut soap into cubes
Spray bottle with rubbing alcohol
Butter knife
Rubber gloves
Cheese Grater
Miter box cutter – not shown in supplies
Square Loaf Soap Mold
Basic Rectangle Soap Mold – not shown in supplies
Disposable Pipette
Thermometer to monitor soap temperature
12 oz Ultra Clear Melt and Pour Soap Base
40 oz Shea Butter Melt and Pour Soap Base
Lovely Type Fragrance Oil
Gel Soap colorant in Orange
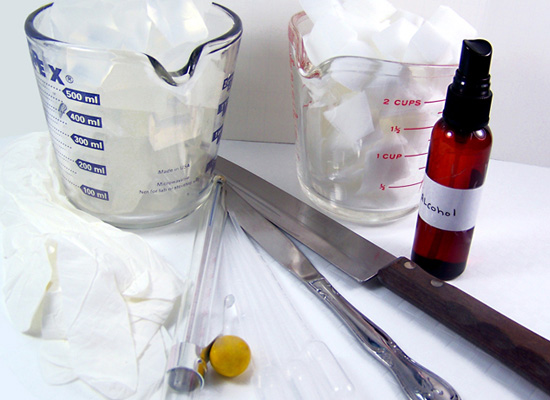
basic supplies needed
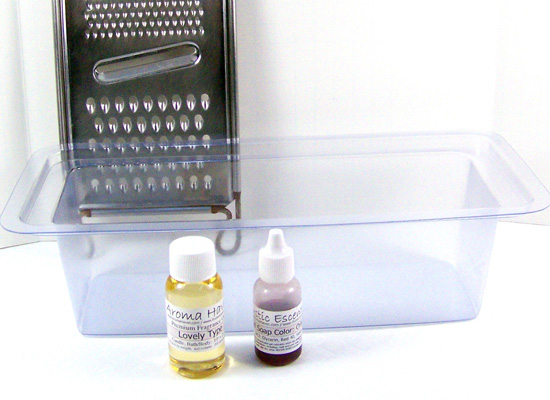
molds and grater
Prepare in Advance
Step 1: To create the grated soap, take 12 oz of Ultra Clear Melt and Pour Soap base and cut into cubes. Once cut, melt it in the microwave safe glass container in 30-second bursts.
Step 2: Once melted, add 8 drops of Orange Gel Soap Colorant and stir slowly.
Note: I did not add scent to this step, as it isn’t needed. Also, you can wrap what you don’t need and put to the side for another project to scent later.
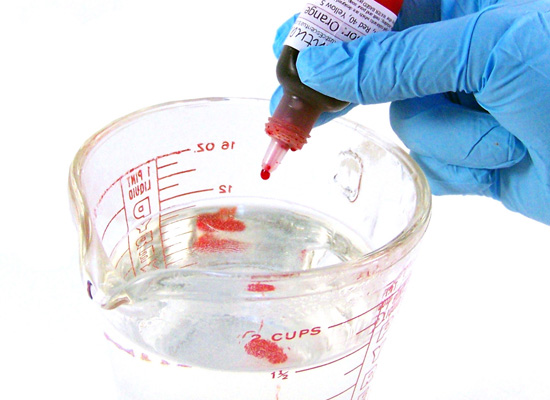
add 8 drops of colorant and stir slowly
Step 3: Use a thermometer to monitor the soap base temperature; it should be about 135° to avoid warping the mold. If soap is too hot, keep stirring slowly until soap reaches 130° – 135°.
Step 4: Pour the orange soap base into the Basic Rectangle Soap Mold. Remember to pour slowly to avoid excess bubbles. You are making enough soap to shred to fill the loaf mold.
pour colored soap base into your basic rectangle mold
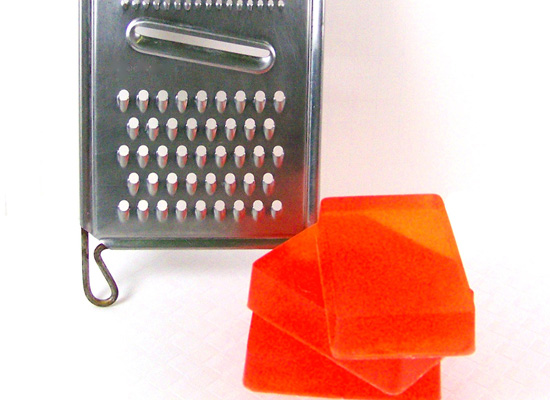
Step 5: Set aside to harden, 2-3 hours. If you want to hurry it up, you can pop it into the freezer for 20 minutes. Turn the mold over and slowly press on the bottom of each cavity to release the soap. Do not force it. If the soap won’t come out, wait another 1/2 hour or so.
soaping is such “grate” fun!
Step 6: Once you have the rectangle blocks of clear orange soap, it’s time to grate them. Using the grater, shred all of the blocks of orange soap. This may seem like a lot but it’s not. Once done, set aside. Note: Please be careful as you get closer to the grater, those finger tips of yours are precious!
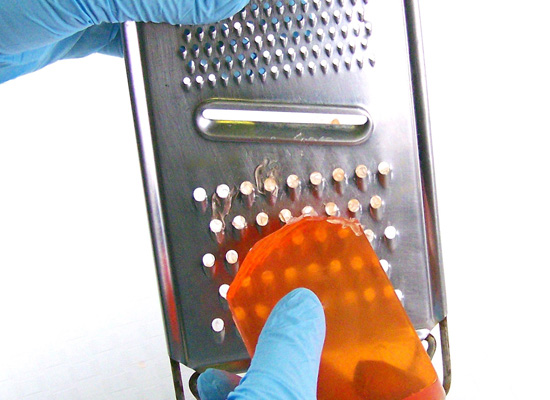
all puns aside, grate the soap carefully, watching out for your fingertips!
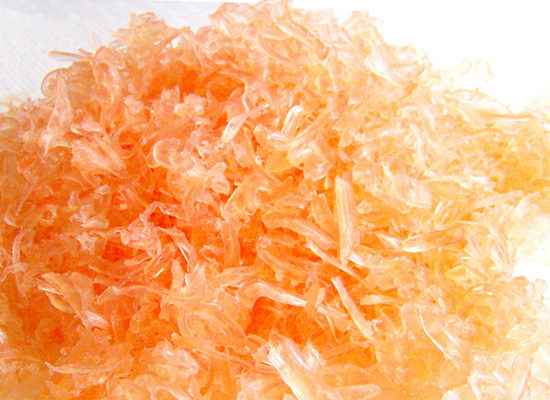
set aside the soap shreds until ready for use
Now let’s make the soap
Step 1: Cut up 40 oz. of Shea Butter Melt & Pour Soap Base into small cubes. Place in a large microwave safe glass container and melt in the microwave using 30 – 60 second bursts, stirring between bursts until melted. This is a large amount of soap and it will take longer to melt, take your time so that you don’t boil or burn your soap.
Step 2: Using a disposable pipette, slowly add 14 ml’s of Lovely Type fragrance oil. Stir slowly until mixed well. 14 ml’s is my preference for this awesome scent.
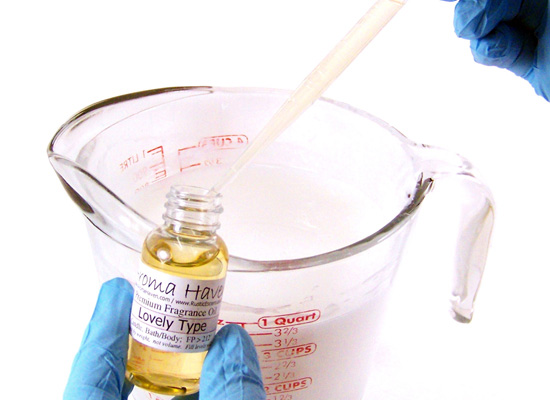
add fragrance oil and slowly stir until mixed
Step 3: Using the Orange Gel Soap Colorant, add in 8 drops of colorant and slowly stir.
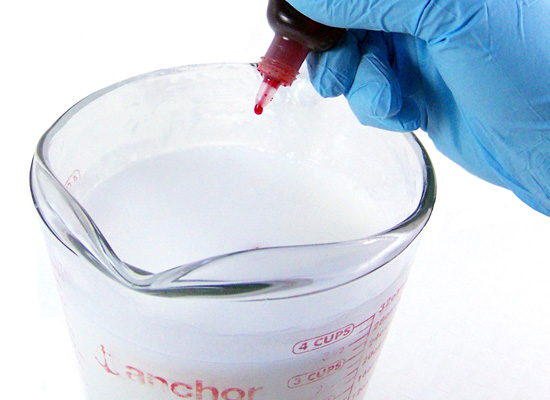
add colorant and stir slowly to combine
Step 4: Use a thermometer to monitor the soap base temperature; it should be about 135° to avoid warping the mold and melting the embeds. If soap is too hot, keep stirring slowly.
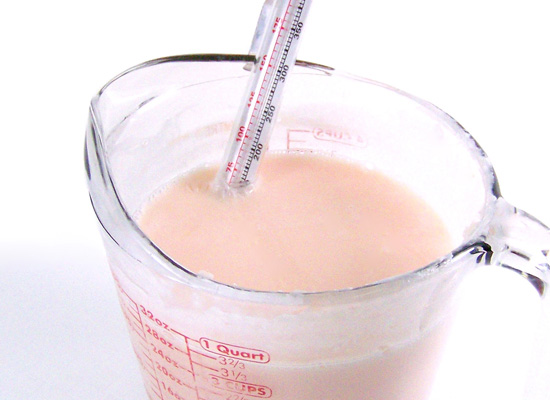
use your handy dandy thermometer to monitor the soap temp: it should be 135F or lower
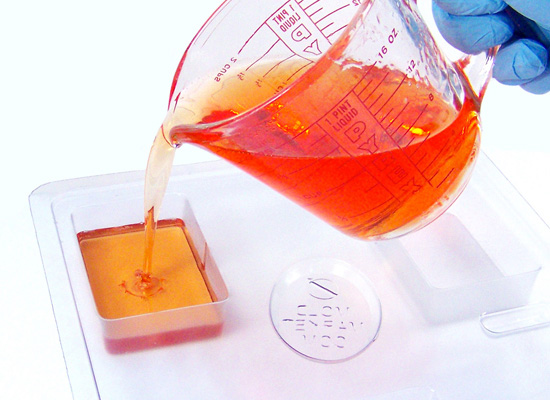
Step 5: Slowly pour a small amount of the melted Shea butter soap into the Square Loaf Soap Mold. Remember to pour slowly to avoid excess bubbles. Pouring a small amount on the bottom before adding in your shredded soap – this creates an even bottom. Spritz the soap to remove any bubbles.
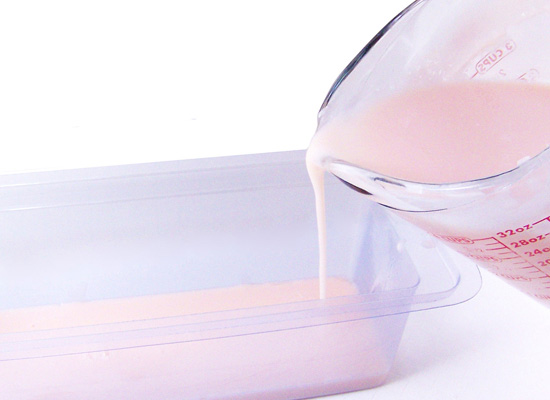
pour an even layer across the bottom of the mold & spritz to remove bubbles
Step 6: Now is the time to add the shredded soap! Spritz the soap shreds with alcohol before adding to the loaf mold. Keep adding until they are all used.
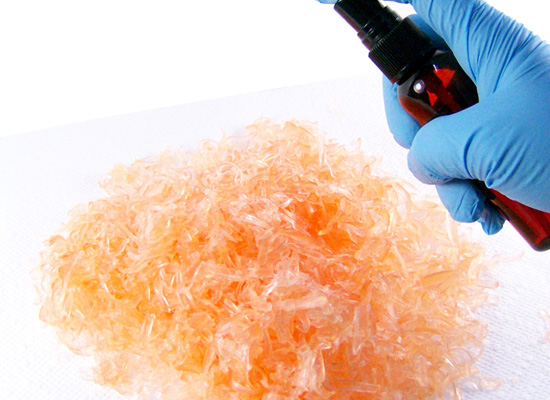
spritz soap shreds with rubbing alcohol
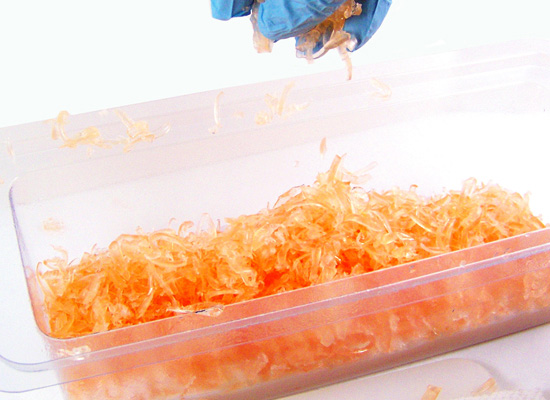
add ALL shreds to loaf mold
Step 7: Slowly pour in the remainder of the melted soap base. Add slowly so you don’t move all of the soap shreds to one area of the mold. This also minimizes bubbles. After you’re finished pouring, spritz the top with alcohol to remove any bubbles.
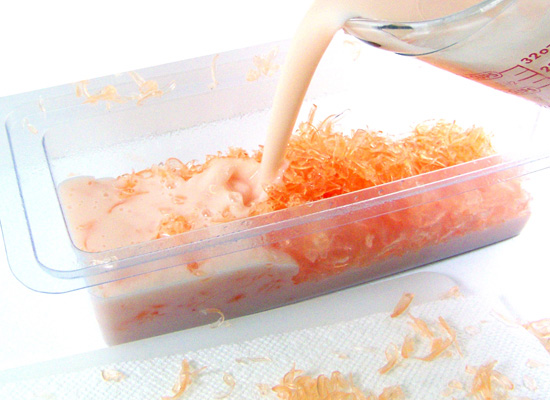
slowly pour remainder of melted soap base over shreds
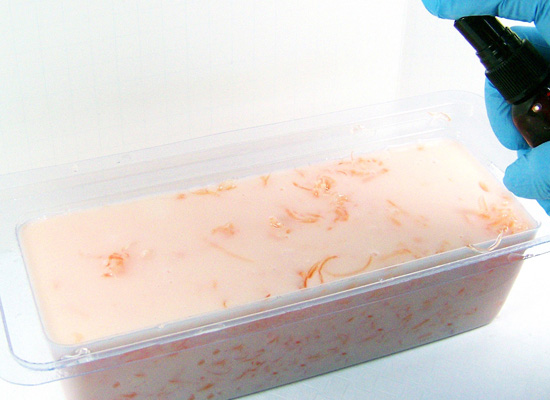
spritz the top with your rubbing alcohol to remove any bubbles
Step 8: This is a large amount of soap and it will take much longer to completely cool and harden. I suggest waiting overnight before trying to remove from the mold.
let harden overnight or until completely set
Step 9: When completely hardened, slowly pull the sides of the mold away from the soap, turn over, and gently press on the underside of mold to release the soap.
Tip: If the soap won’t come out, wait another hour or so – don’t fight it. You can even pop the soap in the freezer for 5 minutes.
Cutting the Soap
Step 10: Cutting the loaf into 1 inch bars will yield approximately 9 bars of soap. I use a miter box cutter for easier and safer cutting. Miter boxes can be found in home improvement stores like Home Depot or Lowes. Without the miter box, the soap loaf tends to shift when you cut.
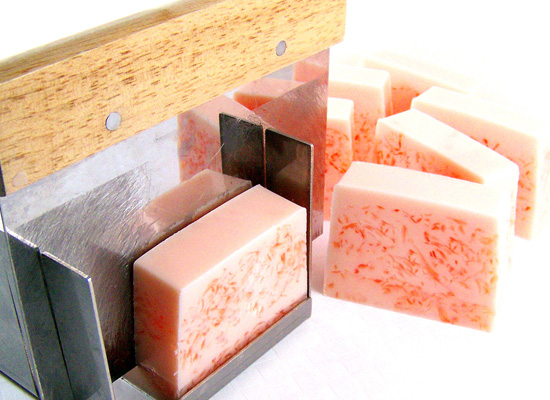
use a miter cut box for easier and safer cutting
This tutorial creates a lovely effect and can be used with a variety of scents and colors. Enjoy!
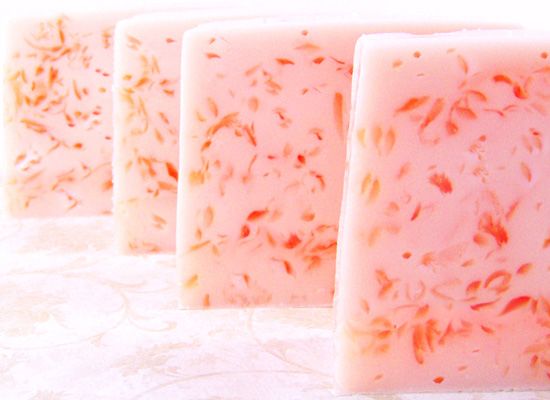
a lovely effect which can be done with a variety of scents and colors!