by Rustic Escentuals
Sometimes you just want something just a little bit different. A fun soap to make and use!
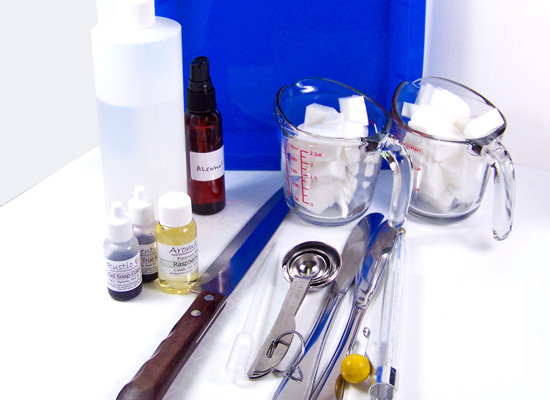
Supplies and equipment needed:
Microwave
Microwave safe glass containers
Sharp knife
Spray bottle with rubbing alcohol
Butter knives for stirring soap
Measuring spoons (1/2 tsp)
Rubber gloves
Disposable pipettes
Silicone baking pan (7.5” x 7.5”)
thermometer to monitor soap temperature
12 oz Goats Milk Melt & Pour Soap Base
Vegetable Glycerin
Raspberry Lilac Fragrance Oil
True Red Gel Soap Color
Dark Purple Gel Soap Color
Step 1: Cut up 12 ounces of Goats Milk Melt & Pour soap base into small cubes using a sharp knife. Separate into two microwave safe glass containers of 6 ounces each.
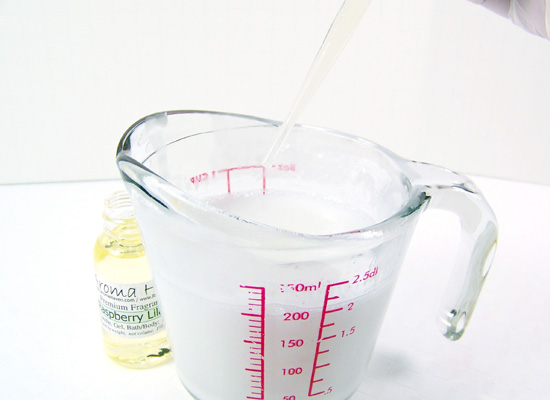
Step 2: Melt one of the containers of soap base in a microwave in 20 -second bursts until melted. Do not burn or boil – this will result in a poor quality rubbery soap. If there are any small chunks of soap left, stir slowly; the heat of the soap will melt these small chunks.
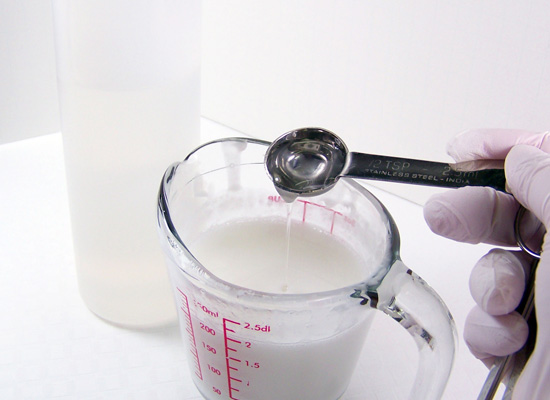
Step 3: Using a thermometer to monitor your soap, wait for it to cool to about 135 degrees and using a disposable pipette add 2 ml of Raspberry Lilac fragrance oil (YUM). Stir in slowly until fully incorporated.
* Always stir your soap base slowly to avoid forming bubbles in the soap.
Step 4: Using your measuring spoon, add 1/2 tsp of Vegetable Glycerin into your melted soap and stir in slowly. Adding the Vegetable Glycerin will help keep your soap more flexible which is important to prevent cracking when you bend your soap into shape as you’ll see later in the tutorial.
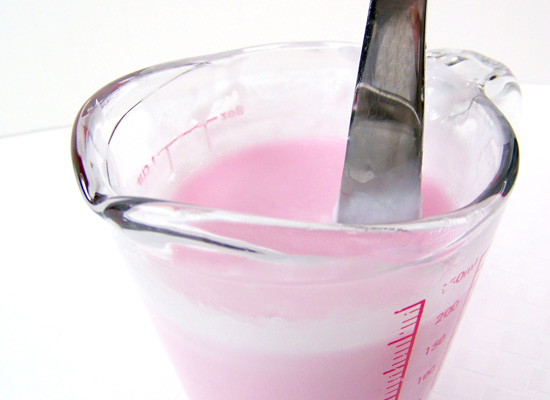
Step 5: Add two or three drops of True Red Gel Color to your melted soap base. The color will come out a pretty raspberry color. Stir in slowly until fully incorporated.

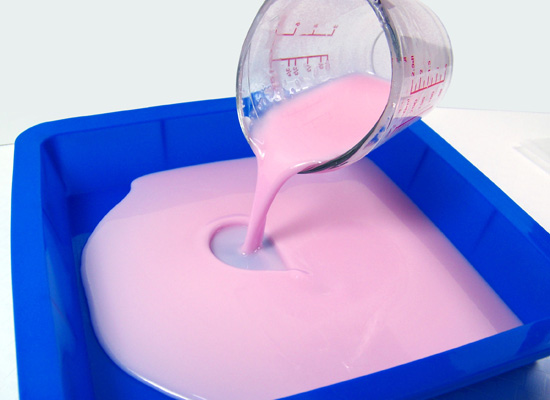
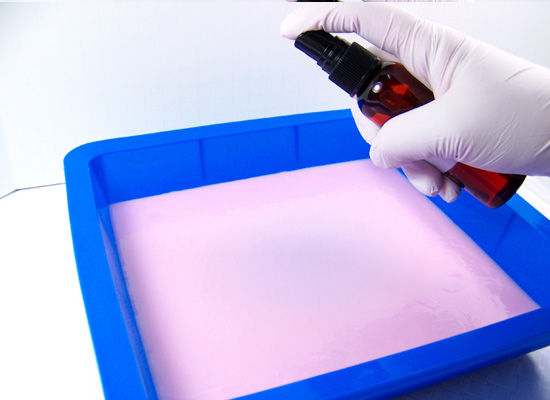
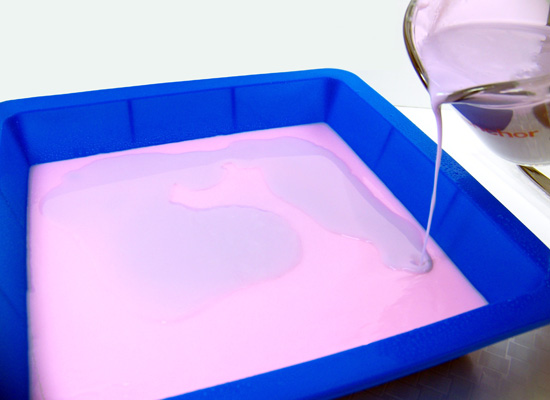
Step 6: Pour the soap base into your silicone-baking pan (or other flexible pan) slowly. It is important to choose a flexible pan as your soap will be on the thin side and it will be easier for you to remove it later. After you’ve finished pouring, spritz with alcohol to remove any bubbles.
TIP: Make sure your pan is lying flat on a tabletop or counter and is perfectly level. You want your soap layer to be even.
Step 7: Let set for 5 minutes.
Step 8: While you are waiting for the pink layer of soap to set, prepare your second 6 ounces of soap base following Steps 2 – 5 using the Dark Purple Gel Color
Step 9: Check your first layer carefully. Using your finger, press gently into the pink layer in a spot or two (don’t press too hard and don’t press all over your soap or you’ll have “dents” all over.) You want the soap to have a thick, firm skin so that it’s firm enough to support the second purple layer, but not completely set.

Step 10: Spritz the first layer thoroughly with alcohol to help the layers adhere together and pour your 2nd color no hotter than 130 degrees. This is to prevent the first layer from melting into the second.
Step 11: Wait approximately 5 minutes and check the top of the soap carefully. You want the soap to be firm but still warm.
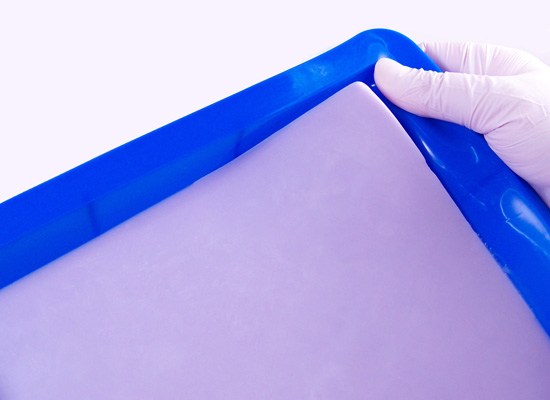
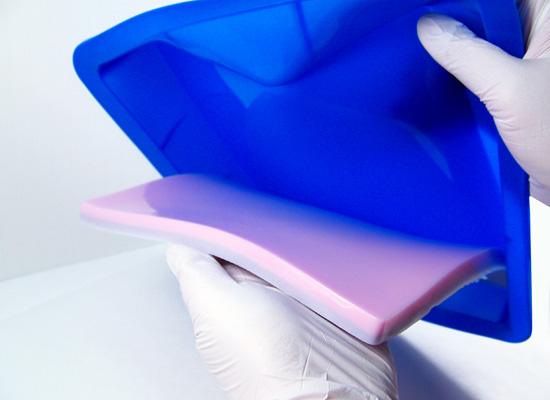
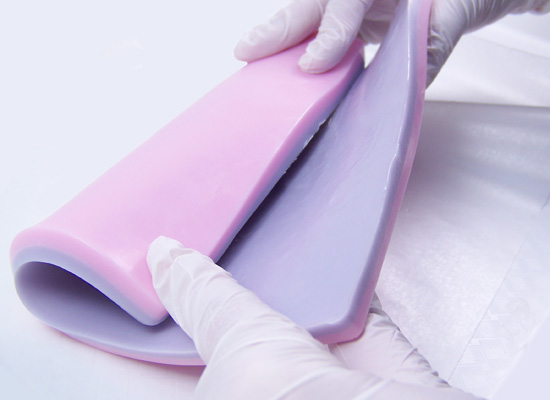
Step 12: Take the silicone pan and slowly pull back one corner of the mold (separating the soap from the mold). Do this with a second corner then pull the rest of the soap out of your mold slowly and lay flat.
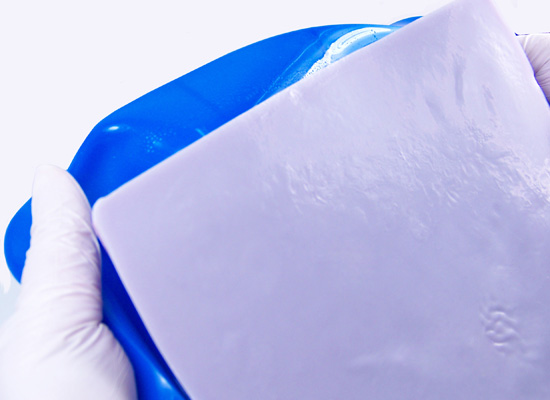

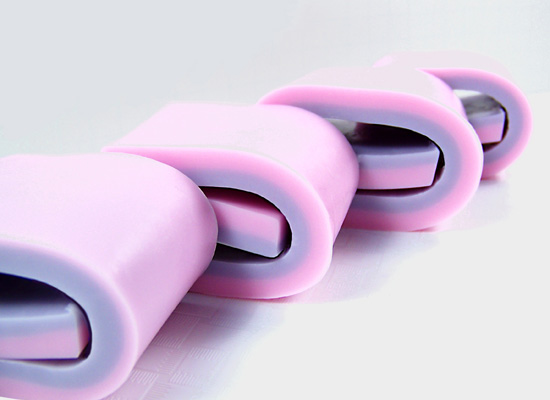
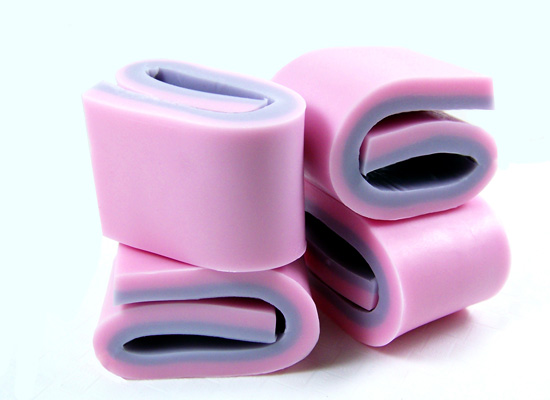
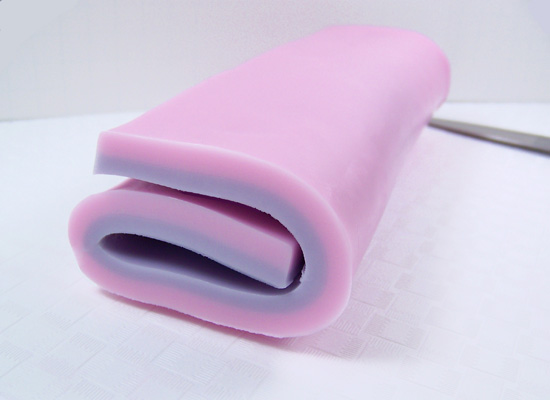
Step 13: Now gently but firmly fold one end toward the middle of your soap. The soap will be solid but still warm. When you are happy with the fold, take the other end and fold over onto the first fold. Work slowly – even with the added glycerin, if you fold too fast, you risk cracking/splitting the soap.
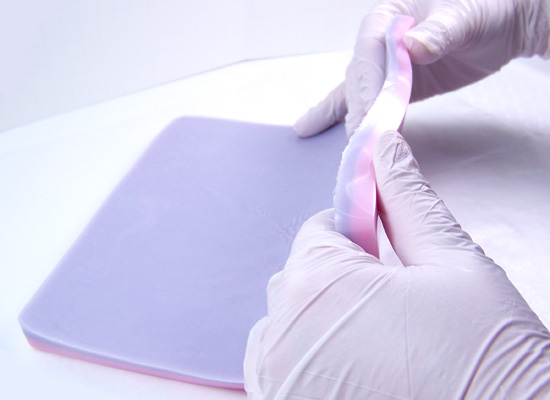
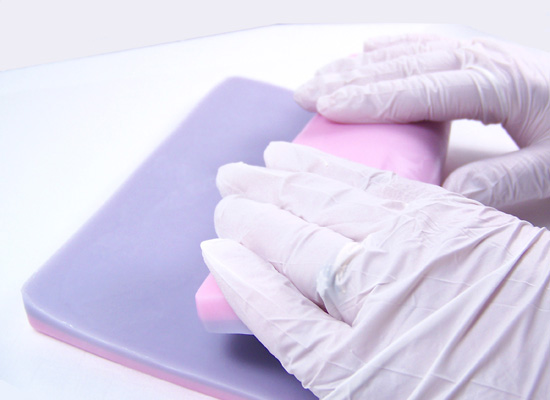
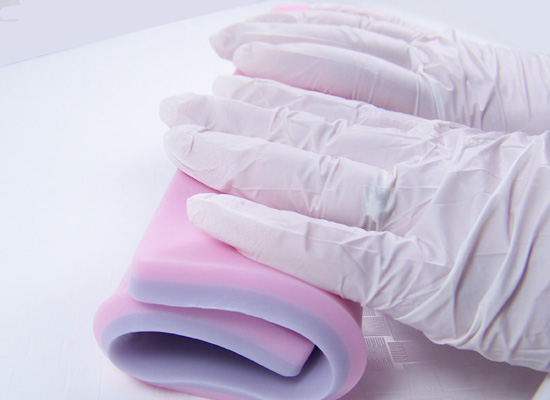
Step 14: Once you are happy with the folds, press down slowly to flatten and allow to set for around 5 minutes.
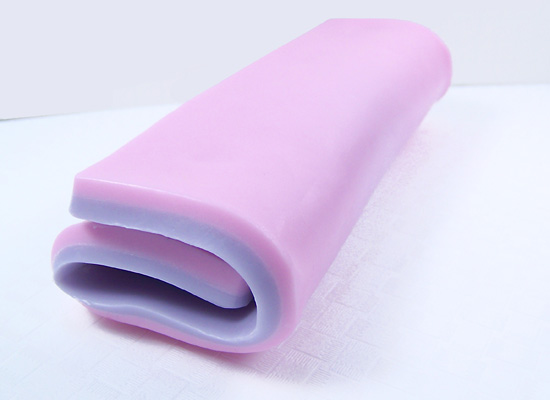
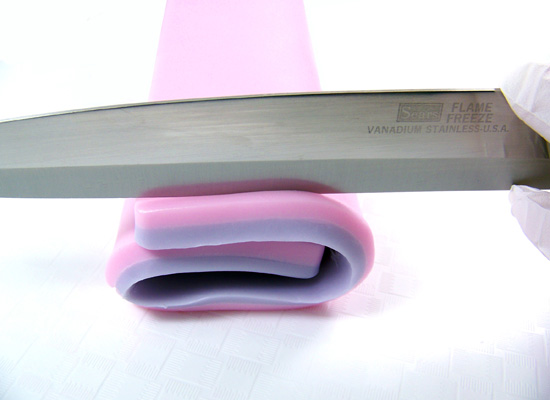
Step 15: Take your sharp knife trim off both ends to smooth out the edges. Measure approximately every 2.5 inches and cut your pieces.

Step 16: Allow your soap to set overnight and enjoy!