by Rustic Escentuals
For the special little Prince and Princess in your life. Help make bath time fun with their own, special soaps!
Skills: Layering and additives
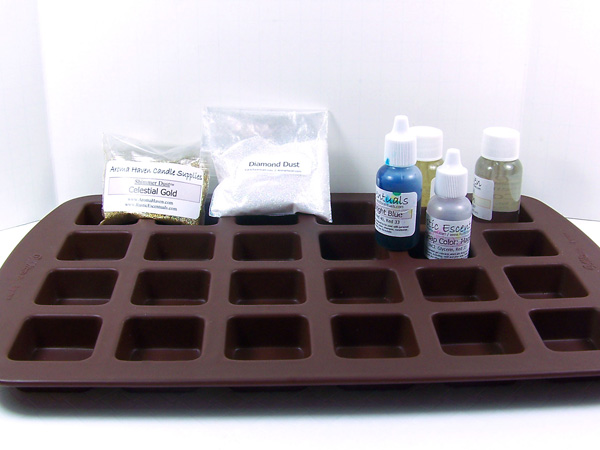
Supplies and equipment needed:
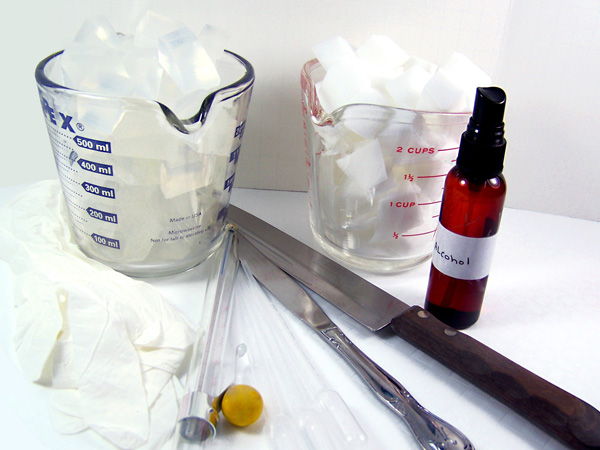
Microwave
Microwave safe glass container (2 to 3)
Sharp knife to cut soap into cubes
Spray bottle with rubbing alcohol
Butter knife for stirring soap (2)
Rubber gloves
Disposable pipettes
Thermometer to monitor soap temperature (Optional)
Mini Squares Silicone Mold (24 cavities: holds .5 oz soap each)
White Melt & Pour soap base (6 ounces)
Ultra Clear Melt & Pour soap base (12 ounces)
Bubble Gum Fragrance Oil
Gel Soap Colors in Magenta and Bright Blue
Shimmer Dust Glitter: Celestial Gold and Diamond Dust
.15cc scoop (2) — Not shown
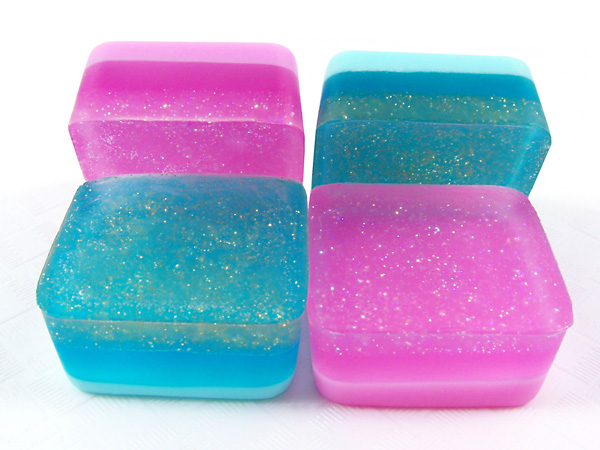
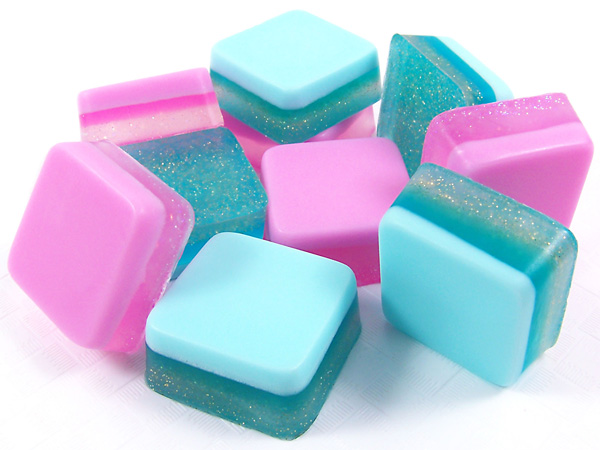
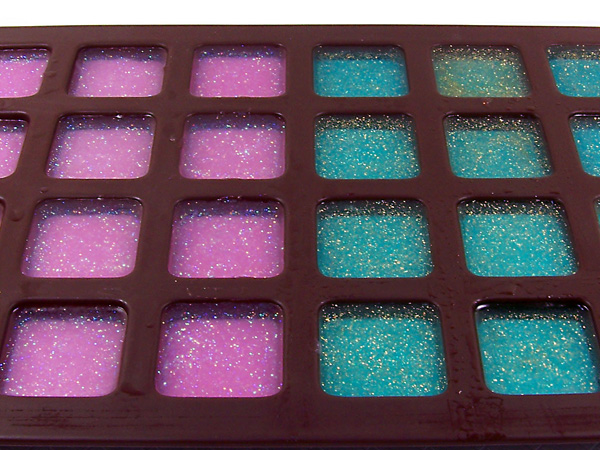
Princess Soaps
Step 1: Cut up approximately 3 ounces of White Melt & Pour soap base into small cubes using a sharp knife.
Step 2: Using a microwave safe container, heat in the microwave in 15-second bursts until melted. Do not burn or boil, this will result in a poor quality rubbery soap. If there are any small chunks of soap left, stir slowly; the heat of the soap will melt these small chunks.
TIP: Melt a little extra to take into account that some of the soap will stick to the container.
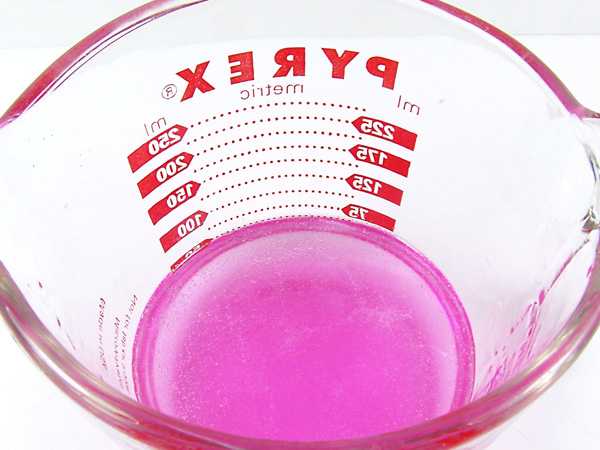
Step 3: Add 1 drop of Magenta Gel Soap Colorant to the melted soap base and stir slowly.
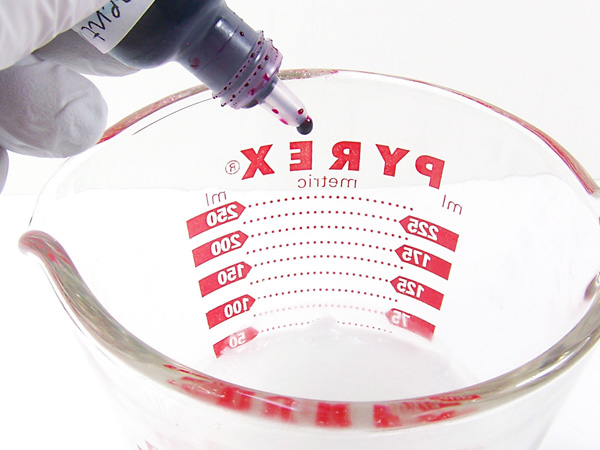
Step 4: Using a disposable pipette, add 1.5 ml of Bubble Gum Fragrance Oil and stir in slowly.

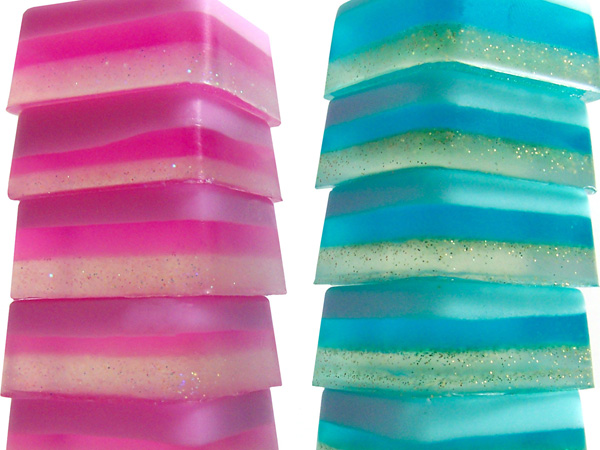
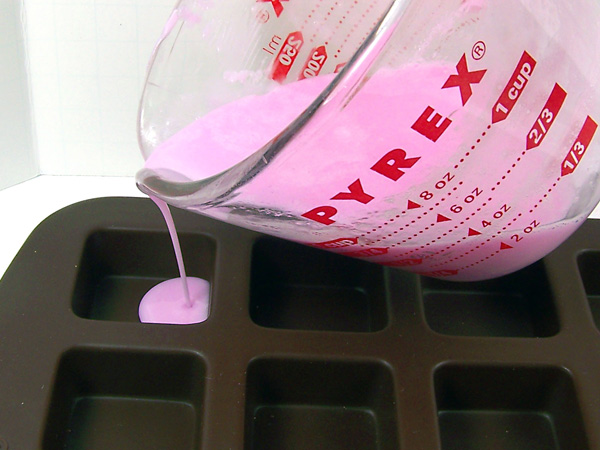
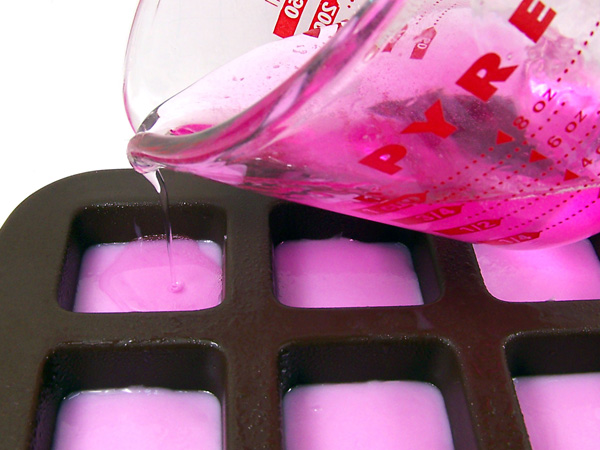
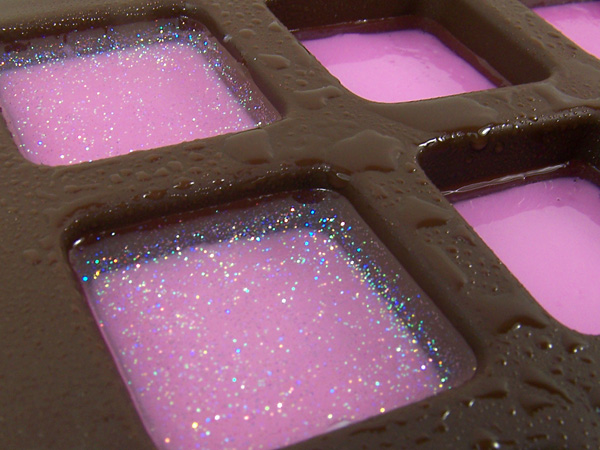
Step 5: Using 12 cavities of the Mini Squares Silicone Mold, pour the soap 1/3rd of the way up each cavity.
Step 6: Repeat steps 1 through 4 using 3 ounces of ultra clear melt and pour soap.
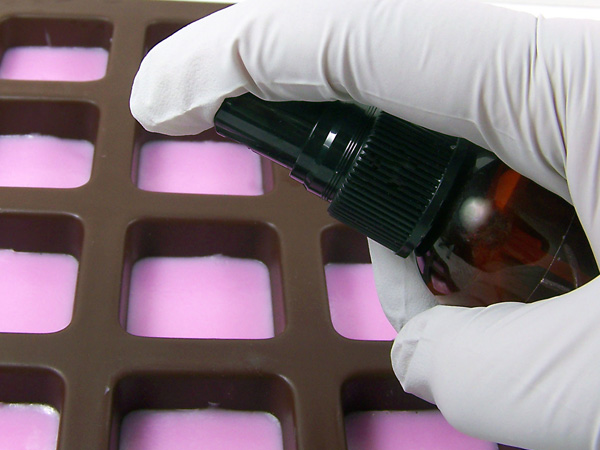
Step 7: When the first layer is set, spritz each cavity with alcohol and pour this second layer 1/3rd of the way up each cavity.
TIP: When layering, don’t pour the layers too hot because they will melt together. If unsure of the temperature, use a thermometer. The soap should be approximately 135 degrees.
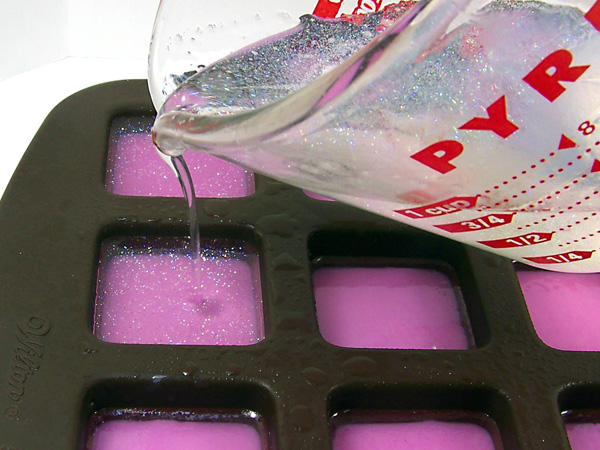
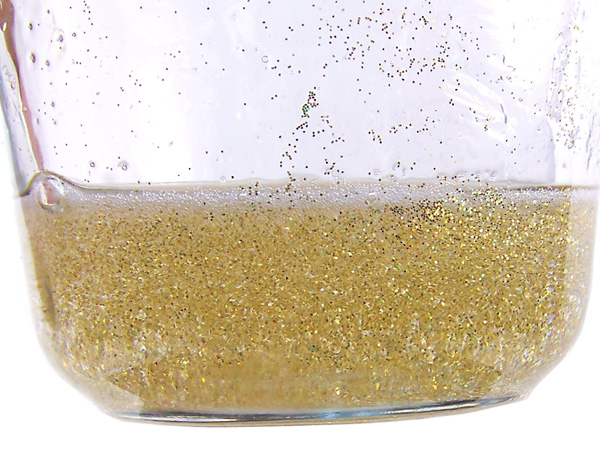
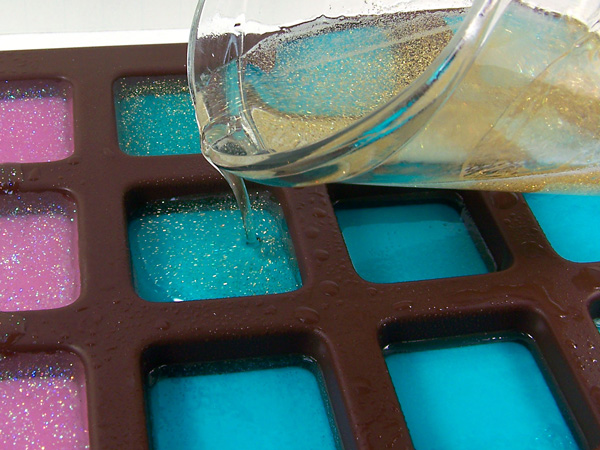
Step 8: While the second layer is setting, repeat steps 1 through 4 using 3 ounces of Ultra Clear melt and pour soap base. Add 3 scoops of Shimmer Dust Glitter in Diamond Dust. Stir slowly to incorporate the glitter throughout the soap. Don’t forget to add the fragrance oil!
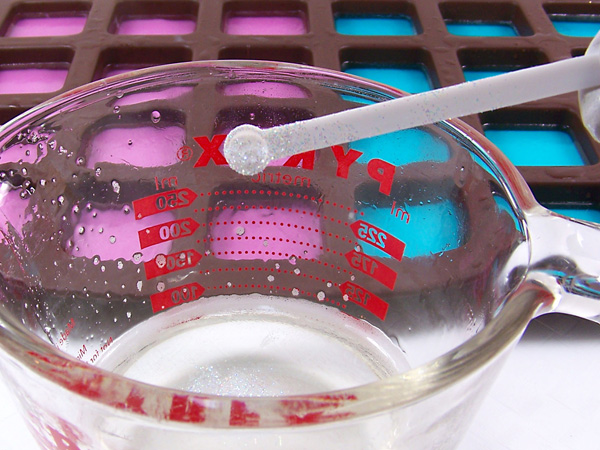
Step 9: Continue to stir the soap slowly – it should be slightly cool to prevent the glitter from settling to the bottom.
Step 10: When the second layer is set, spritz with alcohol and pour this third layer the rest of the way up each cavity.
Step 11: Finish off with a spritz of alcohol to remove any bubbles. Important! Do not move the soap mold until set.
Prince Soaps
Repeat steps 1 through 11 above in the Princess soap tutorial, however, replace with the following:
– Bright Blue Gel Soap colorant
– Shimmer Dust Celestial Gold
Step 12: Wait 2-3 hours or overnight for the soap to completely harden.
Step 13: Turn the mold over carefully and slowly press on the bottom of each cavity to release the soap.
These adorable little soaps are just the right size for your little princes and princesses! They’ll have their own custom soaps that fit securely in their hands. These are also perfect for gift giving!