by Rustic Escentuals
This is Part One of a Fall inspired soap tutorial using the Mini Leaf and Pumpkin Silicone mold. Look closely at the outdoor trees and you’ll see the beginning of Fall, so I thought it fitting to make a leaf shaped soap using this mold. It is a fun way to enjoy the season!
Skills: Swirling 2 colors and soap painting
Click here for part 2 of this tutorial!
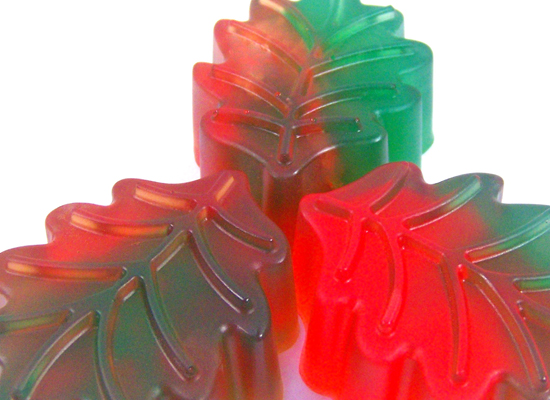
enjoy autumn with these seasonal soaps!
Supplies and equipment needed:
Microwave
Microwave safe glass containers (2)
Sharp knife to cut soap into cubes
Spray bottle with rubbing alcohol
Butter knives for stirring soap
Measuring spoon
Rubber gloves
Disposable pipette
Thermometer to monitor soap base temperature
Mini Leaf and Pumpkin Silicone mold (6 cavities, 2 5/8″ x 2 1/2″ x 1 1/2″ deep; each cavity holds 3.5 ounces)
Ultra Clear Melt & Pour soap base
Creamy Cinnamon Vanilla Fragrance Oil
Gel Soap Colors in Emerald Green, Lemon Yellow, and True Red (not shown)
Metallic Gold soap paint (optional)
Paint Brush
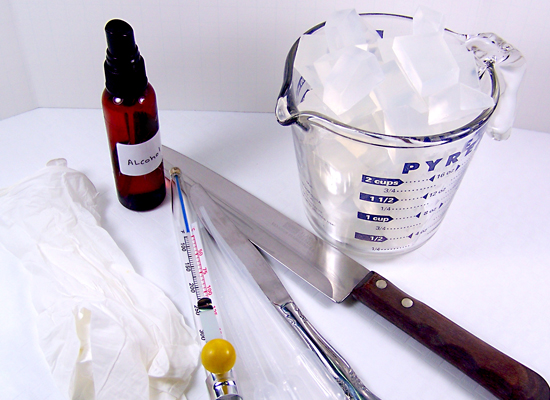
gather your supplies together

don’t forget your soap paint and paintbrushes!
Step 1: Cut up approximately 12 ounces of Ultra Clear Melt & Pour soap base
into small cubes using a sharp knife.
Step 2: Using a microwave safe container, melt your soap in a microwave using 30 – second bursts until melted. Do not burn or boil, this will result in a poor quality rubbery soap. If there are any small chunks of soap base left, stir slowly; the heat of the soap base will melt these small chunks.
TIP: There are three leaf cavities in this mold and each holds 3.5 ounces of soap – melt a little extra to take into account that some of the soap base will stick to the container.
Step 3: Split the 12 ounces of melted soap base into two 6-ounce containers.

split the melted soap into 2 microwave safe containers
Step 4: Use a thermometer to monitor the soap base temperature. I don’t like to add any fragrance oils or additives when the soap base is too hot so I wait for each container to cool to about 145 degrees.
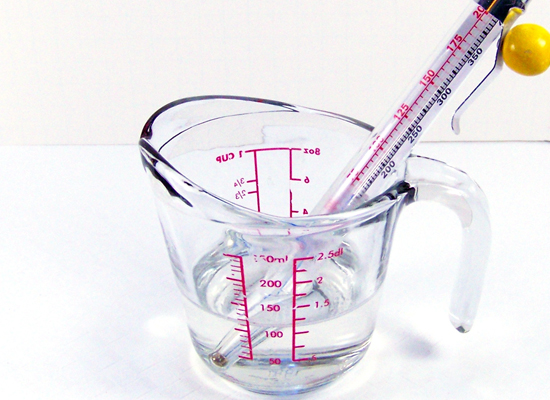
wait until the base has cooled before adding fragrance oils or additives
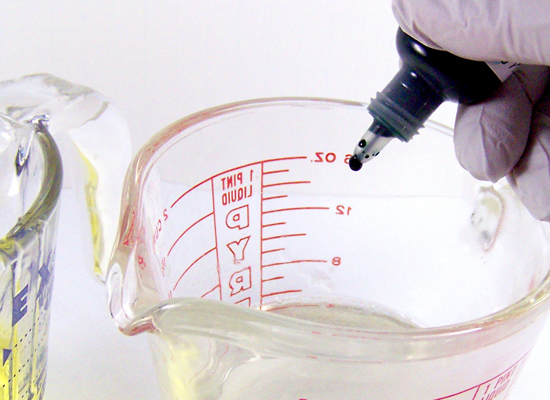
Step 5: Using a disposable pipette, add 2 ml of Creamy Cinnamon Vanilla Fragrance Oil into each container and stir in slowly.
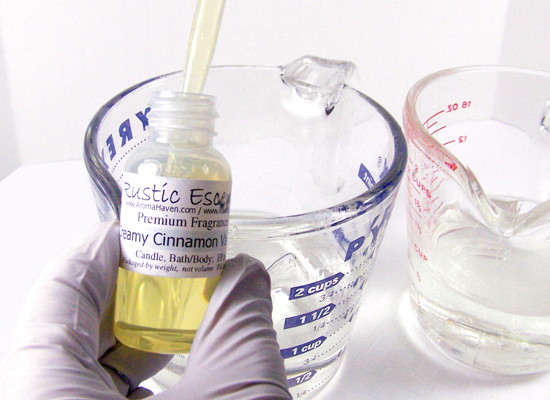
add the yummalicious fragrance oil and stir in slowly.. mmmm!
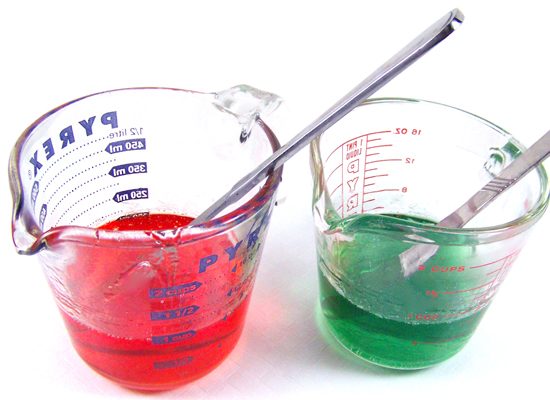
Step 6: In the first container, add 5 drops Emerald Green Gel Soap Colorant and stir in slowly.
add your green gel soap colorant to the first container and stir in slowly
Step 7: In the second container, add 5 drops Lemon Yellow and 2 drops True Red and stir in slowly.
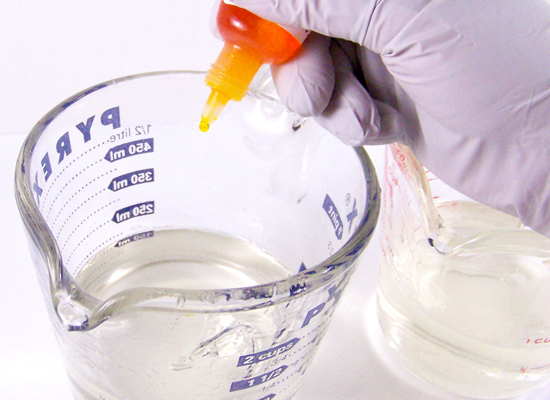
drop in your lemon yellow gel color
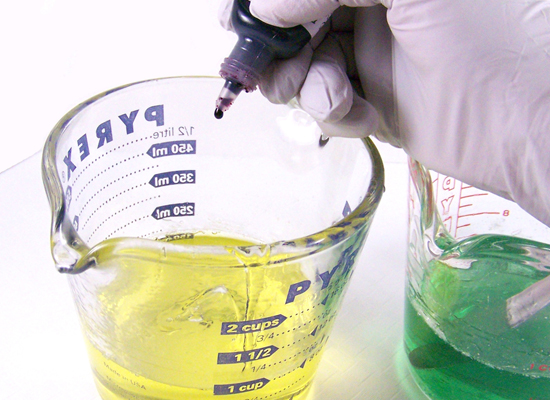
and then your true red and stir together (voila, it’s orange!)
Step 8: We are going to be creating a swirl effect to mimic the changing leaf colors of fall. In order to do this the soap should be poured as cool as you can get it but before it starts to harden on you. Pouring the soap too warm will allow the colors to mix together and you don’t want this. Using the thermometer, make sure the soap is approximately 125 degrees or cooler before pouring. It also helps to pour one color cooler than the other. The soap may form a skin on top while it’s cooling – to avoid this, keep stirring slowly until you’re ready to pour. The soap will start to thicken on you. If it starts to look like thickening gelatin, get ready to pour!
TIP: This takes a bit of practice to get the pouring temperatures just right. If the soap cools too much, quickly zap it in the microwave for 10 seconds.
your soap should be poured as cool as possible – but before it starts to harden
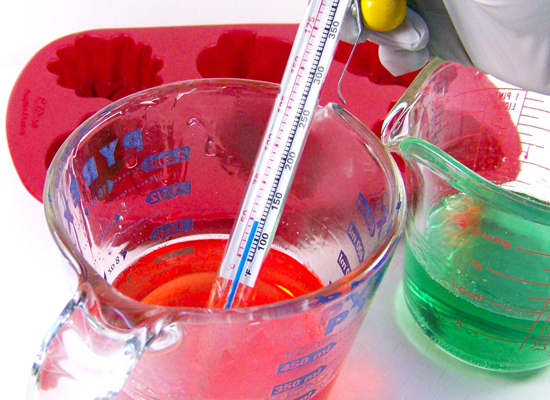
that thermometer comes in super handy for times like this
Step 9: Slowly pour both colors (green and orange) of soap into each leaf cavity at the same time. Don’t pour too fast, or the colors will start to mix together.
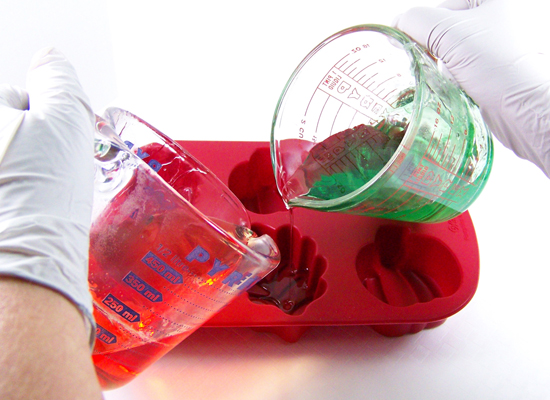
SLOWLY pour the green and orange at the same time
Step 10: Finish off with a spritz of alcohol to remove any bubbles. Do not move the soap mold until set. You’ll be able to see the two colors of soap in the mold. It may look like the two colors are moving (they are), but the movement will stop as the soap hardens.
TIP: You can also spritz the cavities before pouring the soap into them to help the soap flow smoothly into the design.
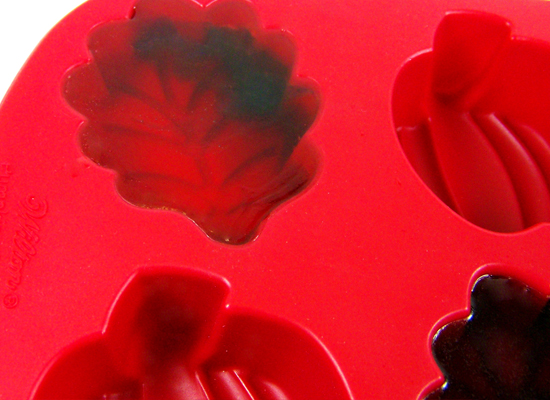
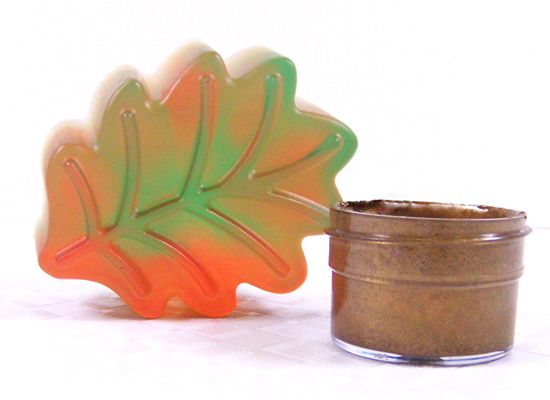
all done – let cool for a few hours
Step 10: Wait 2-3 hours for the soap to completely harden.
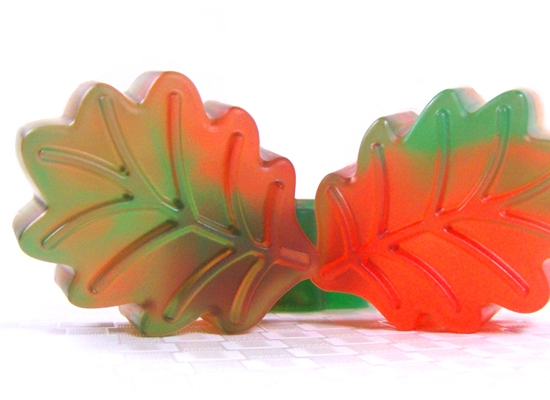
Step 11: Turn the mold over carefully and slowly press on the bottom of the cavity to release the each soap. You may have to pull the edges of the mold away from the soap slightly to add an air pocket. Admire your hard work!
how beautiful… but we can make it even more so. Time to paint!
Soap Painting
Now it’s time to paint! I wanted to add some metallic gold to the leaf veins of one of the soaps.
To get more familiar with soap painting basics, check out the Soap Painting Tutorial.
use metallic gold soap paint to add dimension and sparkle to the leaf veins
Step 12: Use a small artist’s brush to help you paint the raised veins of the leaf using Metallic Gold soap paint. Dip the paintbrush into the paint and using a small amount, begin brushing lightly in smooth strokes, being careful not to use too much paint. I applied 2 coats because I wanted a solid gold color. Wait 20 – 30 minutes between coats or you will just pull off the first coat.
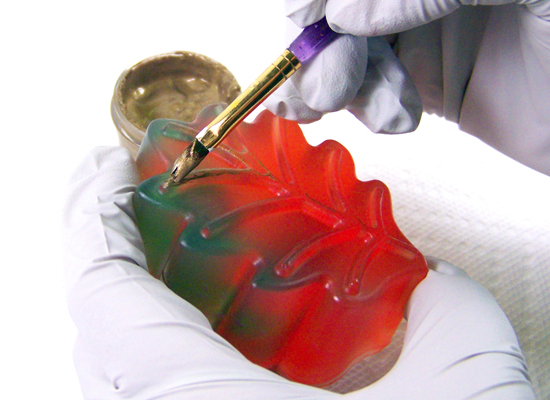
dip paintbrush into paint and (using a small amount) brush lightly in smooth strokes

apply a second coat if desired, waiting 20-30 minutes between each coat
Have fun, be creative, mix and match your colors, and above all enjoy your soap – they make perfect gifts for the holidays!
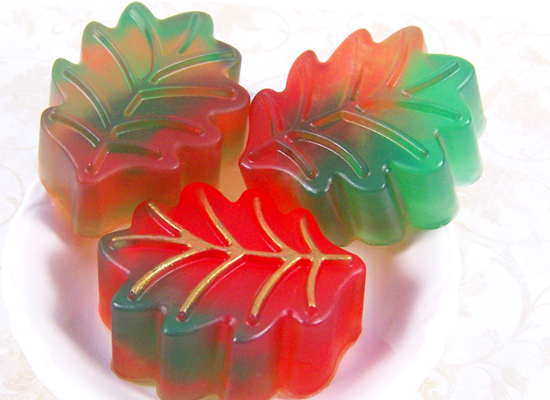
look what you created – they’re gorgeous!
Come back next week for Part II of the Mini Leaf and Pumpkin Mold Tutorial! It’ll be pumpkin time!