by Rustic Escentuals
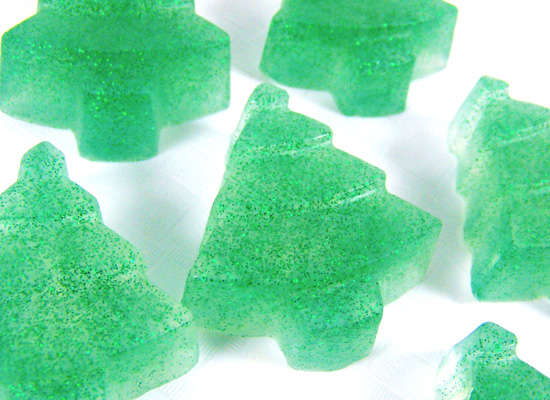
Before you know it the holidays will be here, so let’s get a jump start on some gifts that you can make right at home! I will be using Shimmer Dust Glitter to make floating embeds -a wonderful shimmery look for the holidays!
Skills: embedding and layering
wonderful shimmery holiday soap!
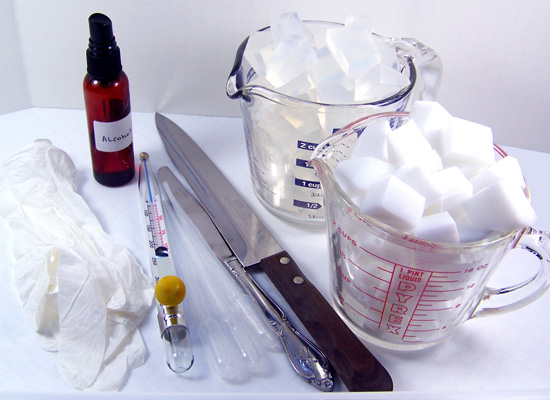
Supplies and equipment needed
3 Microwave safe glass measuring cups
Sharp knife to cut soap into cubes
Spray bottle with rubbing alcohol
Butter knives
Rubber gloves
Mini Tree Silicone Mold (24 cavities)
Basic Rectangle Soap Mold (3 cavities, 4.5 ounces each)
Disposable pipettes
Thermometer to monitor soap temperature
16 oz Ultra Clear Melt & Pour soap base
3 oz White Melt and Pour soap base
Shimmer Dust Glitter: Kelly Green
Mittens and Mistletoe fragrance oil
One .15cc scoop
gather up your basic supplies
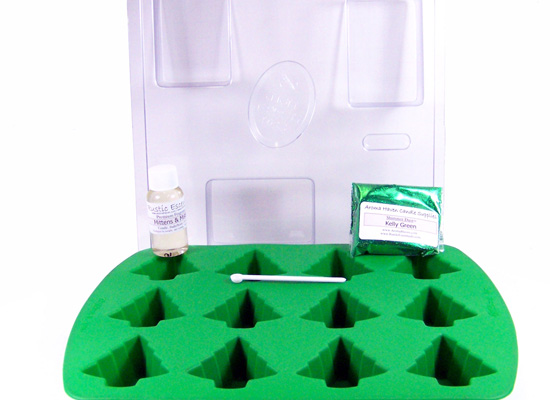
and don’t forget the molds, glitter, and fragrance oil!
Making Inserts
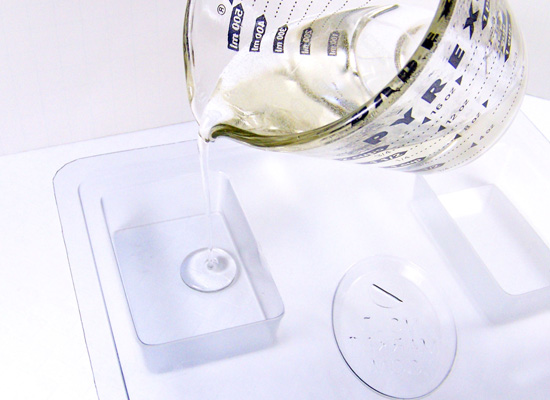
Step 1: Take 8 ounces of cubed Ultra Clear Melt and Pour soap base and place in a microwave safe glass measuring cup. Melt for 30 seconds in the microwave, stir slowly and repeat if necessary. Be careful that you don’t boil or burn the soap; this will result in a poor quality rubbery soap. If there are any small chunks of soap left, stir slowly; the heat of the soap will melt these small chunks.
Step 2: Monitor the temperature of the soap base with a thermometer before adding any additives or fragrance oils to the soap base. Keep the temperature below 140 -145 degrees. Using a disposable pipette, add 4 ml of Mittens and Mistletoe fragrance oil and stir slowly.

remember to closely monitor the temp of the soap – too hot and it gets rubbery

once it’s the appropriate temp, add your fragrance oil
Step 3: Using a 0.15cc scoop, slowly add 5 – 6 scoops of Shimmer Dust Glitter in Kelly Green. Stir slowly while adding the glitter so it doesn’t clump. You want to pour this soap as cool as you can get it but before it starts hardening up on you. This is to prevent the glitter from settling down into the mold after you pour it.
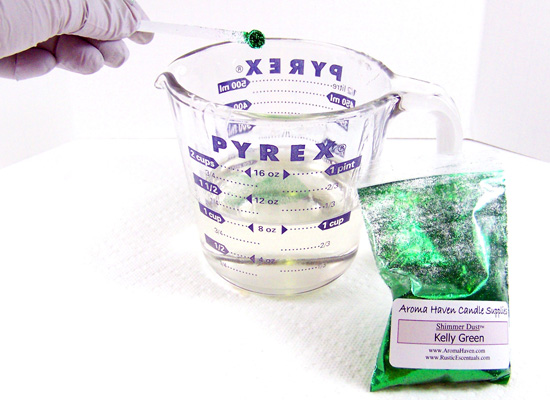
slowly add 5-6 scoops of the gorgeous glitter

stir slowly while adding so it doesn’t clump
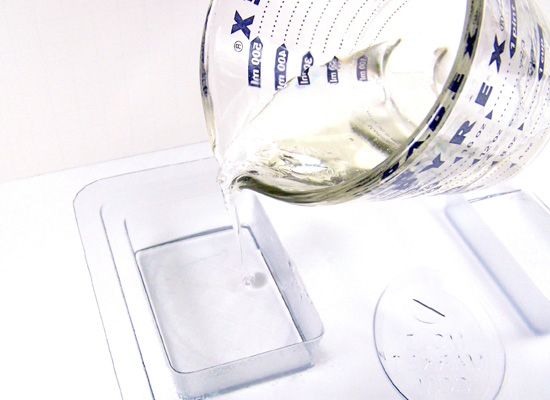
Step 4: Slowly pour the soap into the mold cavities of the Petite Tree Silicone Mold. Fill only half way up each cavity. If you pour all the way up, these inserts won’t fit into your soap the right way (I made this mistake!). After pouring, spritz the soap with alcohol to remove any bubbles that may have formed.

fill molds halfway and spritz with rubbing alcohol to remove any bubbles
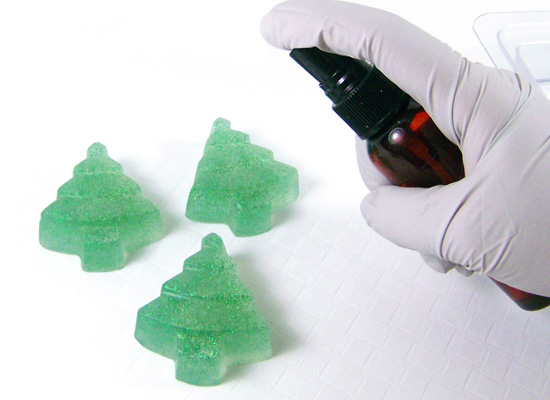
Step 5: Wait approximately 45 minutes for your trees to set. Remove from the mold and set aside.
ooooh! shimmery trees all ready for embedding!
Making Your Soap
For beginners, it’s easiest to work with one mold cavity at a time. The steps below are written with this in mind. As you get more experienced, you will be able to complete each step for all 3 cavities at the same time.
Step 6: Using Steps 1 and 2, melt 8 ounces of clear melt and pour soap base and add 4 ml’s of the fragrance oil. Stir slowly.
Step 7: Making sure the temperature of the soap base is around 130 -135 degrees, pour a very thin layer of soap into one cavity of the Basic Rectangle Soap Mold. Pour just enough to cover the bottom of the mold completely. Spritz with alcohol to remove any bubbles, you want this to be as bubble free as possible.
pour just enough to cover the bottom completely
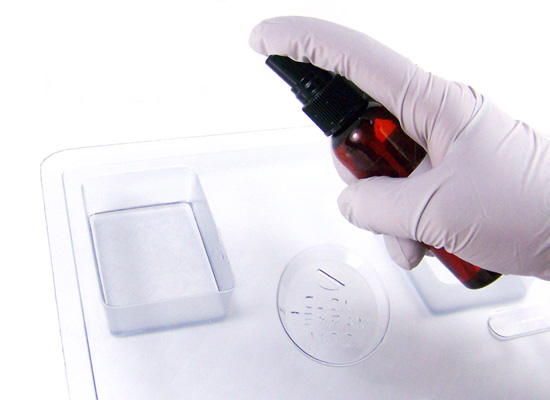
and once again, spritz to remove any bubbles
Step 8: Let soap sit for 5 minutes to form a hardened layer. Press gently with your finger to test. If your finger is able to form a dent, wait another minute or two. You want the layer to be able to support your soapy embeds.
NOTE: Once your first layer is set, you may need to reheat the container of clear soap base. Remember, keep the soap base at 130° to avoid warping your mold or melting your embeds. If soap is too hot, keep stirring slowly until soap reaches 130°.
Step 9: Now you have to work quickly here. Spritz the thin layer of hardened soap that is already in the mold to help the embeds and the next layer adhere together. Pour a small amount (approximately .5 oz) of melted soap into the mold. Spritz both sides of the tree embed with alcohol and then place it into the mold. Remember, you need to place the side of the embed that you want showing face down into the mold. The bottom of the soap mold is the top of the soap.
spritz with alcohol one more time to help everything adhere together
pour small amount of melted soap into the mold
spritz both sides of the trees with alcohol
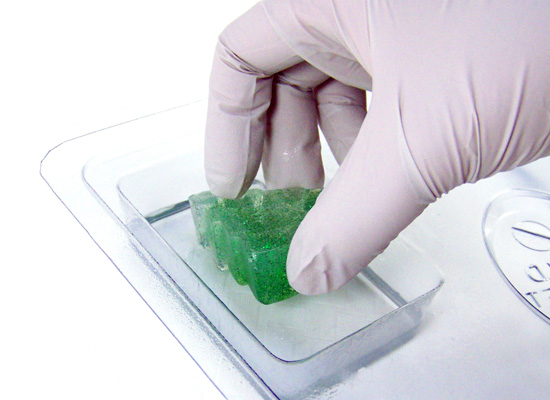
place face down into the mold
Step 10: Once the tree is placed in the mold, pour enough clear soap to cover it. Don’t pour all the way to the top of the cavity; you need to leave some room for your white soap. Spritz again with alcohol to remove any bubbles.

pour enough clear soap to cover the embed
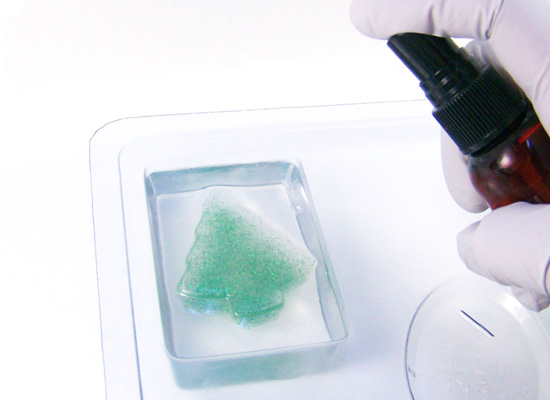
spritz again! away bubbles (until we use the soap, of course)
Step 11: Prepare the other two cavities using steps 7 through 10.
Step 12: After you have completed adding all embeds, wait for the soap to set. This should take approximately 10 – 15 minutes. Press gently to test with your finger.
Step 13: Take 3 ounces of the cubed white melt & pour soap base and melt in the microwave in 15-second bursts until melted. Add about 1.5 ml of Fragrance Oil and stir slowly. Monitor temperature of soap until it reaches approximately 130 degrees.
Step 14: Spritz the soap in your mold with alcohol, especially at the edges of the mold and slowly pour the white soap to the top of the mold. Spritz with alcohol to remove any bubbles. The white soap will make the embeds show up better.
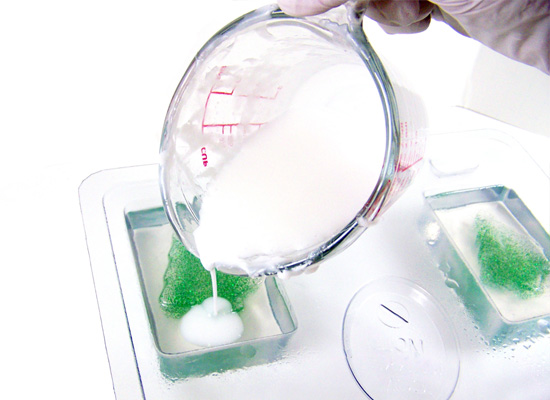
a layer of white soap will help the embeds to really “pop” out of the soap
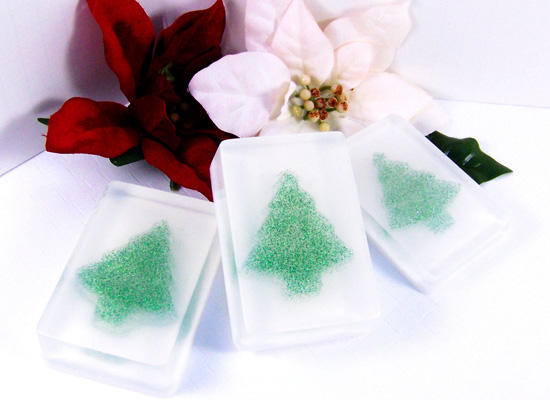
Step 15: After the soap has completely set (approximately 2-3 hours), turn the mold over and slowly press on the bottom of each cavity to release the soap. Do not force it. If the soap won’t come out, wait another 1/2 hour or so. You can even pop the soap in the freezer for 5 minutes then try again.
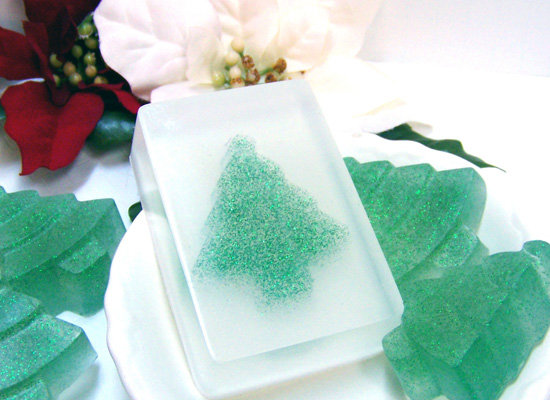
remove from molds after the soap has set – pretty!
If you liked this tutorial, check out the Floating Hearts Tutorial for more embedding fun!