• Skip to main content
  • Skip to primary sidebar
Recipes & Tutorials Crafting Library
  • Soap »
    • CPHP Soaps
    • Cold Process Soaps
    • Hot Process Soaps
    • Liquid Soap
    • Melt and Pour Soaps
    • Special Soaps
  • Bath & Body »
    • Bath & Body
    • Lip Balm
  • Candles & Scent »
    • Container Candles
    • Pillar Candles
    • Wax Tarts
    • Votive Candles
    • Special Candle Projects
    • Fire Starters
    • Air Fresheners
    • Fragrance OIls
    • Scent Blends
  • Seasonal & Holiday »
    • Spring
    • Summer
    • Fall
    • Winter
    • Valentine’s Day
    • Easter
    • Mother’s Day
    • Father’s Day
    • Independence Day
    • Halloween
    • Thanksgiving
    • Christmas
  • Misc. »
    • Misc Craft Projects
    • Business Side of Crafting
  • All Tutorials
  • Contact
You are here: Home / Candles / Pillar Candles / How to Make Candle Carvings

How to Make Candle Carvings

July 28, 2013 By

DIY Crafting Tutorials - spread the love!

by Rustic Escentuals

Our non-traditional version of carving candles produces customized candles in just about any way you can imagine! You can choose to make the pillar candle yourself or purchase one from the store – and then the choice is yours over how to decorate it. The only limit is your imagination! Use the finished carved candles to complement your home decor or use as customized gifts for birthdays, holidays, bridal shower gifts, or baby showers. Also, a customized carved candle makes a wonderful finishing touch to any gift basket.
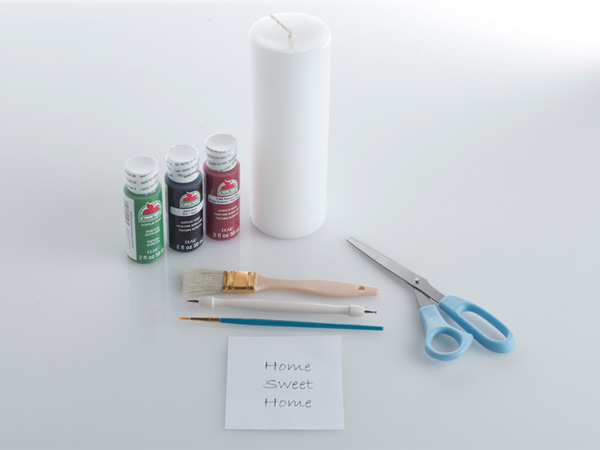
finished carved & painted pillar candle

 
Supplies needed:
Pre-poured pillar candle, any size
Embossing Tool (found at Michael’s, Hobby Lobby, or at Amazon)
Craft paint
Paint brush for painting
Larger paint brush
Pre-printed graphic, lettering, etc. sized to fit your pillar candle

Tip: Start out with simple designs until the feel for candle carving becomes more comfortable.

supplies

 
Step 1
Tracing the design onto the candle is the first step. However, if you have talented drawing skills, feel free to hand-draw on paper, or carve directly onto the candle. Hold preprinted graphic against the pillar candle with one hand. Gently trace the design with the embossing tool using enough pressure to leave an indent in the wax. Be careful to hold the graphic in the same place because moving it even slightly can mar or distort the design. When entire design has been traced, remove the graphic paper.

hold design against the candle


trace design onto candle

 
Step 2
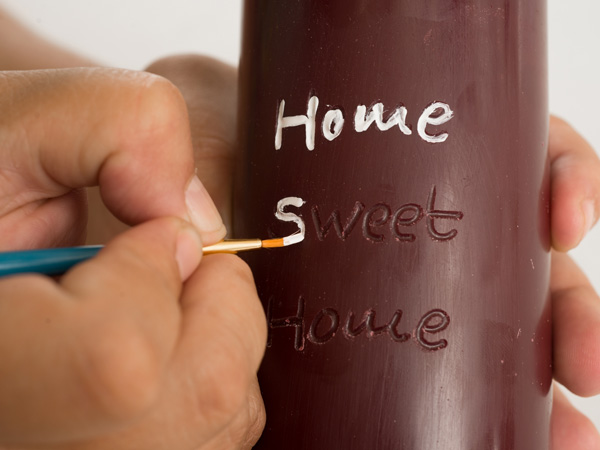
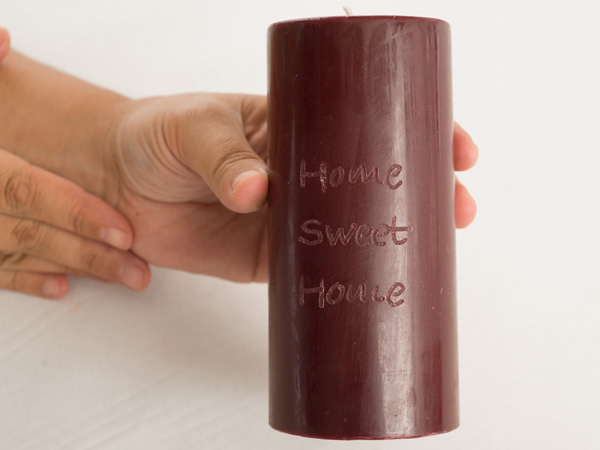
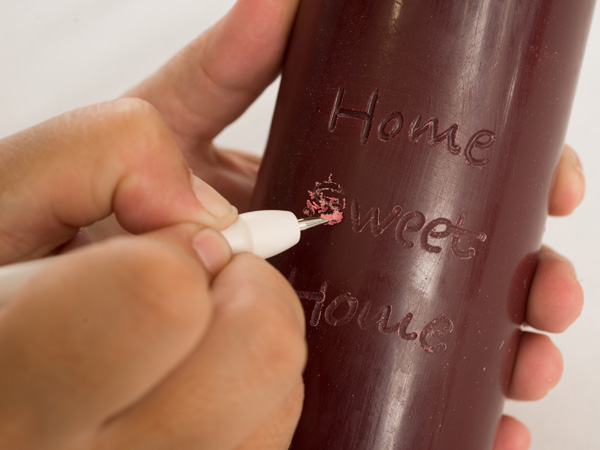
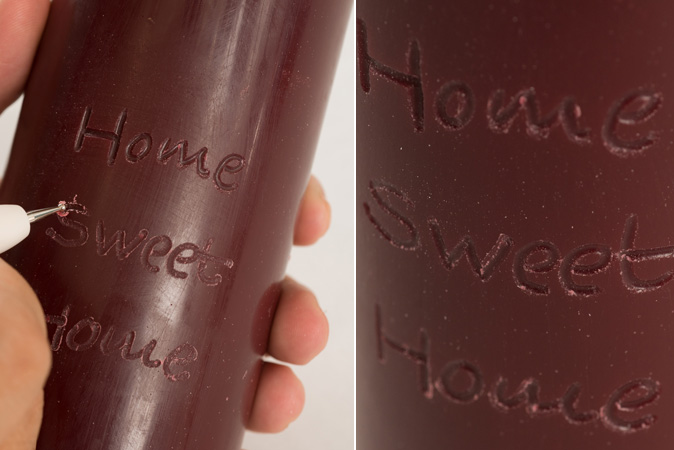
Take the embossing tool and carve out the design following your indentations. Use the larger paintbrush to brush away excess wax from the carving. Don’t use too much pressure. About 1/10” is sufficient for the carved design.

carving the candle


carved candle


carved candle

 
Step 3
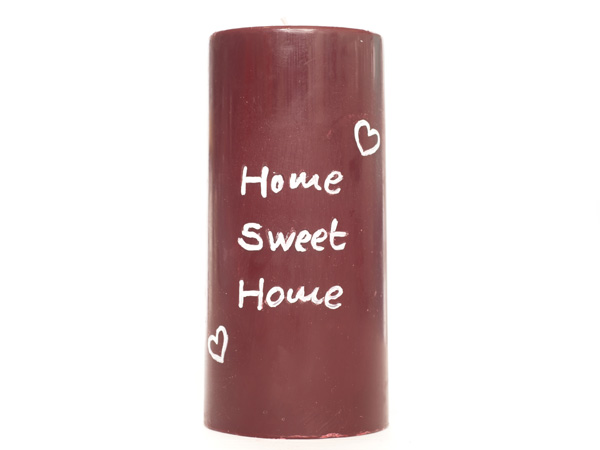
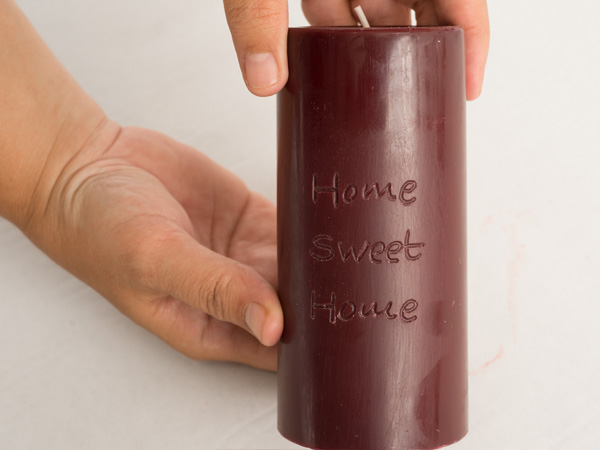
Using craft paint(s), fill in the carving. Let dry & enjoy!

painting


Print Friendly, PDF & Email

DIY Crafting Tutorials - spread the love!

Filed Under: Pillar Candles, Special Candle Projects, View All Tutorials Tagged With: candle crafts, candle making supplies

Previous Post: « How to Make Carpet Sprinkles
Next Post: Cotton Pad Fire Starter Tutorial »

Primary Sidebar

Search the Library

Random Tutorials

Whipped Cream Soap for Bath Parfaits

How to Make Chunky Soaps

How to Make Wax Chunks

Ice Cream Sundae Candles

How to Make Candles Shimmer and Sparkle

How to Make Scent Tarts in Cups

Shredded Cookie Cutter Soap Tutorial

How to Wrap Handmade Soap

Home | View All Tutorials | Contact Us
copyright 2011-2022. Rustic Escentuals
All rights reserved.