by Kathy Heindel
Ingredients
1/2 lb. Pillar Wax (such as: Ky 143 Paraffin Pillar Wax or Ky All-Natural Pillar & Votive Wax)
Colorant: candle dye flakes or chips or liquid candle dye
Scented oil for candles – one half ounce
Candle Wick – 51/32/18 zinc core or similar
Empty pint milk or cream carton
Equipment
Melting pot / double boiler
Spoon for stirring
Rigid wire for boring wick tunnel
Phillip’s screwdriver for distressing
Wrapping and candle label (if selling or giving as gift)
Specifications
One cube-shaped candle, 8 ounces, approx. 2.5+” height & width
Notes
A good design for beginning candle makers, allowing for simple “free style” creativity in a disposable mold.
Design alterations can be layered (as shown here), made as a “chunk candle,” with swirls of color or all one color. Distressed design can be substituted with any number of other design techniques.
The square design will leave some wax behind in the corners after burning, which makes it a candidate for re-pouring the center with a new wick if you make this for personal use.
Instructions
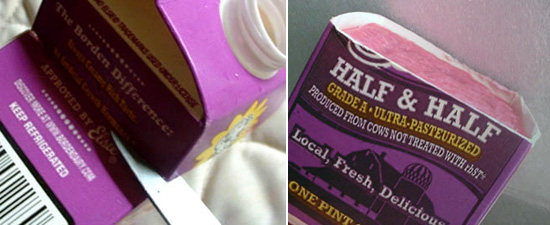
The mold used here is the bottom portion of an empty pint half ‘n’ half carton. Carefully make an incision on a corner of the carton with a sharp knife three inches up from the bottom of the carton. Do not attempt to pierce into the side of the container, as it can “cave in” too easily and ruin your mold.
After the initial cut has been made, use scissors to work around the container until the entire top portion has been cut away.
Here, the scissors are almost around the entire container, with the top portion of the container about to completely separate.
Be sure to rinse your mold thoroughly and allow it to completely dry before pouring your candle.
The finished candle is going to weigh eight ounces.
The amount of wax that will be melted for each layer will be determined by your design concept for the layers. For instance, if you want your first layer to go halfway up the candle, then melt about four ounces of wax.
Note – if you would like the layers to be graduated in color, melt 7+ ounces of wax, adding only a hint of color at first for the first layer, and a bit more color for each subsequent layer before each pour. And, if you would like the very top “surface layer” to match the bottom layer, melt 8 ounces, reserving some of the wax from the first layer, which you can re-melt when ready to add the topping.
Add your colorant after the wax is fully melted. If using color flakes, crumble some flakes and add it to the wax, stirring well.
If using liquid colorant, add only one drop and test the coloring, as this is a very concentrated dye for a small amount of wax. You may wish to increase the intensity by adding a “half drop” at a time by applying just a bit of colorant to the tip of a toothpick and stirring into the wax.
To test the color, dip a spoon into the wax, remove it, allowing the wax to harden to see if it is the shade you desire. If it is not dark enough, add a bit more color to your melting pot and test again.
The candle scent needs to be measured out in proportion to the amount of wax that you have melted. For instance, for four ounces of wax, the amount of scent will be a quarter of an ounce based on using an ounce of scent per pound. Add the fragrance oil after the wax is fully melted and has reached the proper temperature for the type of wax you are using. Make sure to stir very well to ensure that the candle scent oil is evenly distributed throughout the wax.
Prepare your container by positioning a metal rod in the center to create the wick tunnel. If you choose to make your layers at diagonals, it is easier to bore the wick tunnel with a heated metal rod after the candle has been fully poured and cooled, as it is difficult to position a straight wick tunnel in a slanted container.
Pour the wax into the container and allow it to cool before adding your next color. Or, if you would like the layers to slightly blend into one another, wait until there is a thin “skin” on the first layer and then pour the next layer.
If you wish your layers to come out diagonally, simply rest a “lift” under one side of the container so it does not sit level. Continue this process for your remaining layer or layers, changing the position of the container, if desired.
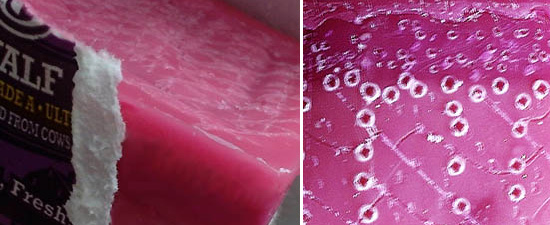
When all of your layers have been poured and the candle is completely hardened and cooled, the mold is removed by tearing it away from the candle to reveal what you have created.
Your candle may be left with a smooth finish, or you may choose to “distress” it a little bit, such as we have done. To make a distressed design, simply use a Phillip’s screwdriver to tap the wax wherever you want to create a “dot” or mark. This is a very simple and basic design technique.
Here is our simple “confetti” dots design.
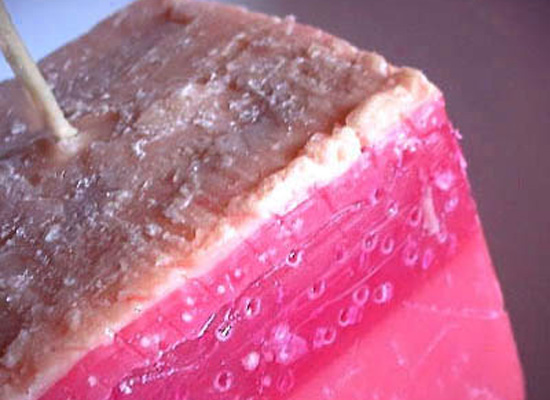
All we need now is the wick and our top layer. After the wick has been inserted into the candle, with the tab fully secured at the bottom, melted wax is poured down the wick tunnel to secure the wick in place and fill the tunnel.
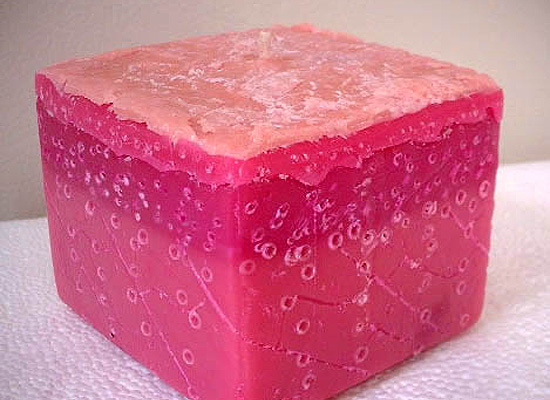
For our top layer, a lighter shade of wax was allowed to partially cool before applying it to the top of the candle. After the top layer has cooled, the candle is rinsed in cool water to remove flakes of wax, and the wick is clipped to approx. a quarter of an inch.
Now you have a little cube candle!