by Rustic Escentuals
This tutorial is a fun way to learn and practice your M&P layering skills while at the same time making adorable soaps to give away, sell or use for yourself. This is a good primer and technique to learn for some of our more advanced tutorials coming soon.
Supplies and equipment needed:
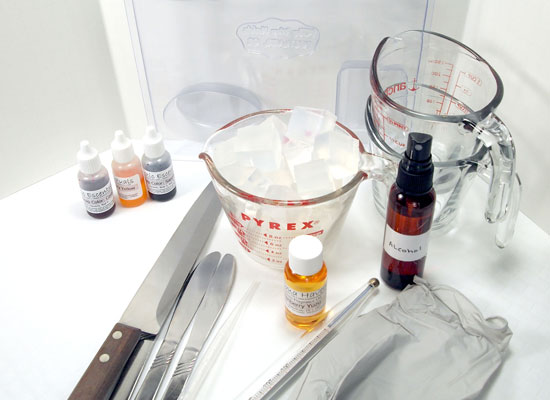
Microwave safe glass containers
Sharp knife to cut soap into cubes
Spray bottle with rubbing alcohol
Butter knives
Rubber gloves
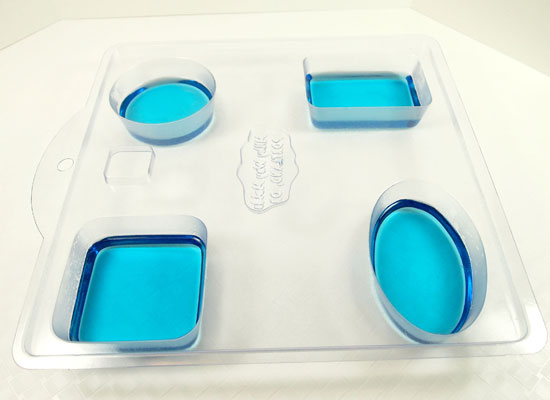
4-in-One Soap Basic Shapes Soap Mold
Disposable pipette
Thermometer to monitor soap temperature
15 oz Ultra Clear Melt & Pour soap base
Gel Soap colorants in Sapphire Blue, Canary Yellow and Coral
Cranberry Yuzu Fragrance Oil
Step 1: Cut up 15 oz. of Ultra clear Melt & Pour into small cubes.
Step 2: Take 5 ounces of cubed soap and place in a microwave safe glass container. Melt in the microwave in 30-second bursts until melted. Be careful that you don’t boil the soap – boiling will result in a poor quality rubbery soap.
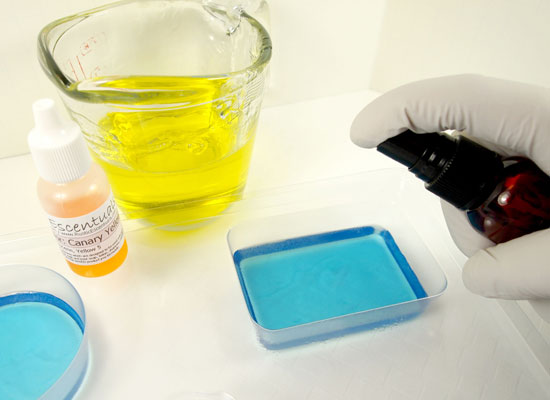
Step 3: Mix in 2 drops of Gel Soap Colorant in Sapphire Blue and 3/4 ml of Cranberry Yuzu Fragrance Oil. Stir slowly until mixed well.
Tip: Always stir slowly when adding colorants, fragrances or any type of additions to your soap base to avoid creating any more bubbles than you have to.

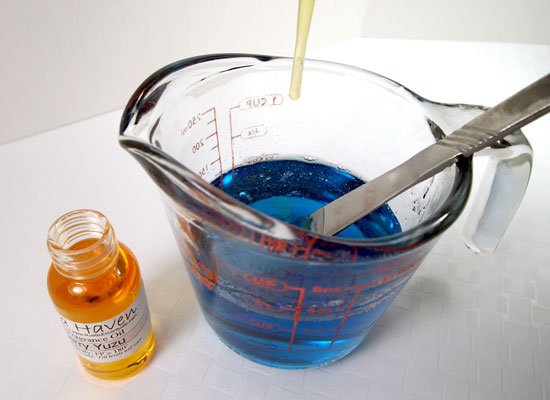
Step 4: Use a thermometer to monitor the soap temperature; it should be about 130° to avoid warping your mold. If soap is too hot, keep stirring slowly until soap reaches 130°.
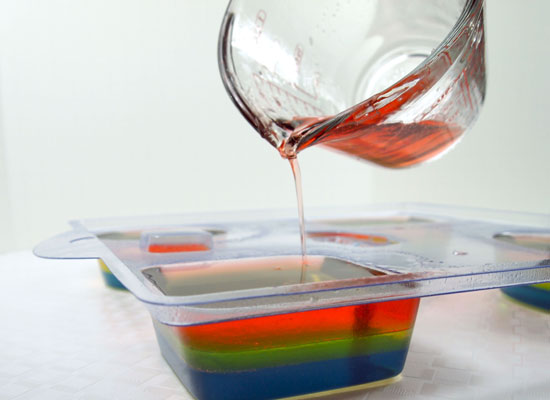
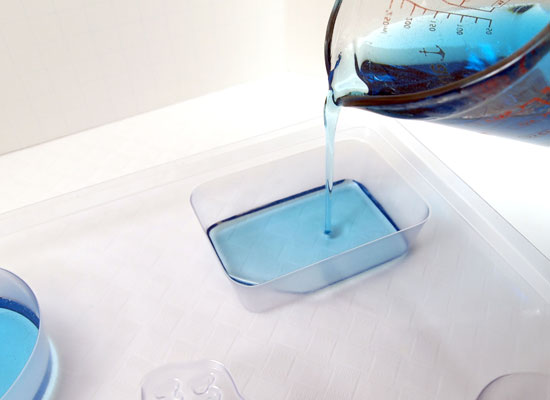
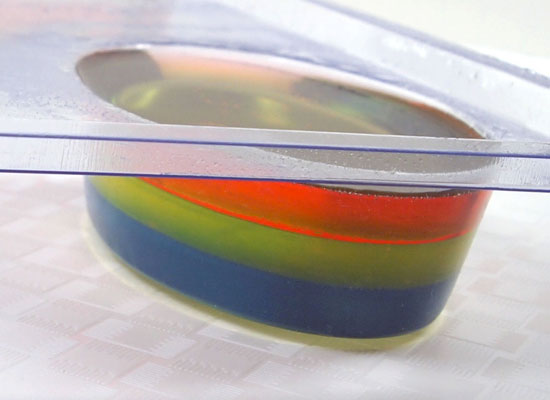
Step 5: Using the 4-in-One Basic Shapes Soap Mold, pour a layer of blue soap base equally between the 4 cavities of the soap mold. Remember to pour slowly to avoid excess bubbles.
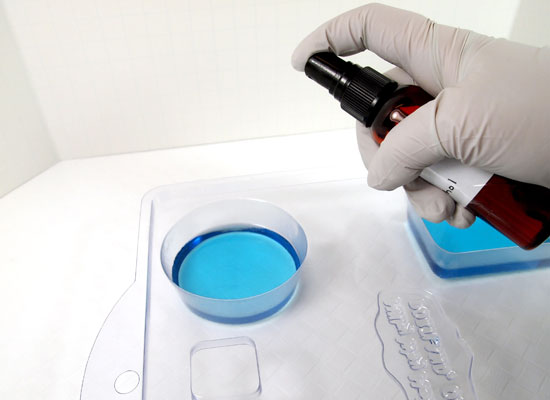
Step 6: Spritz the soap with rubbing alcohol to get rid of any bubbles that formed while you were pouring.
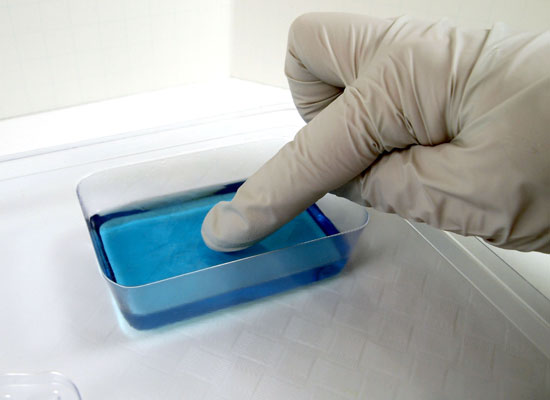
Step 7: Let soap sit for 8-10 minutes to form a hardened layer. Press gently with your finger to test. If your finger is able to form a dent, wait another minute or two. You want the layer to be able to support the second layer without bowing in.
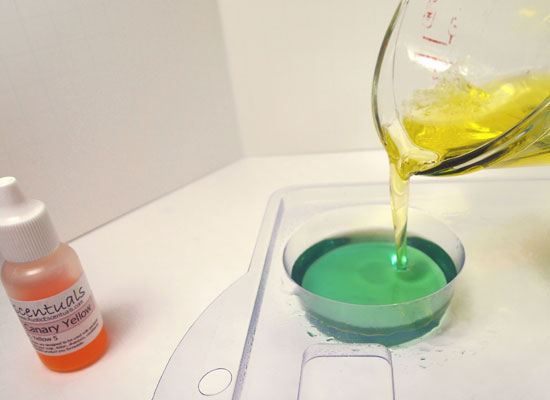
Step 8: While the first layer is hardening, prepare your second layer using Steps 2 – 4. I used Gel Soap Colorant in Canary Yellow for the middle layer. When ready, spritz the blue layer liberally with alcohol (don’t forget the edges). This will help the layers adhere to each other. There’s nothing worse than layers separating after all your hard work! Pour a layer of yellow soap base equally between the 4 cavities of the soap. Spritz with alcohol to remove any bubbles.
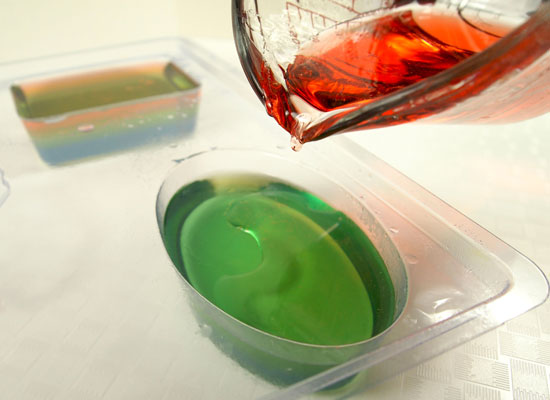
Step 9: Follow Steps 2 – 8 for your last layer. I used Gel Soap Colorant in Coral for the 3rd and last layer. Don’t forget to spritz with alcohol before pouring and after pouring!
Step 10: Wait 2 – 3 hours for the soap to completely harden. Turn over and slowly press on the underside of mold to release the soap.
Tip: If the soap won’t come out, wait another 1/2 hour or so – don’t fight it. You can even pop the soap in the freezer for 5 minutes but I don’t recommend longer than that.
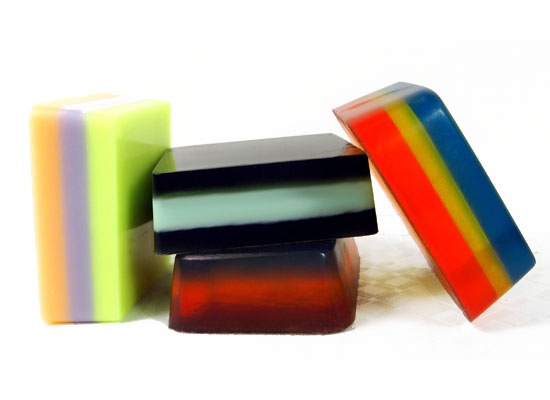
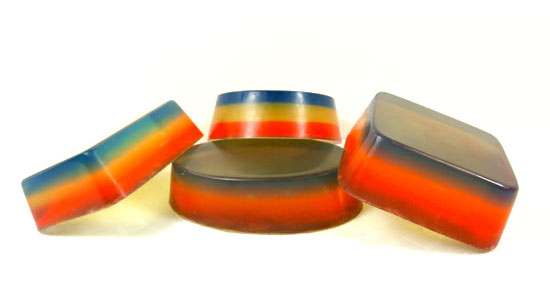
Note: You can use any color scheme that you want. Using clear soap for all layers gives it a glassy look to it. The layers blend in together like a rainbow. For more defined layers, alternate the layers with White Melt & Pour Soap Base that you’ve prepared the same as above. The pictures below show you a variety of layered soaps. Practice and have fun!