by Rustic Escentuals
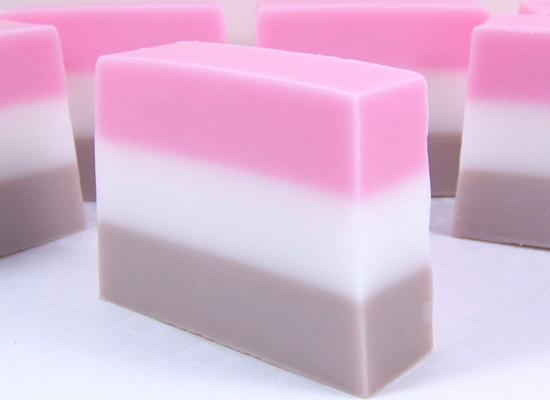
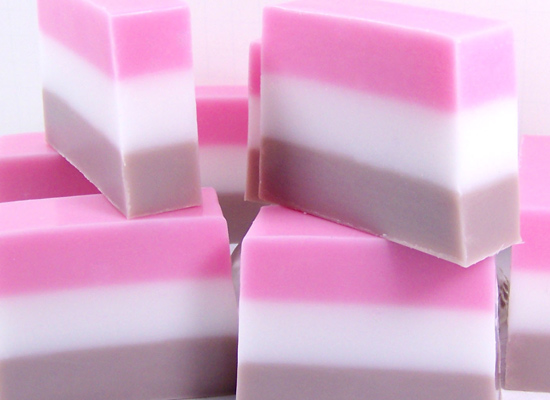
I had some Neapolitan ice cream the other day and thought – Neapolitan Soap! You’ve already learned some layering skills in the Learning to Layer Melt & Pour Soap tutorial, let’s go ahead and step it up.
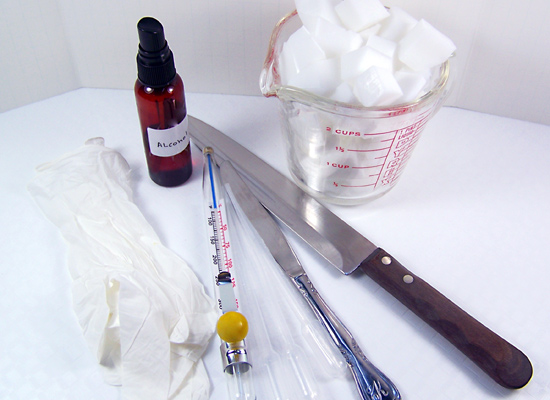
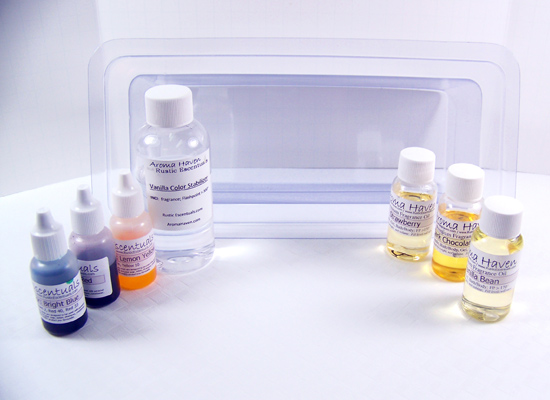
Supplies and Equipment Needed
Microwave safe glass containers
Scale
Sharp knife to cut soap into cubes
Spray bottle with rubbing alcohol
Butter knives
Rubber gloves
10″ Silicone Loaf Mold
Disposable pipette
Thermometer to monitor soap temperature
42 oz Goat Milk Melt and Pour Soap
Gel Soap Colorants in Bright Blue, True Red, and Lemon Yellow
Strawberry Fragrance Oil
Vanilla Bean Fragrance Oil
Dark Chocolate Fragrance Oil
Vanilla Color Stabilizer
Step 1: Cut up 42 oz. of Goat Milk Melt & Pour into small cubes.
First Layer (Strawberry)
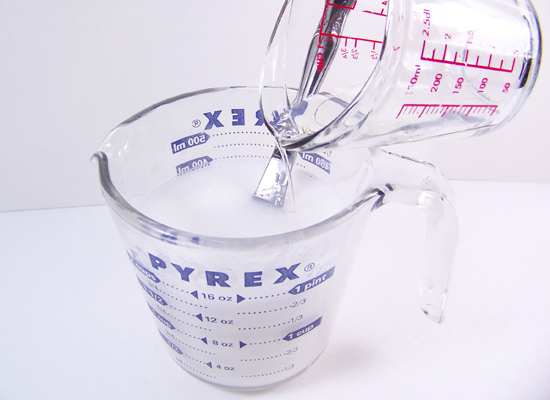
Step 2: Take 14 ounces of cubed soap base and place in a microwave safe glass container. Melt in the microwave in 30-second bursts until melted. Be careful that you don’t boil the soap – boiling will result in a poor quality rubbery soap.
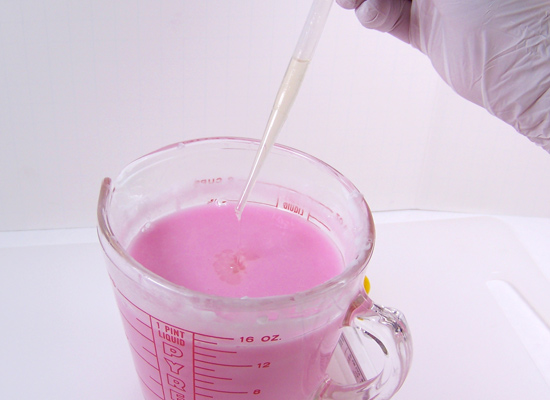
Step 3: Mix in 4 drops of Gel Soap Colorant in True Red and 5 ml Strawberry Fragrance Oil. Stir slowly until mixed well.
Tip: Always stir slowly when adding colorants, fragrances or any type of additions to your soap base to avoid creating any more bubbles than you have to.

Step 4: Use a thermometer to monitor the soap base temperature – it should be about 135° to avoid warping the soap mold. If soap base is too hot, keep stirring slowly until it reaches 135°.
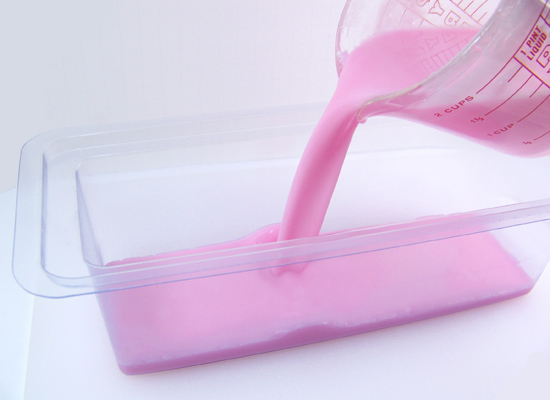
Step 5: Pour the Strawberry scented soap base into your 10″ Silicone Loaf Mold. Remember to pour slowly to avoid excess bubbles.
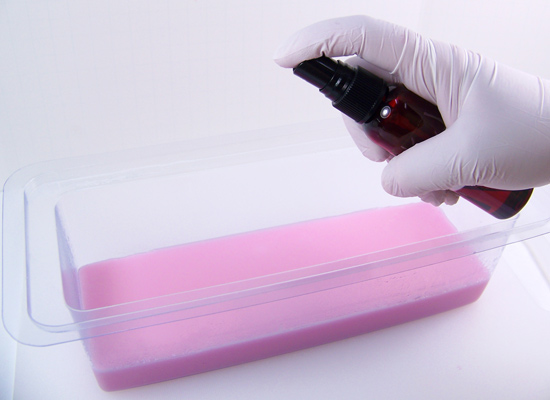
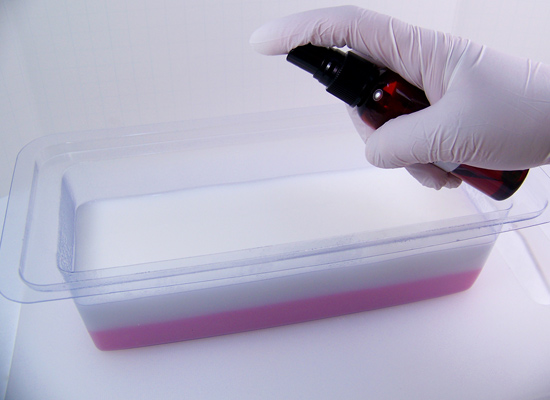
Step 6: Spritz the soap with alcohol to get rid of any bubbles that formed while you were pouring.
Step 7: Let soap sit for 8 – 10 minutes to form a hardened layer. Press gently with your finger to test. If your finger is able to form a dent, wait another minute or two. You want the layer to be able to support the second layer without bowing in.
Second Layer (Vanilla Bean)
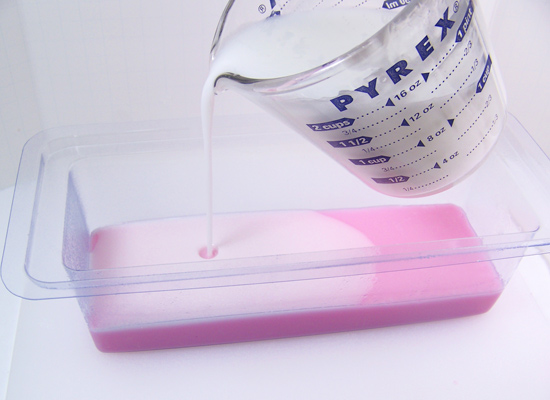
Step 8: While the first layer is hardening, prepare your second layer using Step 2. Melt 14 ounces of Goat Milk Melt and Pour Soap Base and do not color this layer because this is your “vanilla” ice cream layer.
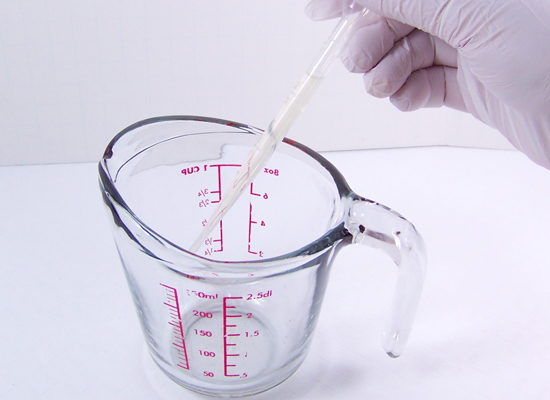
Step 9: Because we are using the Vanilla Bean fragrance oil for this layer, we will need to use the Vanilla Color Stabilizer to prevent the soap from browning. While I love, love, love the scent of vanilla, it does tend to turn white soap into a tan color. If tan is the color you are going for, you can skip this step. In a separate container, add in 0.8 oz of the Vanilla Color Stabilizer and 6 ml Vanilla Bean Fragrance Oil, mix together thoroughly before adding it to your melted soap base. Stir slowly until fully incorporated. You can add up to 1 ounce of Vanilla Stabilizer per pound of soap base.

Step 10: When the first layer is ready, spritz liberally with alcohol (don’t forget the edges). This will help the layers adhere to each other. There’s nothing worse than layers separating after all your hard work! Use a thermometer to monitor the soap temperature; it should be about 135° to avoid melting the first layer. When the temperature is right, pour the Vanilla Bean layer and spritz with alcohol to remove any bubbles.
Step 11: Let soap sit for 10 – 12 minutes to form a hardened layer. The second layer will take a little longer to set because there is more soap in the mold. Press gently with your finger to test. If your finger is able to form a dent, wait another minute or two. You want the layer to be able to support the third layer without bowing in.
Third Layer (chocolate)
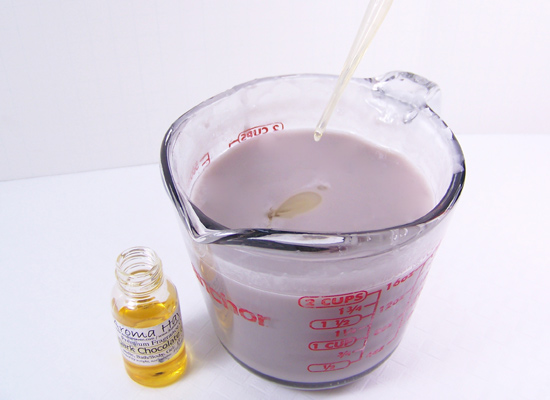
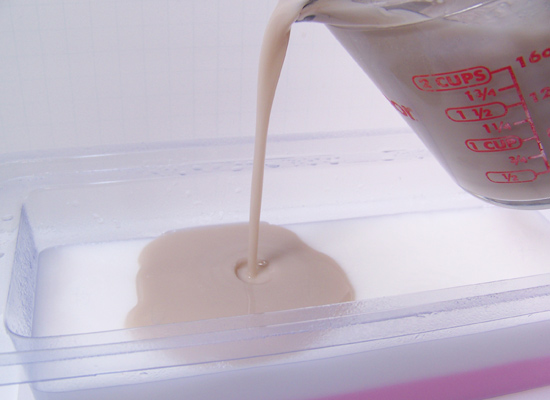
Step 12: While the second layer is setting, follow the methods in Steps 2 – 3 to melt and color the last 14 ounces of soap base for your last layer. To make a chocolate colored soap I used Gel Soap Colorant in True Red, Bright Blue, and Lemon Yellow. Add 5 drops of red, 5 drops of yellow, and 2 drops of blue. Add in 4 ml of Dark Chocolate Fragrance Oil and stir slowly.
Step 13: When the second layer is ready, spritz liberally with alcohol (don’t forget the edges). Use a thermometer to monitor the soap base temperature; it should be about 135° to avoid melting the Vanilla layer. When the temperature is right, pour the chocolate layer and spritz the top with alcohol to get rid of any bubbles that formed while pouring.
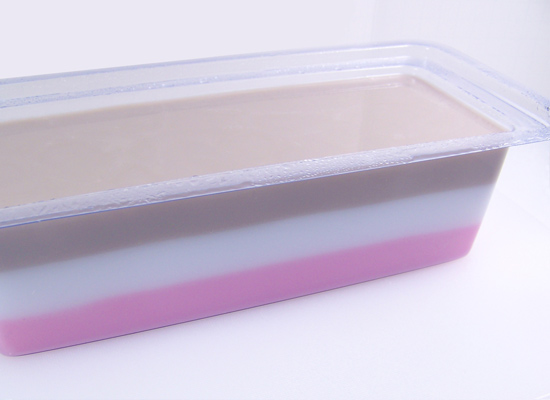
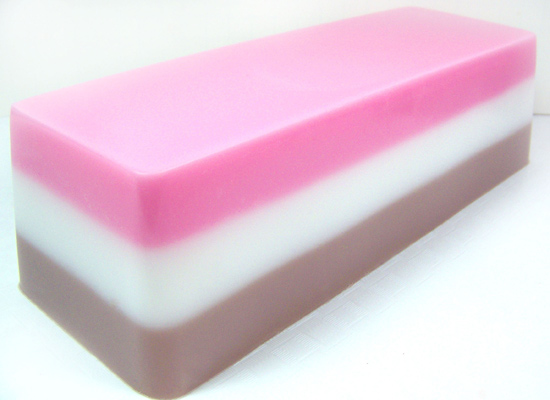
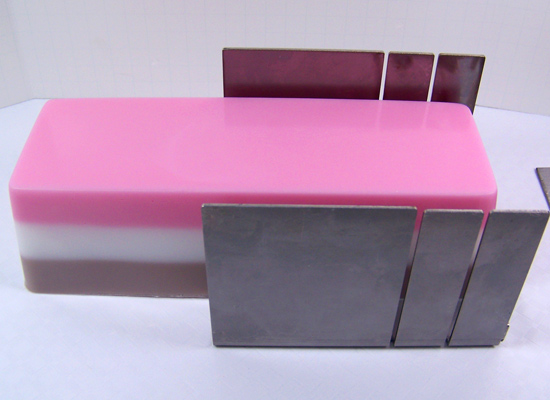
Step 14: This is a hefty 40 oz of soap, therefore it will take much longer to completely cool and harden. I suggest waiting overnight and the next morning, slowly pull the sides away from your soap, turn over, and gently press on the underside of mold to release your soap.
Tip: If the soap won’t come out, wait another hour or so – don’t fight it. You can even pop the soap in the freezer for 5 minutes but I don’t recommend longer than that.
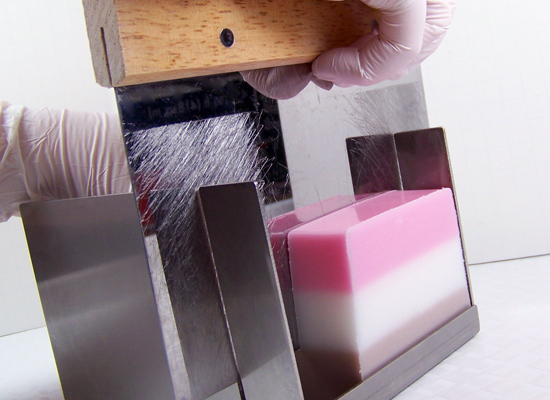
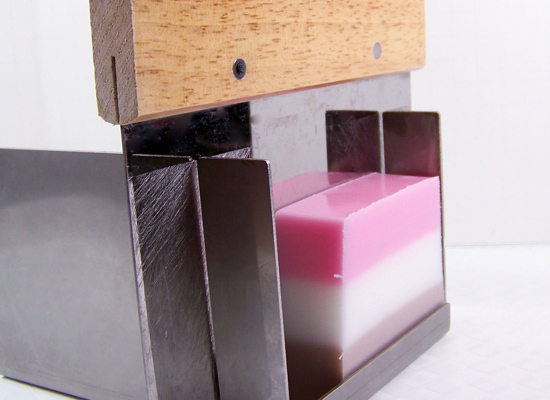
Cutting your Soap
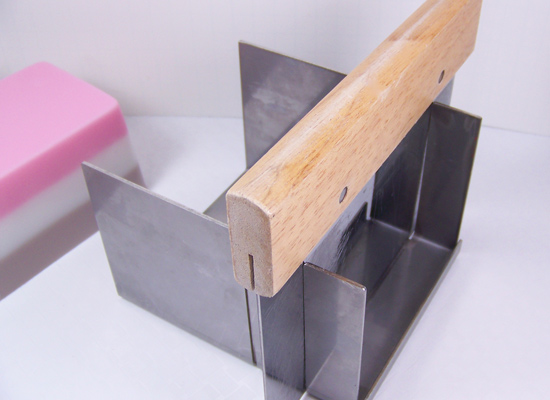
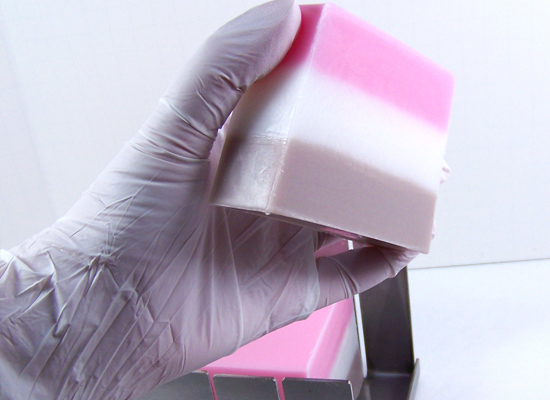
Step 14: Cutting your loaf in 1 inch bars will yield approximately 9 bars of soap. I use a miter box cutter for easier and safer cutting. Miter boxes can be found in home improvement stores like Home Depot or Lowes. Without the miter box, the soap loaf tends to shift
Enjoy! If you like this tutorial, check out the Cupcake Soap Tutorial for more “sweet” treats.