by Rustic Escentuals
A honey of a tutorial! You’ll be surprised how a simple packaging supply product can enhance the look of your soaps! This tutorial will make two Honey Bee Soaps.
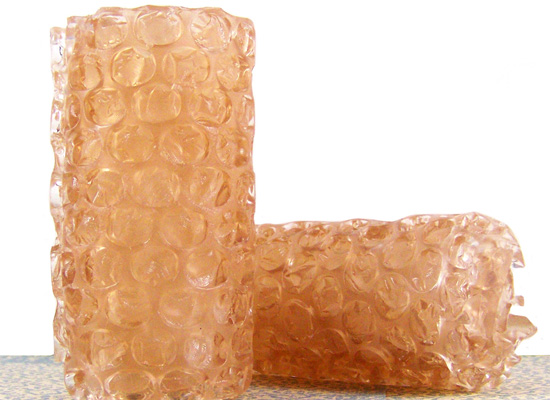
a fun soap to make (and use!)
Supplies and equipment needed:
Microwave
Microwave safe glass container
Sharp knife
Spray bottle with rubbing alcohol
Butter knives for stirring soap
Measuring spoon (1/2 tsp)
Rubber gloves
Disposable pipettes
Silicone baking pan (7.5″ x 7.5″)
Sheet of bubble wrap
Thermometer to monitor soap temperature
7 oz Ultra Clear Melt & Pour Soap Base
Vegetable Glycerin
Honey Bee Fragrance Oil
Gel Soap Colorants in True Red, Yellow and Bright Blue

gather basic supplies
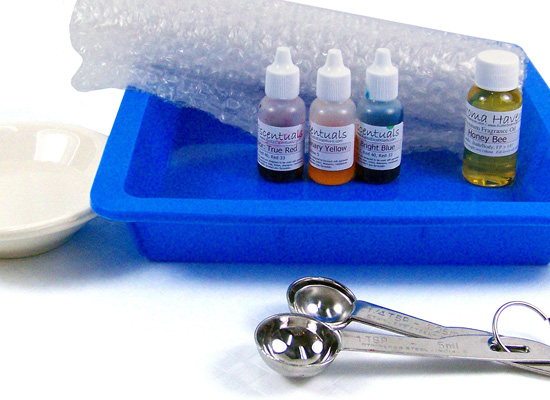
don’t forget your bubble wrap and silicone baking pan
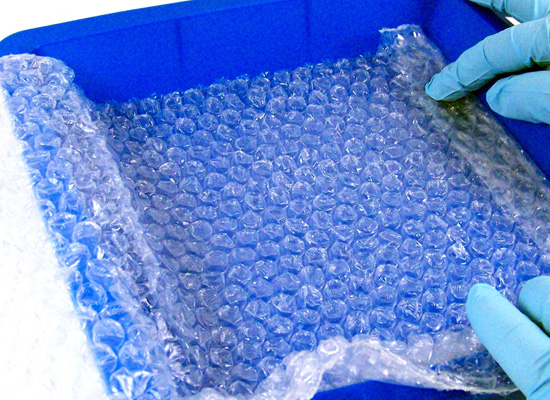
Preparing your mold:
I will be using a sheet of bubble wrap to make an impression onto this soap; the ideal bubble wrap with have small bubbles. The bubble wrap will give a look of a fresh honey comb. Don’t worry if your bubble wrap has some popped bubbles…it gives it a more authentic look!
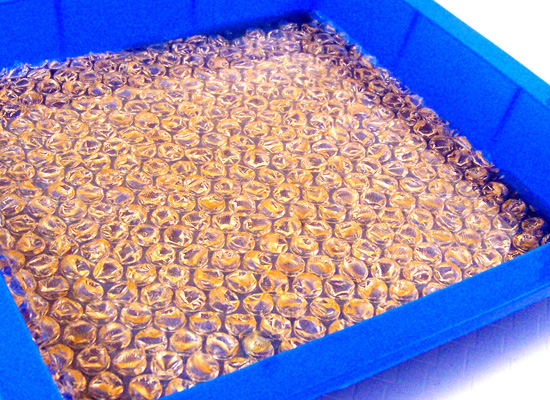
Measure out the bubble wrap and cut it to fit your silicone-baking pan. Place into the pan with the bubbles facing up and then set aside.
measure out bubble wrap
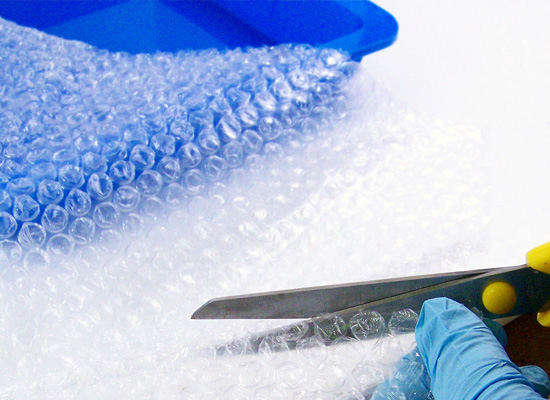
cut to fit your silicone pan
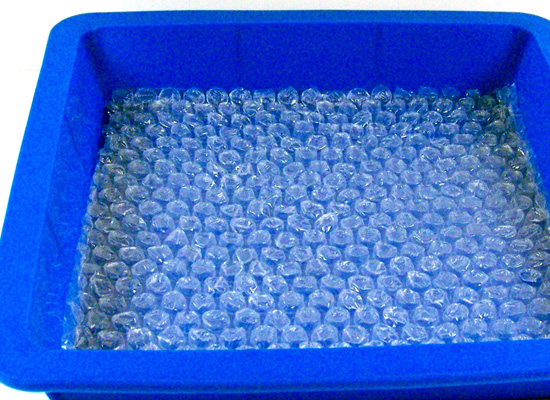
place into the pan with bubbles facing UP
Prepare the soap:
Step 1: Cut up 7 ounces Ultra Clear Melt & Pour soap into small cubes using a sharp knife. Melt using a microwave using 20 second bursts until melted. Do not burn or boil, this will result in a poor quality rubbery soap. If there are any small chunks of soap left, stir slowly; the heat of the soap will melt these.
Step 2: Using a thermometer to monitor the soap base, wait for it to cool to about 135 – 140 degrees before adding any coloring, fragrance oils or additives.
Step 3: To make a “honey” color we will be using Gel Soap Colorants in True Red, Yellow and Bright Blue (you can replace the True Red and Yellow with an Orange if you have it). Use 1 drop of Yellow, 1 drop of True Red and 1/2 drop of Bright Blue.
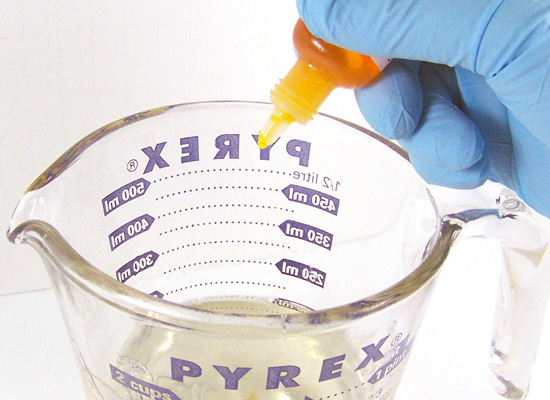
add 1 drop of yellow
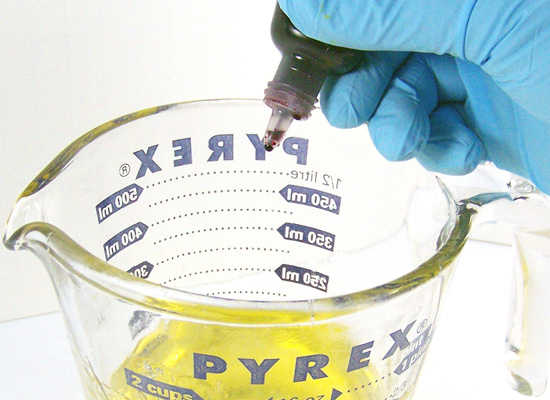
1 drop of red
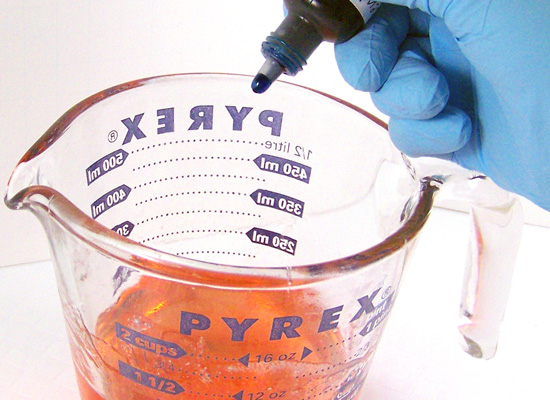
and 1/2 drop of blue
Step 4: Using a disposable pipette add 3 ml of Honey Bee Fragrance Oil.

use disposable pipette to add your fragrance oil
Step 5: Using a measuring spoon, add 1/2 tsp of Vegetable Glycerin. Adding the Vegetable Glycerin will help keep the soap more flexible which is important to prevent cracking when you bend the soap into shape as you’ll see later in the tutorial.

add 1/2 tsp vegetable glycerin to keep the soap pliable and flexible
Step 6: Stir the soap slowly until everything is fully incorporated. Always stir your soap base slowly to avoid forming too many bubbles in the soap.
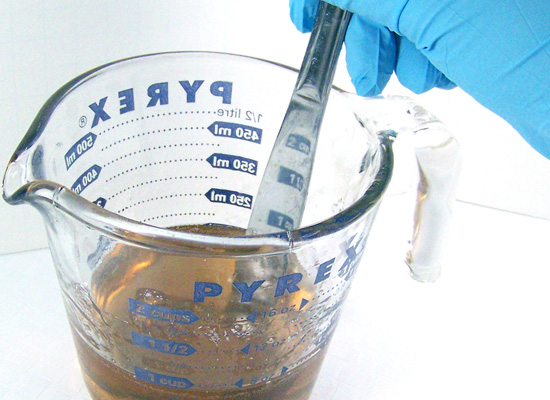
slowly stir to fully incorporate all additions
Step 7: Pour the soap into your silicone-baking pan slowly. It is important to choose a flexible pan because the soap will be on the thin side and it will be easier for you to remove later. After you’ve finished pouring, spritz with alcohol to remove any bubbles. TIP: Make sure your pan is lying flat on a tabletop or counter and is perfectly level. You want the soap layer to be even.

pour into baking dish, over bubble wrap
Step 8: Let set for about 10 minutes.
let set for 10 minutes
Step 9: Check the soap carefully. Using your finger, press gently onto the soap (don’t press too hard and don’t press all over your soap or you’ll have “dents” all over). You want the soap to be hardened, but still a bit pliable.

gently press a finger onto the soap to see if it’s hardened, yet still pliable
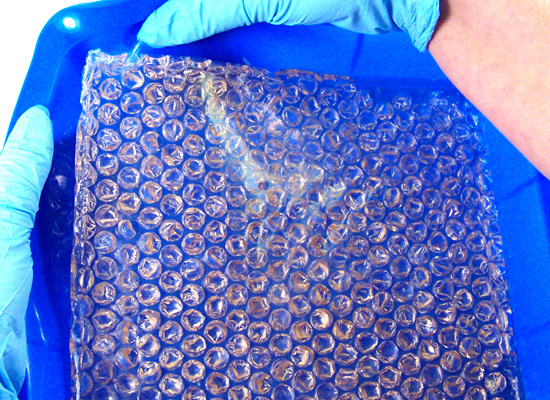
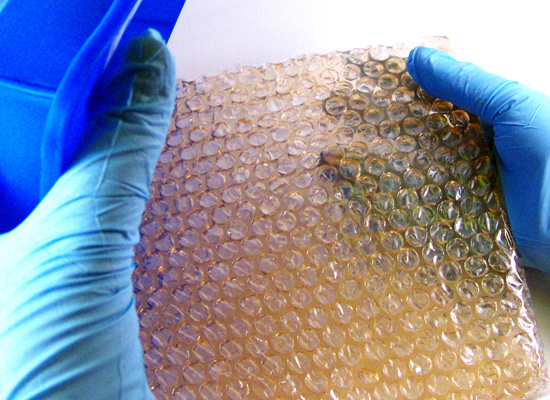
Step 10: Take the silicone pan and slowly pull back one corner of the mold (separating the soap from the mold). Do this with a second corner then pull the rest of the soap out of the mold slowly and lay flat with the bubble wrap facing up. Slowly peel off the bubble wrap.
pull back one corner of mold
pull the soap out of the mold
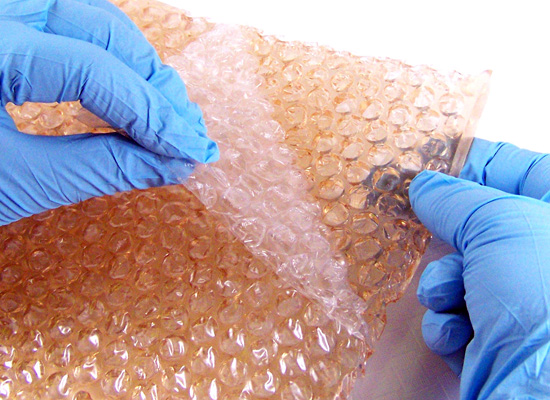
slowly peel off the bubble wrap
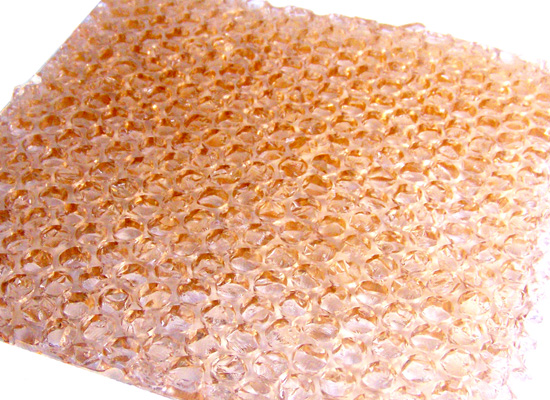
ready to roll and slice
Step 11: Lay the soap down flat with the bubble impression facing down. Now gently but firmly start rolling the soap. The soap will be solid but still slightly warm. Work slowly – even with the added glycerin, if you roll too fast, you risk cracking/splitting the soap.
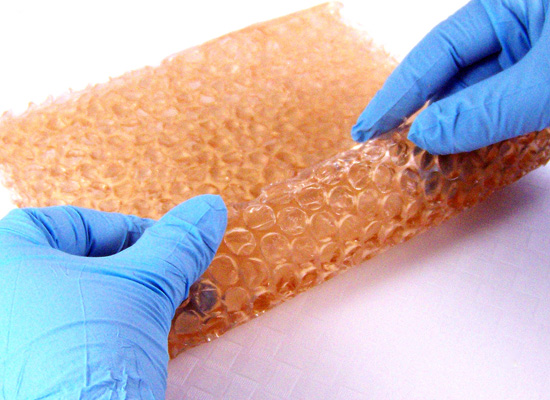
gently but firmly begin to roll the soap

work slowly – to avoid risk of cracking/splitting the soap
press lightly to verify outside is lying flat against the roll
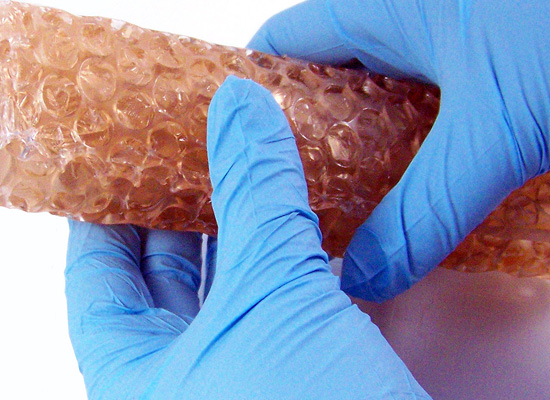
Step 12: Once you are done, allow to set for around 5 – 10 minutes.
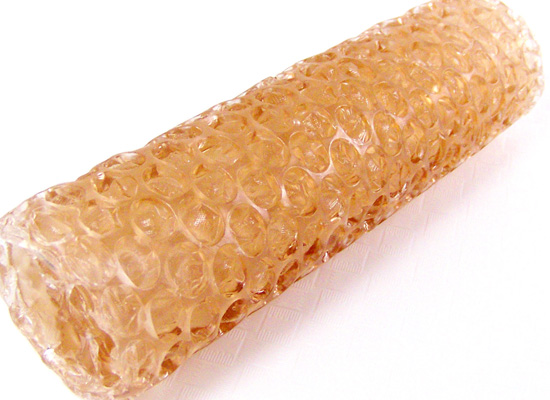
all rolled and ready to slice!
Step 13: Take a sharp knife and cut the soap in half.
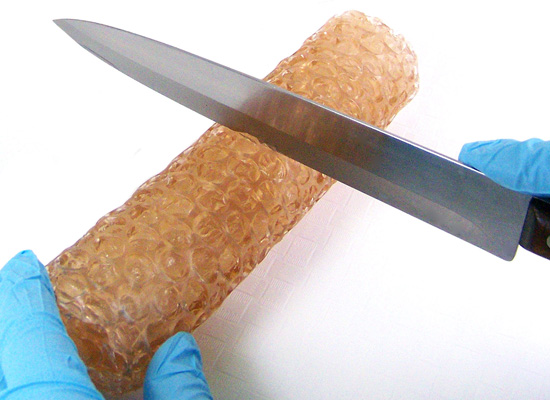
cut the soap in half with a sharp knife
This soap would make an awesome gift set when paired up with a honey scented candle. Check out the Candle Tutorial Section of the free Crafting Library by Rustic Escentuals for some inspiration!
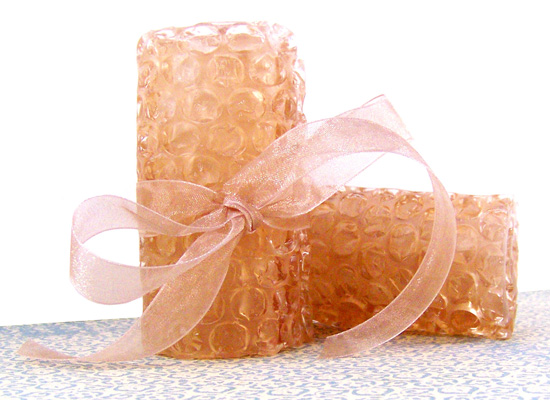
pair with a honey scented candle for an awesome gift set!