by Rustic Escentuals
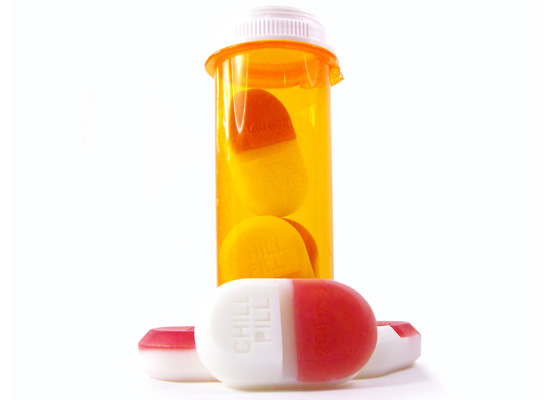
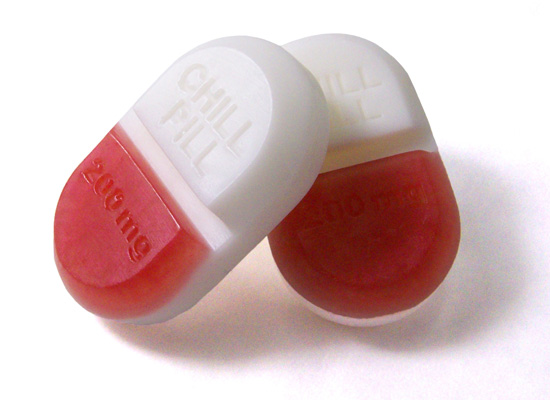
Every now and then you have to just take a chill pill. Calm down and relax. What better way than with this new soap?! Mix and match your colors with this fun soap mold. It’ll bring out a laugh in everyone.
Skills: Using micas, layering
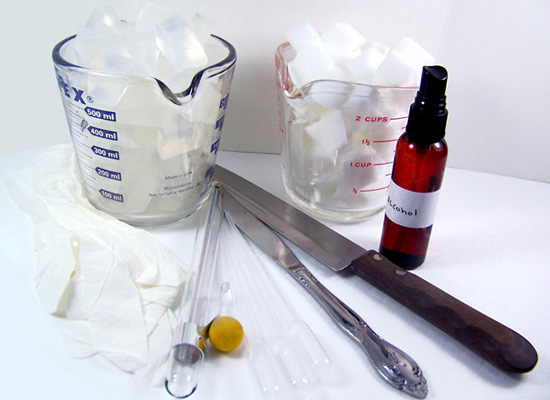
Supplies and equipment needed:
Microwave
Microwave safe glass containers (2)
Sharp knife to cut soap into cubes
Spray bottle with rubbing alcohol
Butter knives for stirring soap
Rubber gloves
Disposable pipettes
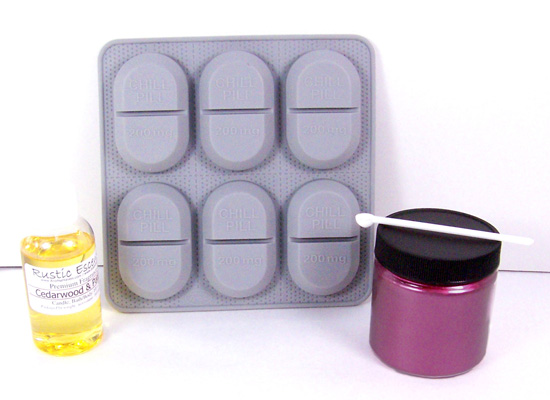
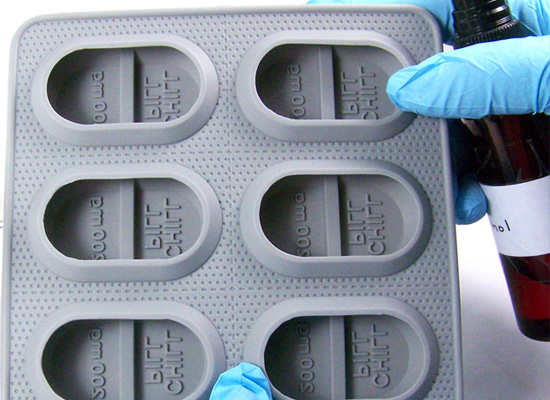
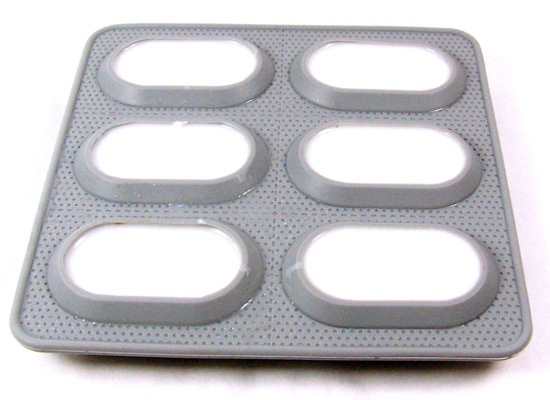
** Chill Pill Silicone Mold
Natural Clear Melt & Pour soap base
White Melt and Pour soap base
Soap Fragrance Oil
Bordeaux Mica
.15cc Scoop (one)
See our Mica Colorants in Soap Tutorial for tips on how to mix Mica into your soap base.
** Rustic Escentuals no longer carries the Chill Pill mold. You can find them on Amazon or other such websites.
PREPARING YOUR RED SOAP
Step 1: Add one .15 cc scoop of Bordeaux Mica into a microwave safe glass container. I am using approximately one .15 cc scoop to 2-3 ounces of soap to get a deep red color. Mica does not bleed and is a perfect colorant to use when you want a distinct separation of colors.

Step 2: Using a disposable pipette, add about 4 drops of alcohol to the mica. Depending on how much mica you have in your container, you may need to add a bit more. Be conservative with the alcohol. Stir together. Optional: you can also use glycerin in place of the alcohol.
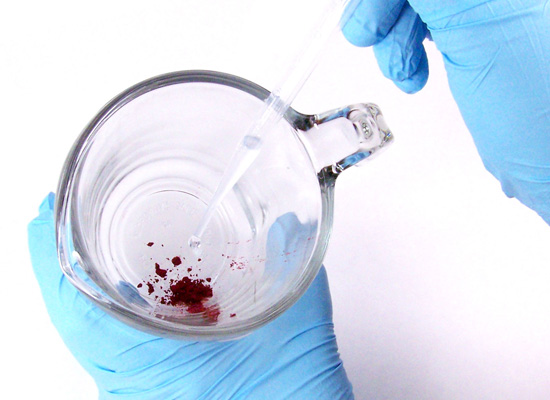
Step 3: Cut up approximately 2 -3 ounces of Natural Clear Melt & Pour soap base into small cubes using a sharp knife. Add the cubed soap base into the container with the mica and melt for about 10 – 15 seconds. Repeat if necessary but be careful as this is not a lot of soap.
TIP: I like to leave a little un-melted soap in my container as the heat of the melted soap will melt whatever is remaining.
Step 4: Stir slowly until well mixed. The soap is now ready to be poured into a mold. Note: I am not adding scent to this stage because it is not necessary for such a small amount of soap.

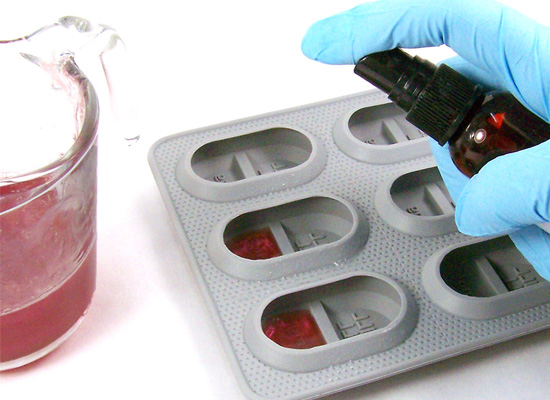
Step 5: Take the Chill Pill soap mold and spritz the cavities with alcohol. This allows the soap to travel well into all the nooks and crannies.
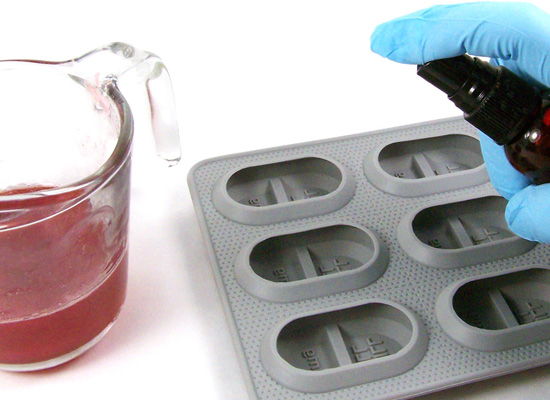
Step 6: Using one of the disposable pipettes, draw approximately 2.5 to 3 ml of the red melted soap into the pipette and add it to one section of the chill pill cavity. Do this to all of the mold cavities.
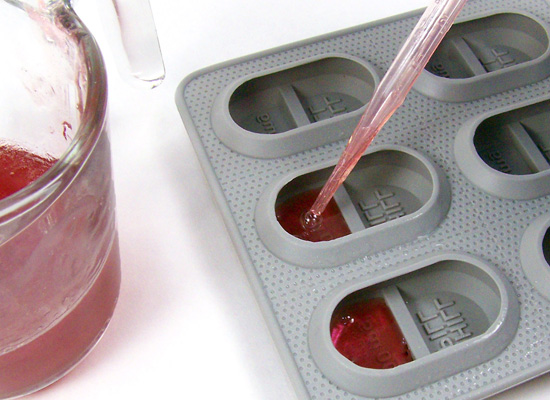
Step 7: Spritz with alcohol to get rid of any bubbles.
TIP: Sometimes the soap cools down too quickly and may stop traveling to the edge of mold’s cavity. Spritzing with alcohol will smooth it out.
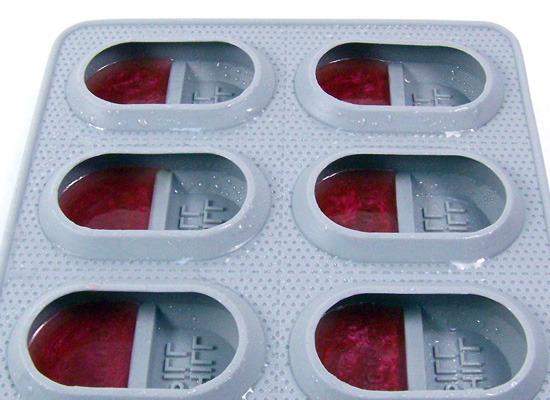
Step 8: Continue with the remaining cavities and let set for approximately 3 minutes. This is not a lot of soap and it will set quickly.
TIP: You will have some of the red soap remaining. Put to the side and save for another project. I like to use the Mini Squares Silicone Mold for leftover soap. Perfect size!
PREPARING YOUR WHITE SOAP
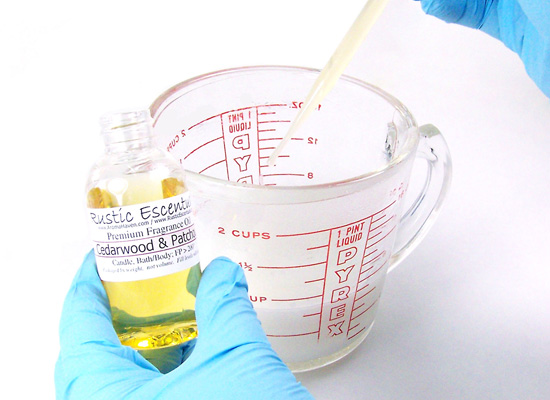
Step 1: Cut up approximately 6 ounces of Ultra Clear Melt & Pour soap base into small cubes using a sharp knife. Melt the soap base in a microwave for 30 seconds. Repeat if necessary.
Step 2: Using a disposable pipette, add 3 ml of soap scent and stir in slowly. I’m using Cedarwood & Patchouli Fragrance Oil for this soap tutorial. This scent is a rich fragrance that is earthy, spicy, rich, and warm. This scent seems the perfect match for this type of soap. Patchouli anyone? I will not be adding any colorant to this step because I want it to be left white.
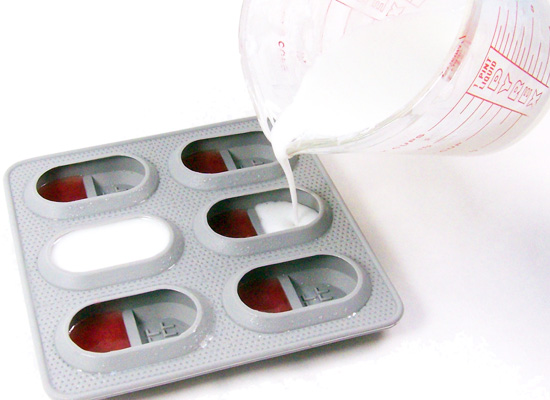
Step 3: Make sure the white soap is not too hot, as you don’t want to melt the red soap. The perfect pouring temperature is 135 – 140 degrees.
Step 4: Spritz the soap cavities with alcohol to ensure adherence between the red and white soap layers.

Step 5: Slowly pour the white soap into each cavity, completely covering the red portion. Finish off with a spritz of alcohol to remove any bubbles on top.
Step 6: Let the soap set for about an hour before attempting to release the soap from the mold. It should be hardened and cool to the touch.
Step 7: Turn the mold over carefully and slowly press on the bottom of the cavity to release the each soap. You may have to pull the edges of the mold away from the soap slightly to add an air pocket. Admire your hard work. It’s that easy! We bet you know someone who needs a bar of Chill Pill Soap!