by Rustic Escentuals
Lately I have had polka dots on my mind. No idea why, but I am seeing them everywhere, so I thought floating holiday dots would be a cute tutorial for the holidays and hostess gifts! This tutorial will show you how to use the Shimmer Dust Glitter to make floating polka dots in the soap.
Skills: Advanced embedding, layering.

festive soap with floating polka dots!
Supplies and equipment needed
Microwave safe glass containers (3-4 if you have them)
Sharp knife to cut soap into cubes
Spray bottle with rubbing alcohol
Butter knives
Rubber gloves
1″ circle Embed mold (36 cavities)
Basic Rectangle Soap Mold – 3 cavities at 4.5 ounce each (Shown in tutorial)
Disposable pipettes
Thermometer to monitor soap temperature
14 oz Ultra Clear Melt & Pour soap base
3 oz White Melt and Pour soap base
Peppermint Swizzle Stick Fragrance Oil
Shimmer Dust Glitter: Bright Red
Shimmer Dust Glitter: Sapphire Blue #1
Shimmer Dust Glitter: Diamond Dust
Shimmer Dust Glitter: Kelly Green
Shimmer Dust Glitter: Celestial Gold
Five .15cc scoops
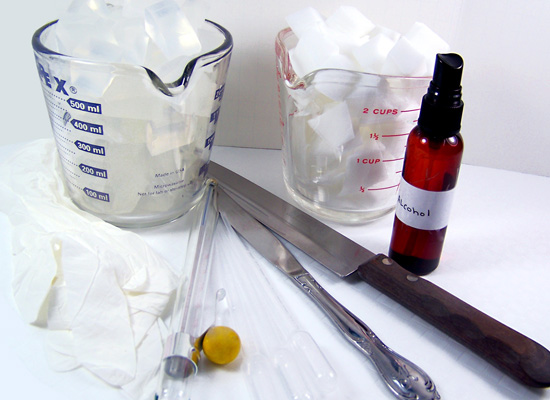
gather basic supplies

as well as your glitters and other ingredients
Making Inserts
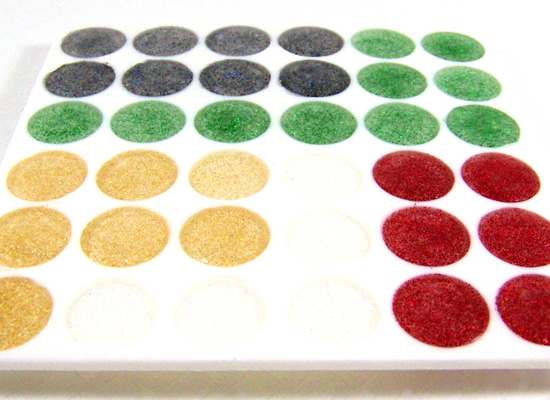
The Circle Embed Mold creates perfect little dots for this project.
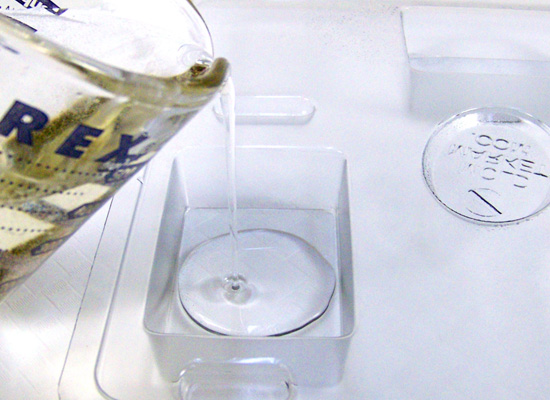
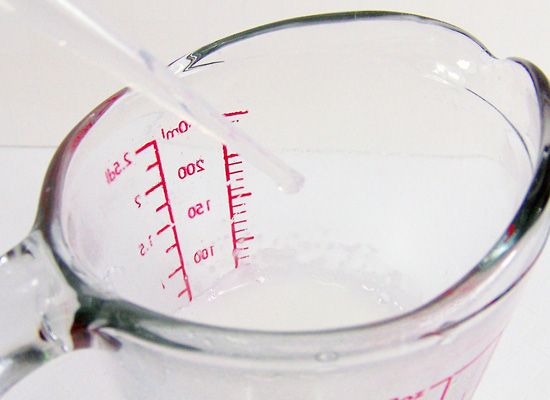
Step 1: Take 4 ounces of cubed Ultra Clear Melt and Pour soap base and place in a microwave safe glass container. Melt in the microwave in 15-second bursts until melted. Be careful, this is not a lot of soap and can easily boil which will result in a poor quality rubbery soap.
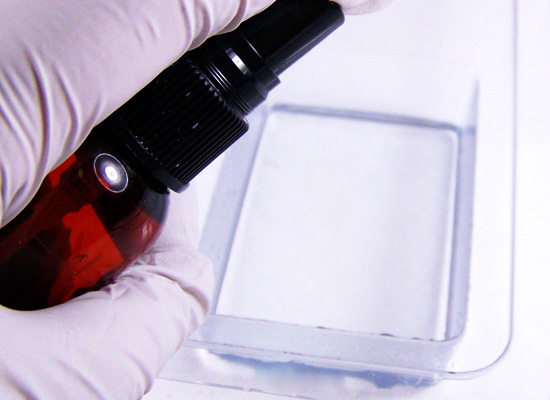
Step 2: Because I am using several different colors of the Shimmer Dust Glitter I poured about .75 ounce of melted soap into a separate container. Using a 0.15 cc scoop, mix in 3 scoops of the first glitter, in this case, the Shimmer Dust Glitter in Celestial Gold and stir slowly until mixed well. No scent is necessary at this stage.
Tip: Always stir slowly when adding the Shimmer Glitter or any type of additions to your soap base to avoid creating any more bubbles than you have to.
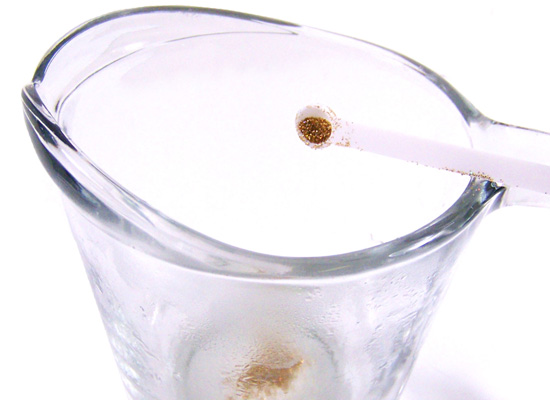
add celestial gold and stir slowly until mixed
Step 3: Pour the gold shimmery soap into 5 or 6 of the circle embed mold. If you have any left over put to the side for use at a later date or make extra of any color you choose (hint – we will be using left over circles for the next tutorial!). Be careful pouring the soap and make sure it is cool enough (around 130 degrees) to keep the glitter suspended evenly in the soap.
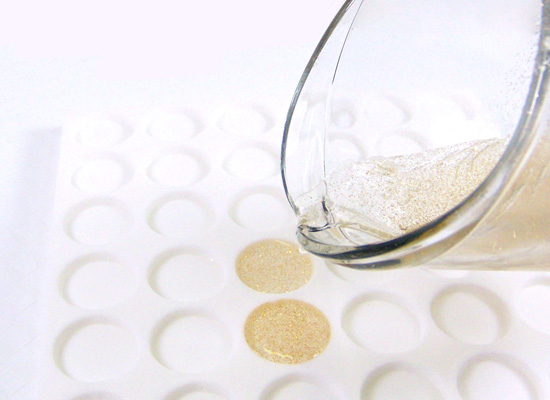
pour gold soap into5 or 6 of the circles
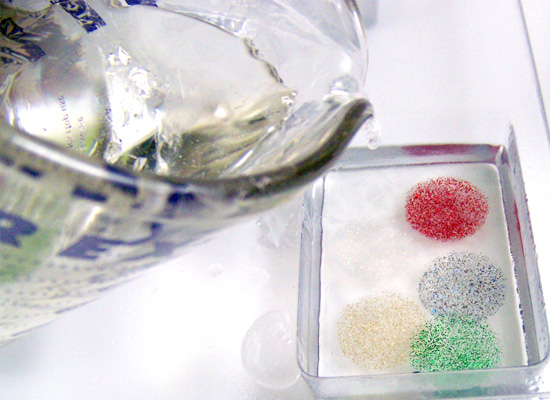
Step 4: Spritz the circles with alcohol to remove any bubbles that may have formed while pouring.
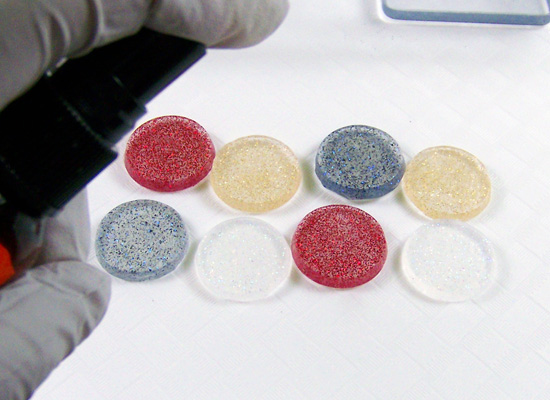
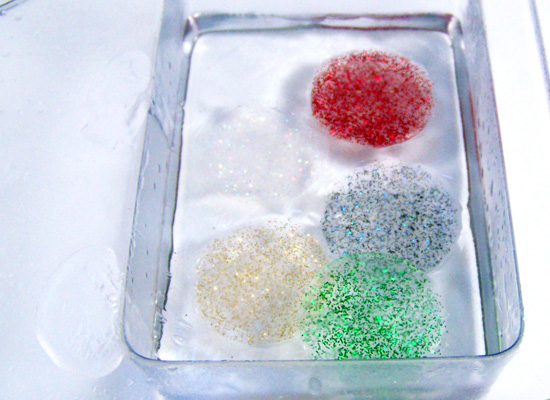
Step 5: I also made some circles using Glitter in Sapphire Blue, Diamond Dust, Kelly Green, and Bright Red. Prepare each by following steps 2 – 3. Make as many as you like – remember to make some extra for the next tutorial. If you want to limit the number of circles you are making, decrease the amount of soap base you use per color.
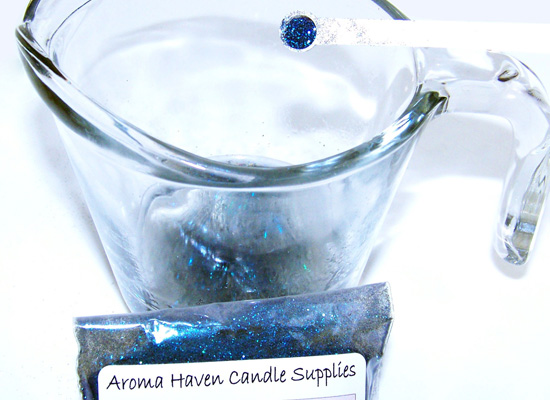
make as many colors as you’d like (pretty blue!)
be sure to make a few extra circles for the next tutorial..
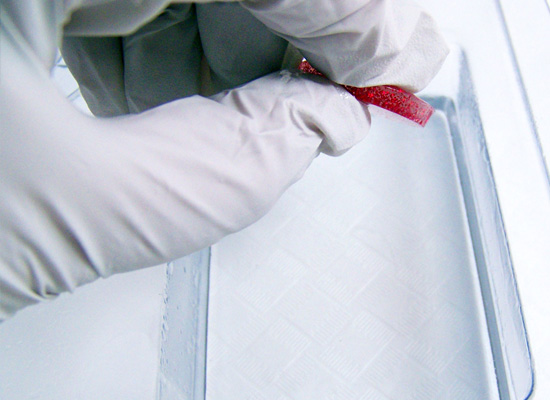
Step 6: Wait for the circles to set approximately – 10 to 15 minutes. I placed these into the freezer for 3 minutes and they popped right out of the mold. Love these little circle dots!!!
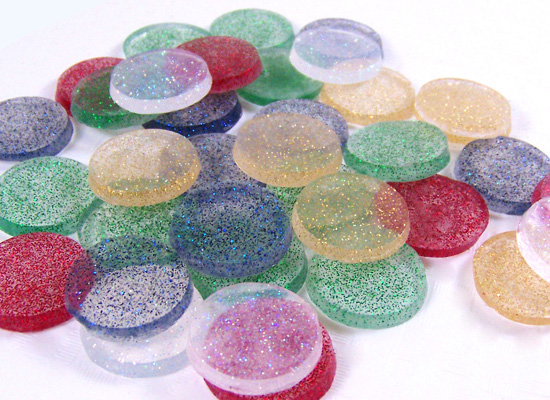
let circles set for 10-15 minutes
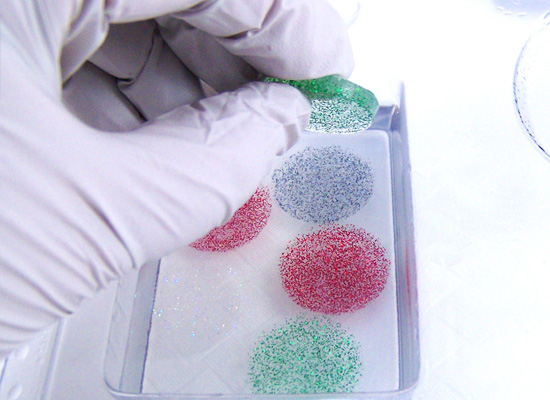
Step 7: Arrange the circles on your workspace ahead of time to make them easier to pick up when you’re ready to embed them in the soap. You will need to work quickly in that step.
arrange on your workspace so you’re ready for the next steps
Making Your Soap
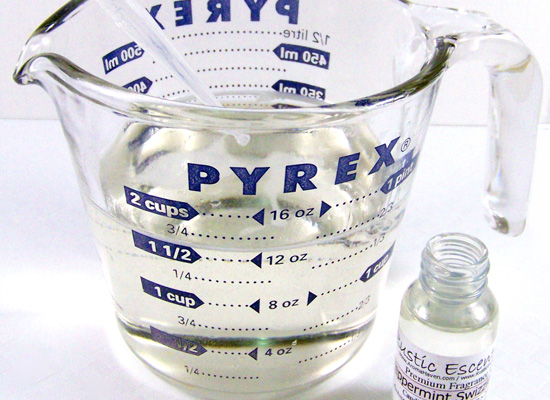
Step 8: Melt 10 ounces of cubed Ultra Clear Melt and Pour soap base. No colorant is used. Using a disposable pipette, add 5 ml of Peppermint Swizzle Stick Fragrance Oil to the soap base and stir slowly. You will be using approximately 3 oz of clear soap for each mold cavity. You’ll have 2/3 of each cavity filled.
add your yummalicious fragrance oil – mmmmm!
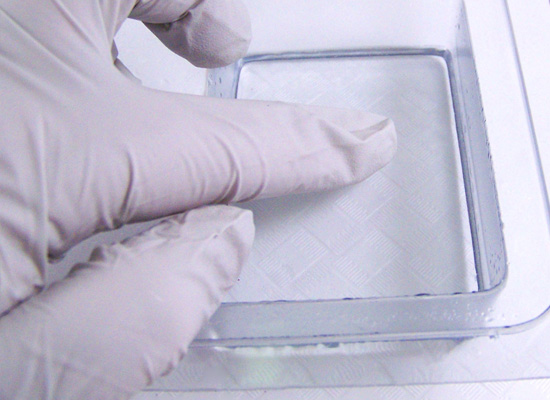
Step 9: Make sure the temperature is around 130 – 135 degrees and pour a very thin layer of soap into each cavity of the Rectangle Soap Mold. Pour just enough to cover the bottom of the cavity completely. Spritz with alcohol to remove any bubbles, you want this to be as bubble free as possible. You will not be pouring all of the clear soap at this time.

make sure soap is at optimal pouring temperature (130-135F)
pour just enough to cover the bottom of the cavity
spritz with rubbing alcohol to remove any bubbles
Step 10: Let soap sit for 5 minutes to form a hardened layer. Press gently with your finger to test. If your finger is able to form a dent, wait another minute or two. You want the layer to be able to support your circle embeds.
soap should be hard enough that it doesn’t show a dent when pressed with a finger
Step 11: Once the first layer is set, you may need to reheat your container of clear soap base. Use a thermometer to monitor the soap temperature, it should be about 130° or cooler to avoid melting your embeds. If soap is too hot, keep stirring slowly until soap reaches 130°.
TIP: If you cover your container of melted soap with either aluminum foil or clear plastic wrap, the soap stays warmer longer and you may not need to remelt.
Step 12: At this point, work with one cavity at a time. You need to work fast here. Spritz the hardened soap that is already in the mold to help the embeds and the next layer adhere together.

spritz the bottom layer again
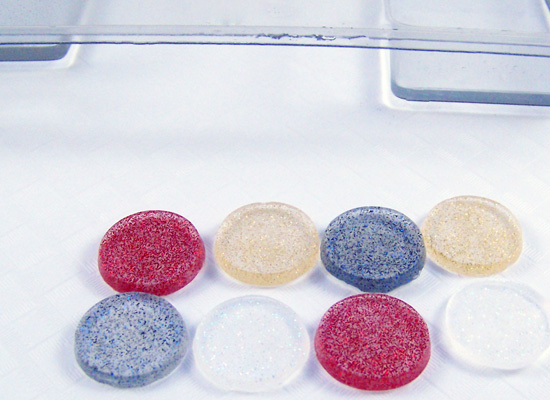
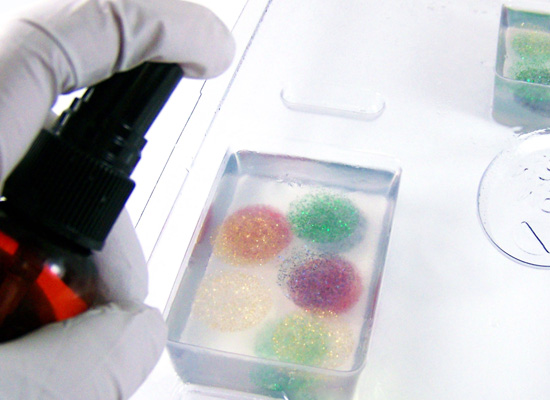
Step 13: Pour a small amount – approximately .25 oz of melted soap into the mold. Spritz the circles with alcohol and then place them into the cavity. Remember, you need to place the side of the embed that you want showing, face down into the mold. The bottom of the soap mold is the top of the soap.

pour tiny amount into each cavity
spritz the circles with rubbing alcohol
place circles into the cavity
(remember place the side you want showing face down..)
Step 14: Once the embeds are placed in the mold, spritz with alcohol and then pour just enough to cover the embeds. Spritz again with alcohol to remove any bubbles.

spritz top of soap with rubbing alcohol
pour just enough soap to cover the embeds and spritz again
Step 15: While this soap is hardening, prepare the other 2 mold cavities using step 11 – 14.
Step 16: Now go back to the first cavity and repeat steps 12 – 14. We are adding another layer of floating dots. Once done, complete your other 2 cavities. IMPORTANT: Do not pour the clear all the way to the top of the mold – you want to leave enough space to add the white soap layer. This makes the embeds pop!
add second layer of floating dots
Step 17: After you have completed adding all embeds and pouring the clear soap, wait for the soap to set. This should take approximately 8 – 10 minutes. Press gently to test with your finger.
Step 18: Take the cubed white melt & pour soap base (about 3 ounces) and place in a microwave safe glass container. Melt in the microwave in 15-second bursts until melted. Add about 1 ml of Peppermint Swizzle Stick Fragrance Oil and stir slowly. Monitor temperature of soap until it reaches 135 degrees.
add more of that yummy FO to your white soap
Step 19: Spritz the soap in the mold with alcohol, especially at the edges of the mold and slowly pour the white soap to the top of the mold. Spritz with alcohol to remove any bubbles. The white soap will make the embeds show up better.
spritz dotted layers with rubbing alcohol

pour white layer to top of mold
Step 20: After the soap has completely set (approximately 2-3 hours), turn the mold over and slowly press on the bottom of each cavity to release the soap. Do not force it. If the soap won’t come out, wait another 1/2 hour or so. You can even pop the soap in the freezer for 5 minutes then try again.
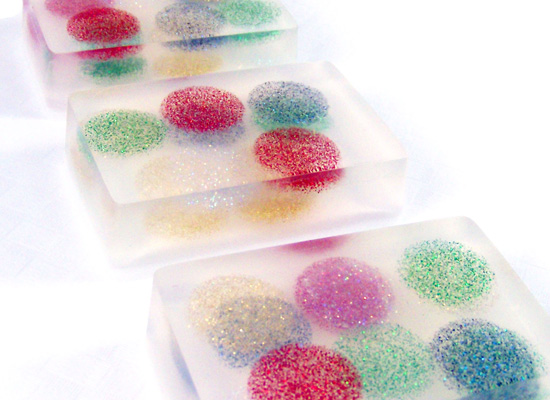
voila! festive and merry holiday soaps. Enjoy!