by Rustic Escentuals
It’s that time of year when our skin needs some extra exfoliation. Here is a soap that will make you soft and smooth in no time. It’s especially useful for those pesky tough areas like your heels. This is a two-part tutorial. In this tutorial I will be using sliced loofah for individual smoothing, skin softening loofah soap (no molds needed). They are pretty and useful at the same time! Stayed tuned next week when I’ll be showing you a different method – now let’s get started!
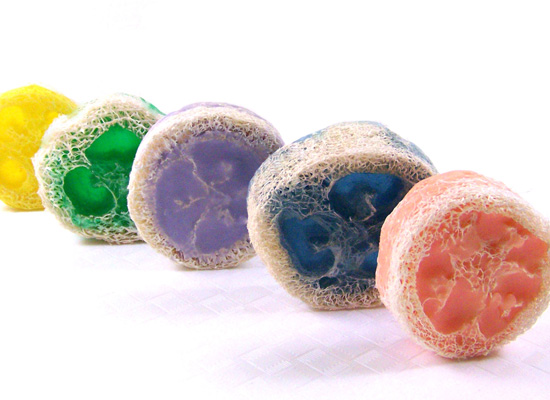
individual skin softening loofah soap slices – perfect for dry weather!
Supplies and equipment needed:
Microwave
Microwave safe glass containers
Sharp knife to cut soap into cubes
Spray bottle with rubbing alcohol
Butter knives for stirring soap
Rubber gloves
Disposable pipette
Thermometer to monitor soap temperature
Loofah Slices (.75” x 2.25” – 3.25”)
Natural Melt & Pour soap base (2.5 ounces for each loofah slice)
Shea Butter Melt & Pour soap base (2.5 ounces for each loofah slice)
Apples and Oats Fragrance Oil
Gel Soap Colors in Orange, Royal Blue, Yellow, Teal, and Purple
Wax paper or plate (not shown)
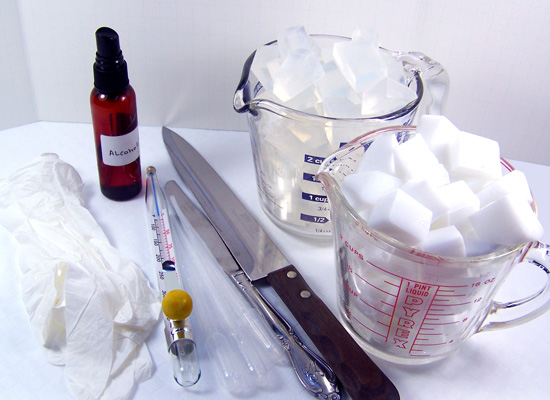
gather your tools and basic supplies
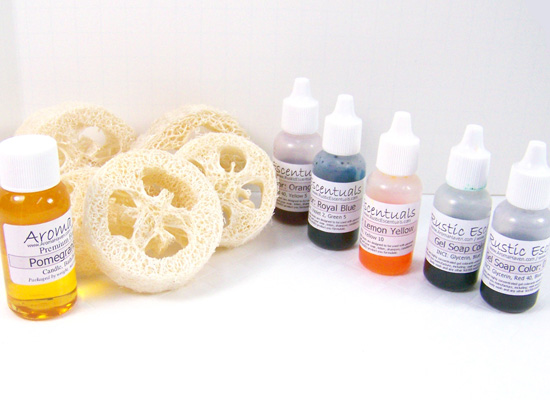
and then the fun stuff – FO’s, colors, and the loofahs!
Depending on how many loofah soaps you will be making, you will be using 2.5 ounces of melt and pour soap base for each finished product.
Step 1: Cut up approximately 2.5 ounces of Shea Butter Melt & Pour soap base into small cubes using a sharp knife. If you are making more than one loofah in the same color, you will need to double or triple the amount of soap you will use:
1 loofah = 2.5 ounces
2 loofah = 5 ounces
3 loofah = 7.5 ounces
Note: Depending on the size of your loofah, you may need slightly more or less soap. I suggest you test one before making a whole batch.
Step 2: Using a microwave safe container, melt the soap base in a microwave using 15 – second bursts until melted. Do not burn or boil, this will result in a poor quality rubbery soap. If there are any small chunks of soap left, stir slowly; the heat of the soap will melt these small chunks.
Step 3: Use a thermometer to monitor the soap base temperature. I like to keep my soap base around 145 degrees or cooler before adding and any fragrance oils or additives. Also, the cooler the soap base is when you pour, the more will stay inside the loofah (you’ll see shortly what I mean).
Step 4: Add 3 drops of Orange soap colorant into the soap base and slowly stir.

once soap is cool enough, add 3 drops of orange soap colorant and slowly stir to combine
Step 5: Using a disposable pipette, add 2 ml of Apples and Oats Fragrance Oil into the container and stir in slowly. If you haven’t had the opportunity to smell this scent you really need to do so – it’s wonderful!
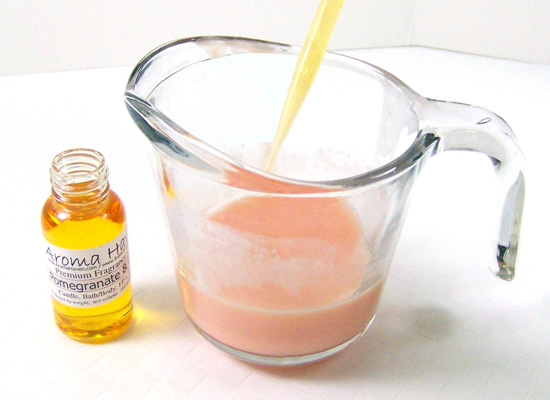
drop in your fragrance oil using a disposable pipette
Step 6: Continue slowly stirring until you’re comfortable with the temperature of the soap. You want the soap to be on the cooler side but not too thick – as you gain experience you’ll start to see that magic timeframe…when the soap starts to thicken on you. If all else fails and your soap base gets too cool, just zap again in microwave for approximately 5 seconds.
Step 7: Pour a small circle of soap onto the wax paper (or plate).
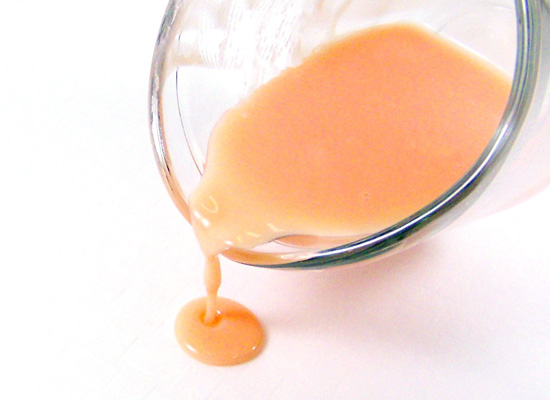
pour a small circle of soap onto your waxed paper (or plate)
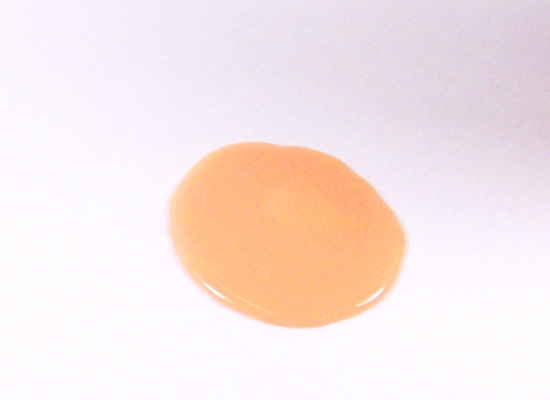
you don’t need a *ton* – just a small circle
Step 8: Gently press one of the loofah slices into the soap. The goal here is to prevent the soap you will be pouring into the center of the loofah from pouring out of the bottom. You are essentially sealing the bottom. Wait approximately 1 minute for the soap to harden and the seal to set.
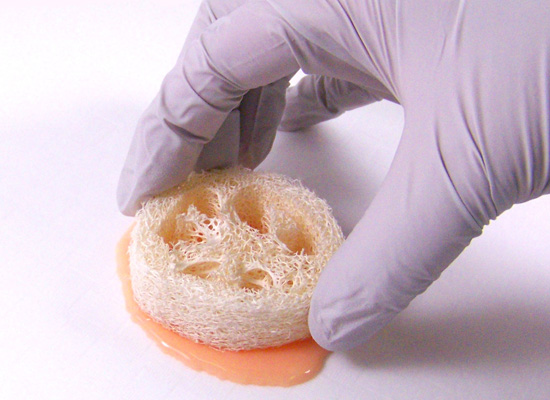
gently press a loofah slice into the circle of soap
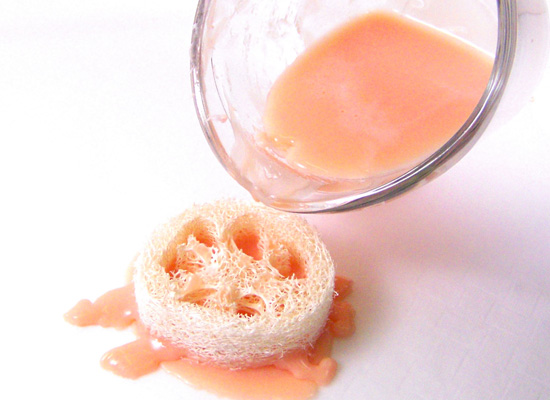
Step 9: Slowly (did I say slowly?) pour a small amount into the center of the loofah. Don’t worry if some soap starts to leak out of the bottom, just stop pouring and allow the soap to set a bit. The hotter the soap is the more will come out – this is why you need to pour cooler.

*slowly* pour small amount of soap into center of the loofah
Step 10: Let soap set a bit, then spritz with alcohol.
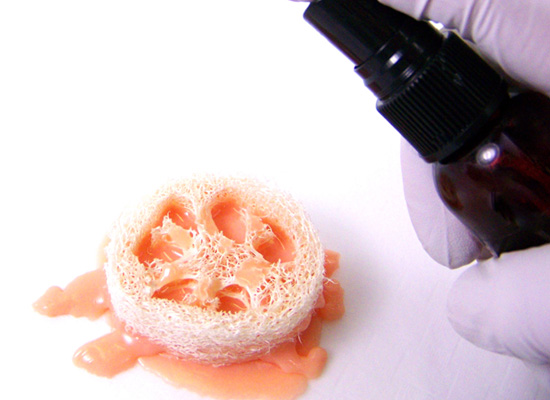
rubbing alcohol – a M&P soaper’s best friend!
Step 11: After spritzing, begin pouring more soap into the center of the loofah slice. Depending if you have more leakage or not you may need to repeat Step 9. I found that the cooler I poured, the less and I had to “stop, let set and pour again”.
after spritzing, pour more soap into the center of the loofah slice
Step 12: After you have finished pouring, allow the soap to set approximately 10 minutes. As you can see from the picture, I could have poured this a little bit cooler. But don’t worry if you have too much soap that leaked out. We’ll trim this when completely set.
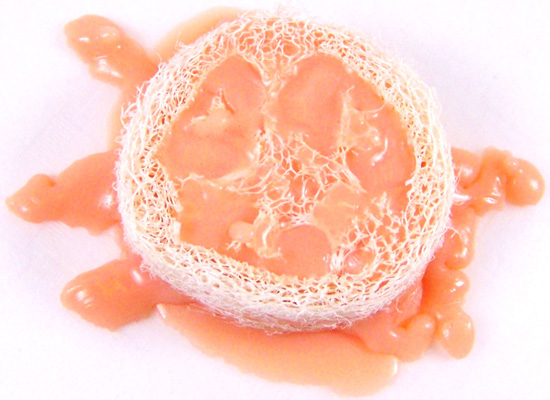
don’t worry about any soap that leaked out – it’ll get trimmed off
Step 13: Once set, peel slowly from the wax paper and begin to trim off the excess soap. You can use these trimmings to melt again and reuse.

peel off the wax paper
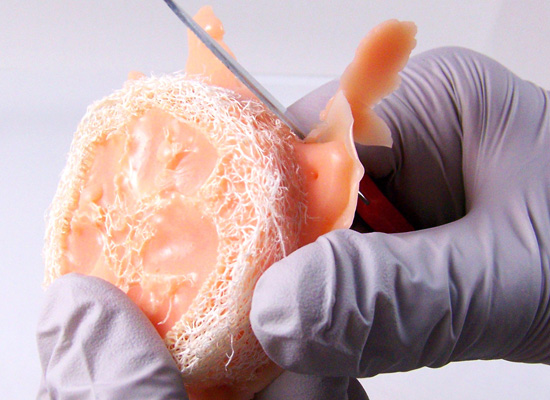
trim off the excess soap (great to melt and reuse for future projects!)
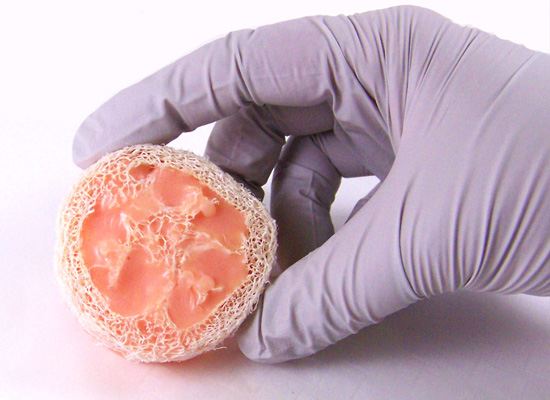
You can now see that each side of the soap has a different finish – they’re both beautiful!
Ooooh, pretty orange!
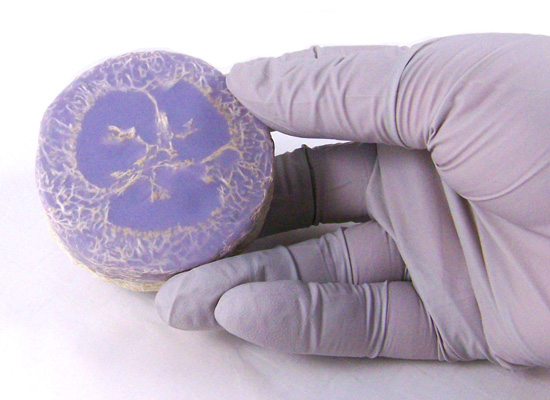
and the purple is fabulous!
Step 14: To repeat this in any color or soap combination, just repeat Steps 1 through 13. I made a variety using the Natural Melt & Pour Soap Base and Shea Butter Melt & Pour Soap Base.
You have a wonderful exfoliating soap that scrubs away your rough parts (please do not use on your face!). These make wonderful hostess and holiday gifts. Now go have some exfoliating fun!
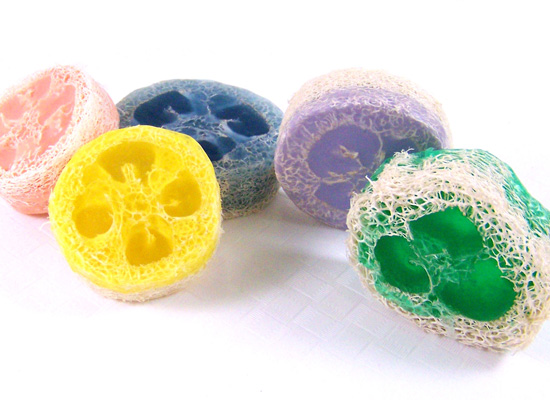
what a great hostess gift these would make!

love the blue – perhaps that one you’ll want to save for yourself
Join us next week for a different version of the loofah soap! Happy Soaping!